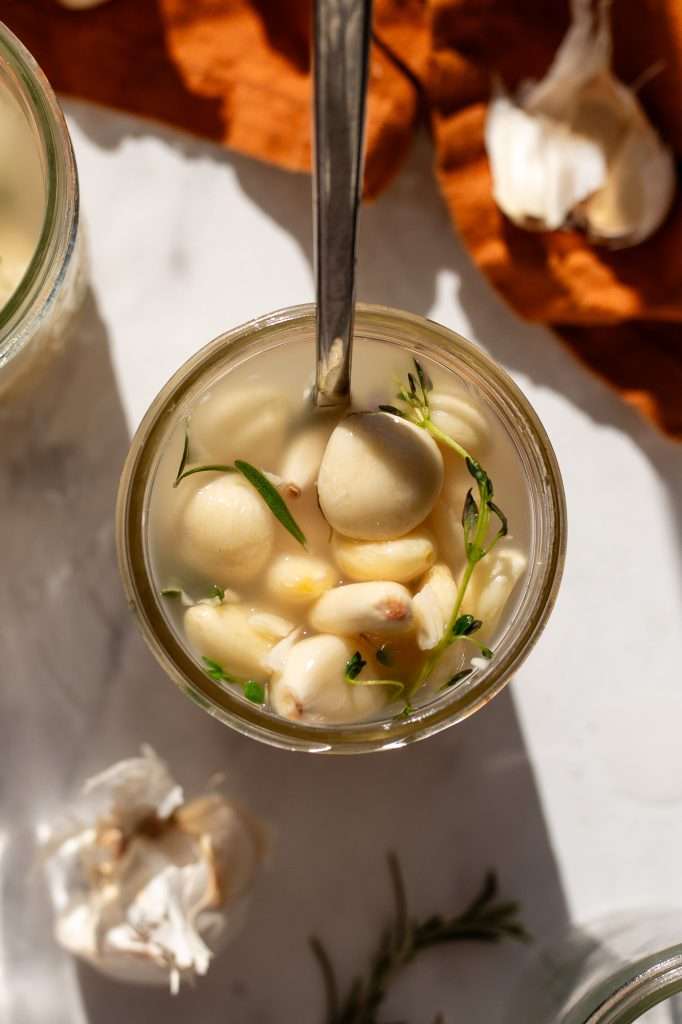
Fermenting garlic is easy with the healthiest lacto fermented garlic recipe. You only need five ingredients and 4 weeks of fermentation to get all the benefits of fermented garlic. Use this fermented garlic in any recipe that calls for garlic.
Is it Safe to Ferment Garlic?
The fermentation method used in this recipe is perfectly safe! If you follow all of the recipe amounts and directions, your fermented garlic will be perfectly safe and healthy to eat.
Before publishing any recipes here, I check the pH and microbial composition to ensure it’s a great and healthy recipe. The final pH of fermented garlic should always be below 4.5
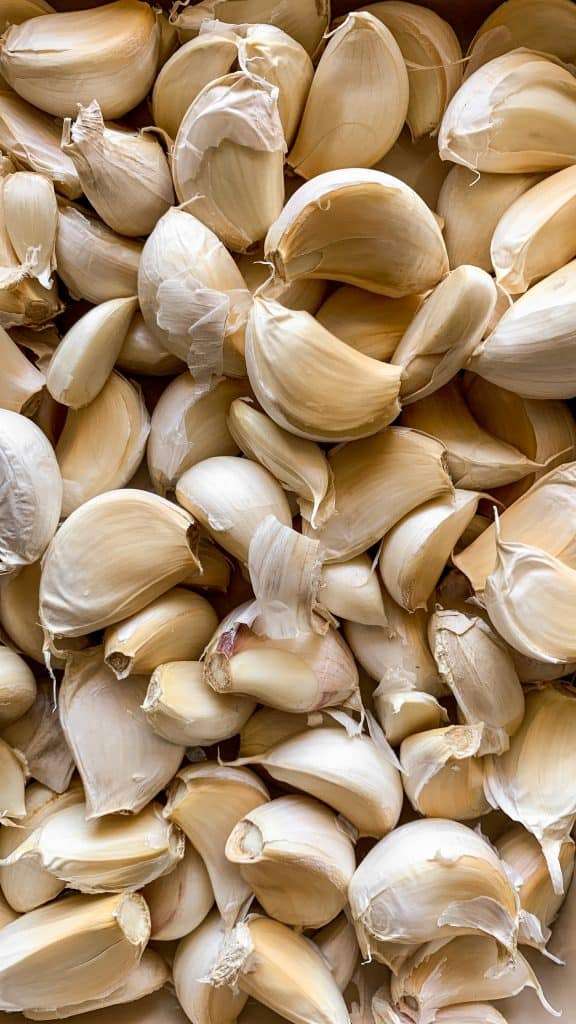


How Do You Ferment Garlic?
My favorite way to ferment garlic is to roast it first, then ferment it with fresh cabbage leaves, apple cider vinegar, water, and a 2.5% total salt concentration. Since the garlic is roasted before fermenting, we must include another source of wild microorganisms to facilitate fermentation. That’s where cabbage leaves come in.
The addition of acid to this recipe is essential. I used apple cider vinegar here, but you can also use rice or white vinegar. Another option is to use already fermented sauerkraut brine.
Adding acid, in the beginning, is essential to stabilize the pH. When fermenting a large amount of garlic, the garlic can have antibacterial effects against the bacteria that produce lactic acid. This inhibits a drop to the necessary pH for preservation. Garlic is also high in fructans and can favor an alcohol fermentation pathway over a lactic acid fermentation pathway.
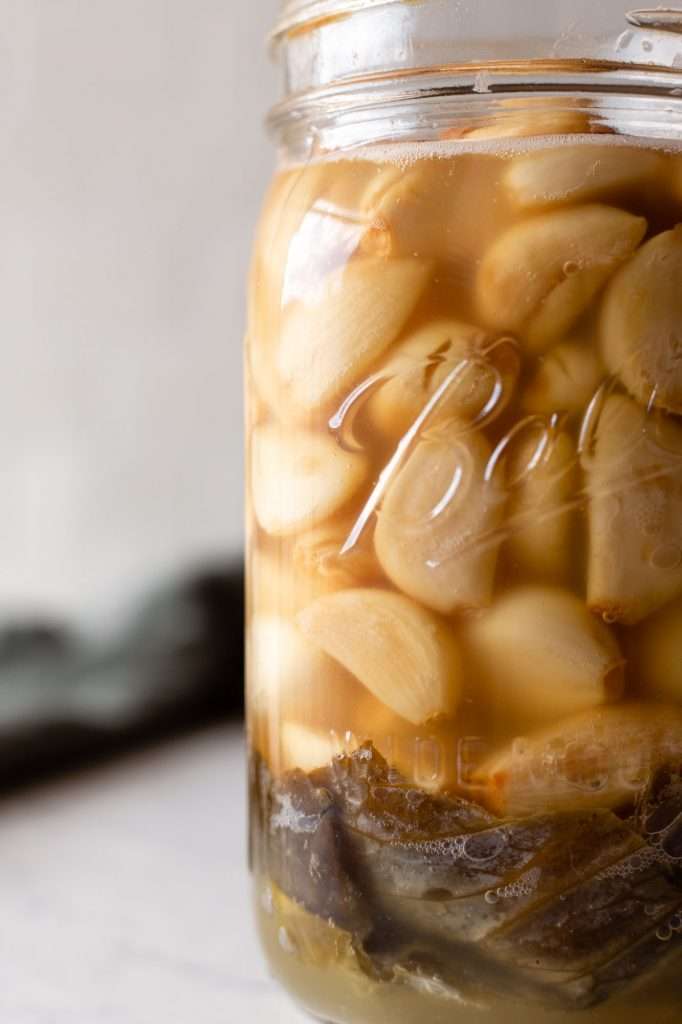
The Benefits of Fermented Garlic
Fermented garlic is great for you! As with any other ferment, you can eat too much, so don’t overdo it.
In ancient Egypt, Greece, Rome, Babylon, and China, garlic was a treatment for heart disease, joint pain, kidney stones, respiratory problems, rashes, diarrhea, constipation, headache, parasites, minor wounds, ulcers, and tumors. People have used garlic as a food and medicine since around 3000 B.C.
The beneficial compounds in garlic have effects on the human body. The potential benefits include reduced risk of cardiovascular diseases, cancer, and better immune function. Allicin (diallyl-thiosulfinate), the most bioactive compound found in garlic, is known for its antimicrobial (mainly antifungal) activity.
In our course at The Cultured Guru School of Fermentation, I teach students that including fresh garlic in vegetable fermentation recipes is a great way to prevent yeast and fungal growth in ferments.
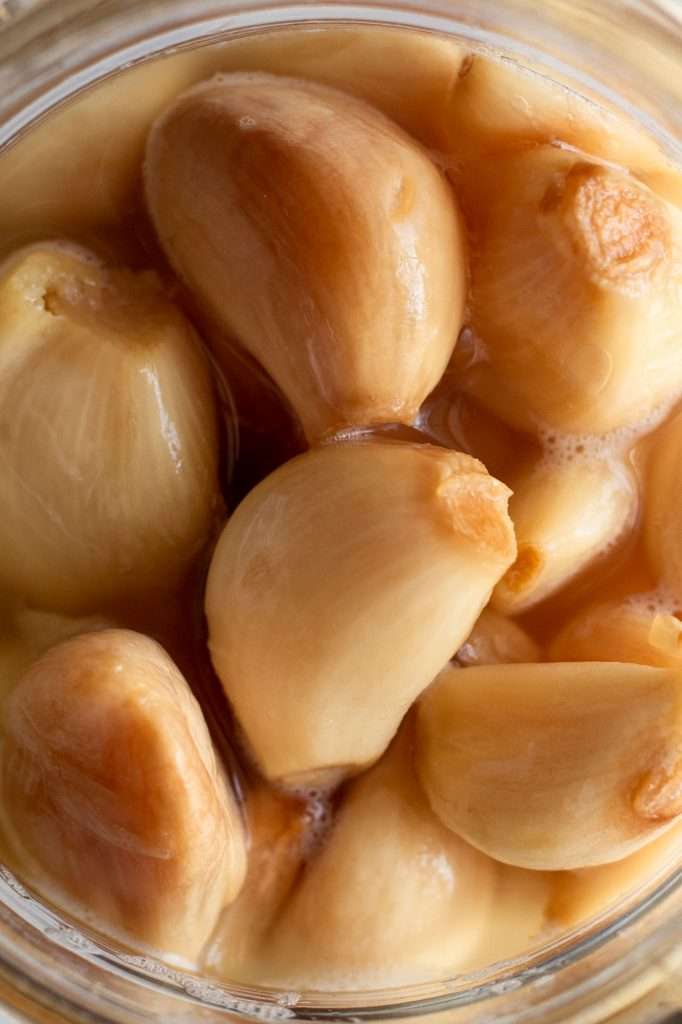
Does roasting the garlic destroy all the beneficial allicin?
No, roasting the garlic will not destroy all the beneficial compounds in garlic. First, allicin only forms in garlic when the clove is crushed, chopped, or damaged… Because two compounds (alliinase and alliin) in the garlic must be released from the cell walls and combined to form allicin. Heating garlic immediately after crushing or slicing will destroy the heat-sensitive enzyme alliinase, and allicin cannot form without this enzyme.
When you chop or mash garlic or crush it to peel, as in this recipe, keep it away from heat for 10 minutes. If you wait a few minutes before heating, the maximum amount of allicin can form, and a beneficial amount is still present even after the garlic is cooked.
Is it Safe to Make Fermented Garlic in Honey?
I do not think it is inherently safe. It all depends on the ingredients used! So it can be safe, but sometimes it isn’t.
A study came out that said consuming garlic and honey together can have synergistic health benefits. But I’m unsure who first decided to “ferment” the two together. I’m a fan of time-tested fermentation, not new trends, so I prefer to ferment garlic and honey as an oxymel, which is a recipe over 2,000 years old.
Oxymel has been around since the ancient Greeks, but it is not made with only garlic and honey. It contains half honey and half vinegar and can be made with many different herbal mixtures. The vinegar is an essential ingredient to keep it safe. If you want to make honey garlic, I recommend making it as an oxymel.
Honey Fermented Garlic
Garlic is a low-acid plant food, and honey varies from low to high acidity (between 3.5 and 5.5, depending on the botanical source of the honey). Honey has low water activity due to its high sugar content, and low water activity generally makes things safer.
However, when you combine garlic and honey, the final water activity is variable. Garlic can also increase the pH as it ferments. So, safety depends on the ratio of garlic to honey, what kind of honey is used, and other fermentation factors.
Contrary to popular belief, the combination of only garlic and honey leads only to yeast fermentation, as conditions are not right for lacto-fermentation and safe pH development via lactic acid production.
This is especially true since large amounts of garlic can have antimicrobial effects against lactic acid bacteria. For honey garlic fermentation to be safe, a starter culture should be added, similar to making oxymel.
I recommend adding raw apple cider vinegar or kombucha primary fermentation to honey-based ferments. This makes it an oxymel, and guarantees yeast and acetic acid bacteria mixed fermentation, similar to vinegar fermentation.
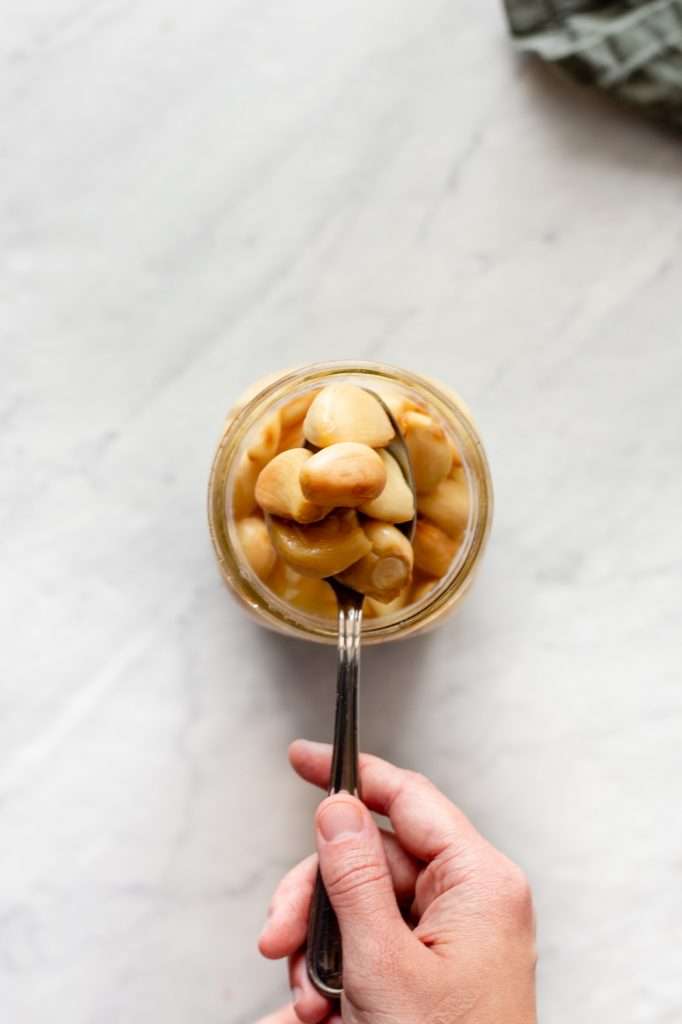
How to Know When Garlic is Done Fermenting
The best and safest way to tell if your fermented garlic is done is to test the pH with pH strips. Just dip a strip into the fermentation liquid and ensure it is at a pH of 4.5 or below.
Every time I’ve made fermented garlic this way, the pH ends up right around 4. However, it does take quite some time for the pH of fermented garlic to drop. Sometimes, the pH stalls around five due to the nature of garlic. That is why it’s very important to use a safe, exact salt concentration in this recipe and to add an acid (ACV) at the start of fermentation.
Equipment You Need to Make Lacto Fermented Garlic
Here are all the supplies and equipment you will need to make this recipe:
- 32 ounce Wide Mouth Mason Jar
- Fermentation Weight
- Standard Metal Mason Jar Lid (this can rust in the presence of salt)
- OR Rust Free Plastic Lid
- or you can use a Weck Jar (without the gasket; only use the clips to secure the lid)
- Sea Salt
- Scale
- Mixing Bowl
- pH strips
Fermented Garlic Recipe Conditions
- 4 weeks of fermentation
- Room temperature (60-78° F)
- Approximate 2.5% total salt concentration
- Final pH below 4
- Store in refrigerator after fermentation for up to 2 years.
More Fermentation Recipes to Try
- The Best Lacto-Fermented Green Beans with Ginger and Scallions
- Simple Wild Fermented Shallots Recipe
- Learn How to Ferment Green Tomatoes
- Roasted Garlic Sauerkraut with Black Pepper
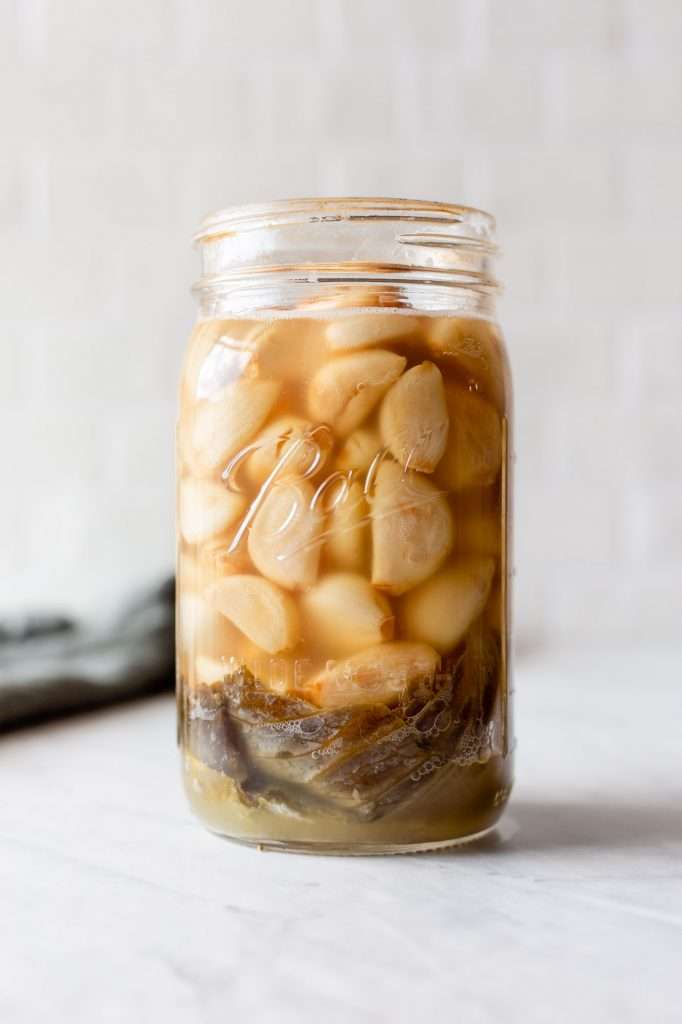

The Healthiest Lacto Fermented Garlic Recipe
Fermenting garlic is easy with the healthiest lacto fermented garlic recipe. You only need five ingredients and 4 weeks of fermentation to get all the benefits of fermented garlic. Use this fermented garlic in any recipe that calls for garlic.
- Prep: 30 minutes
- Total Time: 672 hours 30 minutes
Ingredients
- 400 grams garlic, peeled
- 50 grams fresh cabbage leaves
- 400 grams water
- 200 grams vinegar
- 24 grams sea salt
Instructions
- Lightly crush each garlic clove with the flat side of a chopping knife to make it easier to peel. Peel each clove and set it aside. Let the garlic cloves rest for 10 minutes (this will ensure allicin benefits and flavor even after cooking).
- Preheat your oven to 450° F. Add the peeled garlic to a parchment paper-lined pan. *DO NOT USE ANY OIL*
- Dry Roast the garlic in the oven for 10 minutes, gently toss the garlic with a spatula, then roast for another 10 minutes.
- Fill a large bowl with ice and water.
- Immediately remove the garlic from the oven and scoop it all into the ice water bath. The cloves should still be firm but lightly toasted on the outside. Some cloves might be softer than others, but that’s fine.
- Dissolve 24 grams of sea salt in the water to create a brine.
- In a clean mason jar add the 50 grams of fresh cabbage leaves.
- Drain the garlic from the ice water bath. Add the 400 grams of garlic into the jar with the cabbage leaves.
- Add all of the saltwater brine to the jar.
- Place a fermentation weight in the jar to keep all of the garlic submerged. Place the mason jar lid on the jar and secure it in place.
- IMPORTANT: After 48 hours, you will notice bubbles and carbonation in the jar. (the tighter sealed your lid is, the more bubbles you will see) Remove the lid and the weight. Pour out about half of the brine and top off the jar with 5% acidity vinegar. Add at least 200 grams of vinegar (5% acidity). Place the lid on the jar and invert gently to mix. Replace the weight and the lid.
- Ferment for 4 weeks at room temperature. Set the jar in a glass dish to prevent messes. For the first few days, loosen the lid every 24 hours to burp the jar and let the gas out.
- After 4 weeks of fermentation, remove the fermentation weight and check to ensure the pH is right around 4 (it should always be below 4.5).
- Then move to refrigerated storage.
Notes
- The salt concentration in this recipe is extremely important since the pH of fermented garlic can take quite a while to decrease; do not use less than the listed amount of salt.
- This recipe is sized to fit a 1-quart mason jar.
- Do not skip step 11!! Adding vinegar adjusts the pH to safe levels and is an essential ingredient. The vinegar should be 5% acidity. I suggest using store-bought vinegar since homemade vinegar can have variable acidity.
References










I am just starting my fermentation journey, I love your information! If I cook with fermented items, will they loose their health benefits?
If you cook with fermented foods, the beneficial bacteria will die, but the other health benefits remain. I love cooking with ferments, the flavor is beautiful.
Can’t wait to try this! I have a bag of frozen (was raw when I put in freezer) garlic. Do you think I could defrost garlic before roasting and use in this recipe? Or does it need to be fresh?
Thank you for sharing your recipes!😊🌴
I think your frozen garlic should work!
I read and reread, but I didn’t see why not to use raw garlic? I buy my garlic as prepeeled whole cloves from my local Asian market, and I just add olive oil to cover and it lasts for weeks. I assumed oil (makes it mushy a little bit) would keep it safe by avoiding contact with oxygen. A layer of fat on my chicken broth makes it not go bad for a couple days if I don’t get it reduced and frozen immediately. Anyway, sorry rambled, but will this work on raw garlic cloves?
You can use raw garlic and keep everything else in this recipe the same. If you use raw garlic it will probably turn blue during fermentation.
Yes, the fat layer on bone broths helps them stay good in the fridge longer, but that has nothing to do with fermentation. You do not ferment broth. The broth is cooked at a high temperature for long periods of time, then cold-stored, with the goal of inhibiting any microbes from growing at all.
In fermentation, you are trying to encourage the growth of certain microorganisms. You should never use oil in wild fermentation, it will mess up the fermentation process and encourage the growth of opportunistic pathogens instead of healthy microbes.
Hi Kaitlynn,
I successfully lacto-fermented several jars of raw garlic, and used them to cook over one year.
So I decided to ferment additional batches because I loved it.
For some reason, I keep failing at fermenting the new batches.
The fermentation goes well for about two weeks of carbonation, with a strong (good) garlicky smell, turn blue-green.
No yeast, no mold, everything is fine, clear beige brine, until suddenly no bubbles and two days after that the smell changes, the brine also changes to a more brownish color At that time ph is over 5,5.
I naturally came across the idea to add an acid at the beginning of the process, because I though that maybe the garlic did not have enough sugar in it and maybe induced a premature stop of the fermentation. So I thought the acid would at least guarantee an acidic environment during fermentation.
I chose lemon because I know lemon can be fermented and has a good amount of sugar.
I made sure to filter and add fresh lemon juice to the brine to drop the ph to 3.5
The fermentation started well, but at a much slower pace that usual after two week there are still small bubbles.
But as I am monitoring the ph, I observe some jars have a ph increase to a level above 5. The ph increased front 3.5 to 5.
By reading your article, I realize my intuition was not so bad, and that the increase of ph level would probably be caused by the fermentation of the garlic itself.
I also realize that waiting for the first bubbles before adding the acid would help not inhibiting the lactic bacteria growth in the first days.
Unfortunately, I feel like I still have to throw away the jars in which ph has passed 5, as their smell began to change.
And I hate to waste such good garlic.
So I really would appreciated your opinion on this.
Is the use of lemon correct?
Also, could you to explain what is the advantage of using apple cider vinegar. I though vinegar was acetic acid does that make any difference, or interfere with lactic bacteria growth?
Finally, what is the role of roasting the garlic?
Thank you!
I’m not comfortable advising people on recipes that are not my own, so the garlic you made before is a use at your own risk situation. I personally wouldn’t use it if the pH is above 5.
I’ve never tried lemon juice, I find the synergistic effects of acetic acid and lactic acid works best with garlic. Lactic acid bacteria survive fine in the presence of acetic acid.
I like to roast my garlic because I find it tastes better, and it destroys the compounds that produce the blue color, so it stays an appetizing color in the presence of acid.
Thank you
my garlic didnt bubble in 48 hours I followed everything to a T! and use fresh homegrown garlic. I did not add the vinegar at 48 hours because there were no bubbles… I am onto day 5 and yesterday I put it all into the fridge…. I don’t know what to do at this point. there is no activity. should I add the vinegar and let it sit outside the fridge? please let me know what ud do if no bubbling occurs.
You even included fresh raw cabbage leaves and weighed all your ingredients? I’ve made this garlic at least 7 times and it works for me every single time. Are you using a regular jar? or some sort of special lid that lets gas out? Once more question, is it cold in your home? If it is cold where you are it may just take a bit longer to get started bubbling, and that’s okay.
What is the purpose of the the cabbage leaves? Are hey necessary or can they be left out?
I explain the cabbage leaves in the blog post above the recipe. They are necessary for this recipe.
Can you preblend before or after roasting?
If you want to make garlic paste, you should blend it up after it is finished fermenting.
This is my second time making this recipe because the first batch got eaten up SO fast! Very easy to follow steps and the end result was perfect. I’ve mainly been using the garlic and brine in salad dressings, but the cloves/cabbage are also tasty on their own. Thanks for inspiring my fermentation journey!
I’m so glad you’ve enjoyed this recipe!
I am trying this for the first time and the amount of garlic (400 g) doesn’t begin to fill my quart mason jar. Is it ok to increase the garlic or should I just add the weight and proceed with a half full jar?
you should follow the recipe as it’s written. I’m unsure how it “doesn’t begin” to fill up your quart jar. 400 grams is what is pictured here. one garlic clove weighs about 5 grams. so I’m pretty sure 80 garlic cloves should almost fill the jar.
So I did this recipe exact, yet my PH is sitting right at 5 why?
Can I use my pickled onion brine from your recipe instead of the ACV?
No, It needs to be full-strength vinegar that is 5% acidity.
Hi, after following recipe I left mine to ferment on bench , then I forgot it, opened today, tested for PH it’s 4 can I now move it to the fridge, it was probably on the bench for 10 weeks. Will it be ok to eat?
If ok do I remove the cabbage leaf and store I. An airtight container in the fridge?
yep! you can move it to the fridge. If the pH is four it’s good to eat! You can also remove the cabbage leaf.
Thank you
Your the best 🙂
I have bought some nice large fermenters that I use for my chillies. I grew 150 bulbs of garlic last year and the Fire is an early so nearly past it’s best, but still firm now. Can I easily upscale this recipe for a much bigger fermentation vessel? I can easily work out the correct salt concentrations by following your other post on that subject, however what weight of vinegar would I add? For eg if I had 2kg of garlic which is 5X the 400gm in your recipe, would I multiply the vinegar by the same factor and add 2 kg of vinegar?
Hi,
I just found out this blog and it seems an amazing guide, so thank you so much.
I’ve been reading for a while and I have some concerns that I appreciate if you help me out to clarify.
Regarding ACV in this recipe, is there any different between using ACV with a mother or without it in terms of the fermentation process? (I’m not sure if that culture from the mother should be added to the brine or if it shouldn’t be added)
Talking about FODMAP, I think pickled garlic is low in fructans, would be the same for the fermented ones? In that case, those fructans would be in the brine instead of in the garlic and then the brine would be high FODMAP?
I have a less important doubt about the lids because I see sometimes photos with the gasket and other times photos without it. Is there any rule about the using of the gasket?
Thank you so much for all your guides and recipes, looking forward to make all of them!
Hi!
Can I use red cabbage?
sure, it will make all the garlic pink though.
Hi there!
I wanted to check in because I followed the directions closely but for a half batch, in a smaller jar. I used 50% of the weight of all ingredients, including the additional vinegar because I had less brine and garlic to begin with. I saw some small bubbles at the initial 48 hour point but haven’t seen any carbonation since adding the vinegar (I used white vinegar). There’s a bit of space at the top of my jar- could this be why I haven’t needed to burp and haven’t seen bubbles? Should I be concerned that something has gone wrong? Of note, a few of my garlic cloves are slightly blue/green now which I take as a good sign that the mixture is decently acidic but I have no strips to test.
Sounds like it’s going well! what kind of jar/lid are you using? that greatly effects how much the bubbles build up.
It’s just a regular glass mason jar with the metal lid and band- I was out of my screw on plastic Mason jar lids that I use for salty ferments.
So i made this last year with my small garden garlic. I havent even tasted the batch yet! I may in the coming days. I dont recall there being the bubbly action very much in the beginning. which has made me weary about tasting/using it. BUT its pH reads at 4. So.. i may taste soon!! they smell delicious!! I had them sit out for at least 2 weeks and have had them in the fridge for about 10ish months or so now.
-Rachelle
Sounds like it’s a great pH and fine to eat! If it smells good and is a great pH its good.
Hi Kaitlyn,
I’ve successfully fermented two of your recipes, and they were worth the wait! In the directions above, it doesn’t mention when to add the ACV. Is this just added to the brine?
it is the step that says IMPORTANT!
Thank you for this great resource! If you remove a portion of the saline solution at step 11 and replace it with vinegar, doesn’t that lower your salt % ? So it looks like prior to the vinegar, the solution is at 2.75% salt. How do you know the removal of brine and the addition of none salted vinegar won’t bring you beneath 2% salt ? Cheers!
Is this right? 1. Original Brine: Initially, you make a brine with 24 grams of salt.
2. First Fermentation: After 48 hours, you’re told to remove half of the brine. Since the brine is the mixture of water and salt (and the garlic and cabbage wouldn’t absorb all the salt), we can assume that half the salt is removed along with half the brine. So you would have 12 grams of salt remaining in the jar.
3. Adding Vinegar: Then you add at least 200 grams of 5% acidity vinegar which doesn’t contain salt.
So the new total weight of the ingredients in the jar after removing half the brine and adding vinegar would be:
• Remaining brine (which includes water, garlic, and cabbage): This would be half of the original total minus the vinegar (we’ll assume the garlic and cabbage don’t change weight significantly during the initial ferment).
• Plus the 200 grams of vinegar added.
Let’s calculate the new salt percentage.
After adding the vinegar and considering the removal of half the brine, the new salt percentage in the recipe would be approximately 2.29%.
Sort of… but here you are assuming all the salt remains outside of the garlic… it doesn’t. Because of osmosis some salt is inside the garlic. The salt concentration is important to get fermentation started, once bubbles start we’re dropping the pH with vinegar and the drop in pH keeps it safe.
Can I put the cabbage on the bottom instead of the top if I don’t have a fermentation weight?
sure!
Thank you so much for this recipe!!! For the second year in a row I bought tons of garlic at the market and fermented them using this recipe. I’ve been adding these to EVERY recipe for the past year and they are the best!!! Since they are cooked they are soooo great to use in vinaigrette, salads or gaspacho.
Hi Kaitlynn
I have made this fermented garlic successfully twice, but this time it is much less bubbly.
I have already added the vinegar, and the ph is around 4. It has been fermenting for a week.
Should it be ok even if there are no bubbles?