

Ingredients for Roasted Garlic Sauerkraut with Black Pepper
- Cabbage: I suggest green cabbage for this garlic sauerkraut recipe. A small head of cabbage will make about two jars of sauerkraut using this recipe. At the store, look for a cabbage that still has outer leaves. Usually, if a cabbage still has its outer leaves, it’s more hydrated and fresh.
- Garlic: I used half of a garlic bulb for one jar. Below, I’ll go over the steps to roast the garlic.
- Black Pepper: You can use fine-ground pepper, medium-ground pepper, or whole black peppercorns.
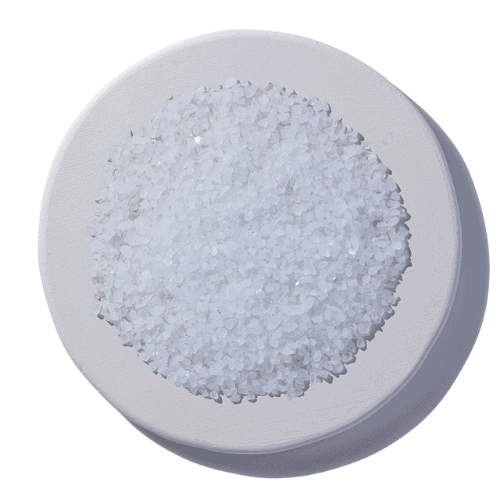
- Sea Salt: I like to use unrefined solar evaporated sea salt, but any pure sea salt will do. If you like experimenting with fancy sea salt in fermentation recipes, I suggest trying French grey sea salt.
- Water: I add water to all of my cabbage fermentation recipes. Water is still drawn out of the cabbage when salt is added. However, having water in this recipe accounts for seasonal changes in produce hydration levels. So, no matter where you are in the world or what your cabbage is like, you should have success with this recipe.


Dry Roasting Garlic
Do not, under any circumstances, roast garlic with oil for this recipe.
Fermenting vegetables with oil can have negative consequences. I simply cut a whole garlic bulb in half, unpeeled. Then, I put it face down on a parchment paper-lined pan and roasted it at 400 degrees F for 35 minutes. After that, I allowed it to cool. When you squeeze the cloves, they will slide right out. Some can be softer and mushier than others, and that’s fine.


Supplies You’ll Need to Ferment Sauerkraut

Roasted Garlic Sauerkraut Tips
Carbon dioxide and bubbles will form during the first few days of fermentation. Sometimes, the jars can become overly full of liquid, causing excess liquid to seep out. To address this, you can “burp the jar.”
Remove the lid and press everything back down using a gloved hand, tamper, or spoon. Make sure that all ingredients, including the weight, are submerged beneath the brine. Clean the lid and place it back on the jar. There’s no need to tighten it completely; just secure it enough to keep it in place.
Always trust your sense of smell: properly fermented cabbage should have a pleasantly sour aroma reminiscent of strong cabbage. Do not consume anything that smells unpleasant or overly yeasty.
Avoid eating any food with mold growing on it. If you follow the recipe instructions and recommended equipment, you should not encounter this issue.
Conduct a taste test at three weeks. If you prefer your sauerkraut to be more tart and sour, you can allow it to ferment for up to four weeks at room temperature before refrigerating.


What Temperature Should I Keep My Roasted Garlic Sauerkraut At?
Keep your fermenting cabbage at a temperature between 70 and 80 degrees F. Keep out of direct sunlight
How Long Should I Ferment My Homemade Sauerkraut?
After 3 weeks, remove the fermentation weight and then smell and taste test. Your fermented cabbage should smell pleasantly sour. It should taste tart, lightly salty, and cabbagey. If you would like it to be more sour, you can replace the weight and lid and then ferment at room temperature for one more week before refrigerating.
Do I Need to Refrigerate Sauerkraut?
After fermenting for 3 weeks, remove the weight, place a regular mason jar lid on the jar, and refrigerate. Consume within 6 months for full probiotic benefits.


Roasted Garlic Sauerkraut Fermentation Timeline
We monitored this roasted garlic sauerkraut closely during fermentation, even peeking at the microbes under a microscope, so we could share this timeline with you.
If you’re following our recipe and fermenting at around 75°F, yours should follow this timeline. (Hotter temps will be faster, colder temps will be slower)
24 to 48 hours: All the contents in your jar should be fully submerged in the brine. The salty brine creates an anaerobic environment, which prevents unwanted microbes from developing. However, some Gram-negative bacteria and potential troublemakers may still be present. Don’t worry; they will be eliminated from the mixture over time.
2 to 5 days: Here come the bubbles! You’ll likely notice fizz or bubbles starting around day two. Bubbles are a great sign that stage two of fermentation has kicked in. This is when the helpful Leuconostoc bacteria get to work, and by day five, all the stage one microbes are gone.
5 to 10 days: Things may start to settle down now. You won’t see as many bubbles, but don’t worry, it’s shifting into the next stage. The brine might get cloudy, the color will turn muted, and you should catch a lovely, tangy smell. That’s the Lactobacillus taking over and doing what they do best, preserving the cabbage.
10 to 21 days: By this point, Lactobacillus is mostly running the show. They’re making plenty of lactic acid, which gives sauerkraut its signature sourness and preserves it. This is when your cabbage officially becomes real-deal sauerkraut.

More Sauerkraut Recipes to Try
- Turmeric Napa Cabbage Sauerkraut
- Homemade Kimchi Inspired Spicy Sauerkraut Recipe
- How to Make Old Fashioned Sauerkraut with Caraway Seeds
- The Benefits of Eating Sauerkraut Daily

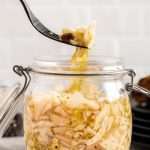
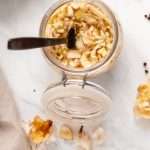
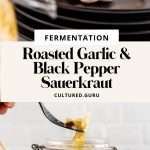
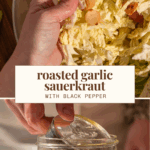
Roasted Garlic Sauerkraut
This recipe is a traditional, wild fermented sauerkraut with roasted garlic and black pepper incorporated. If you love garlic, crunchy and tart sauerkraut, and a light pepper flavor then this Roasted Garlic Sauerkraut with black pepper recipe is for you!
- Prep: 15 Minutes
- Total Time: 15 minutes
Ingredients
- 500 Grams Cabbage, Chopped
- 50 Grams Garlic, Roasted
- 1 Teaspoon Black Pepper
- 200 Grams Water
- 20 Grams Sea Salt
Instructions
- To Roast Garlic: Cut a whole garlic bulb in half, unpeeled. Then, put it face down on a parchment-paper-lined pan (NO OIL) and roast at 400 degrees F for 30 minutes. After that, allow it to cool. When you squeeze the cloves, they will slide right out. Some can be softer and mushier than others, and that’s fine. Alternatively, you can dry roast peeled cloves.
- Wash your fermentation equipment (jar, weight, and lid)
- Remove the outer leaves of your cabbage and lightly rinse with cool water.
- Chop the cabbage to your desired thickness.
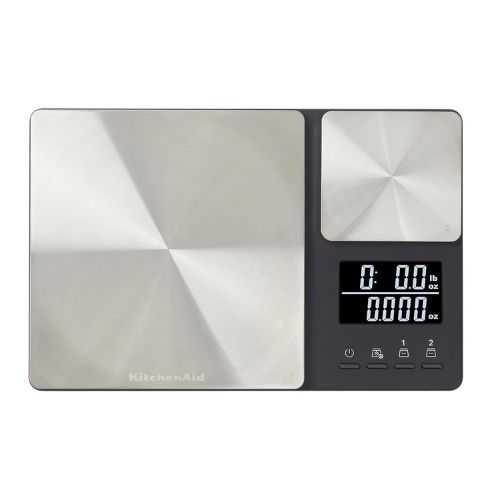
- Measure out all of your ingredients using a kitchen scale.
- Mix all the ingredients, including the water, in a large bowl. Lightly massage the cabbage and break up any large pieces.
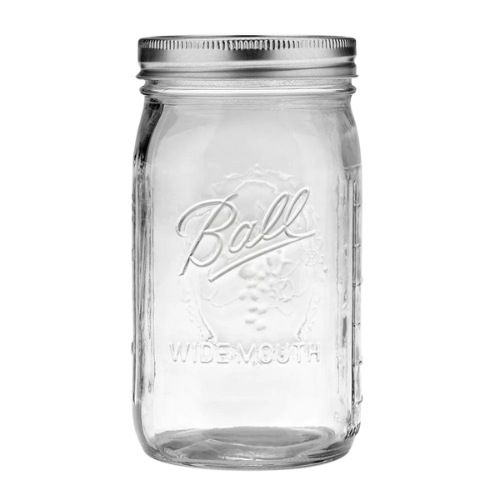
- Pack everything, including the water/brine, into a clean jar. (A 32-ounce jar works best.)
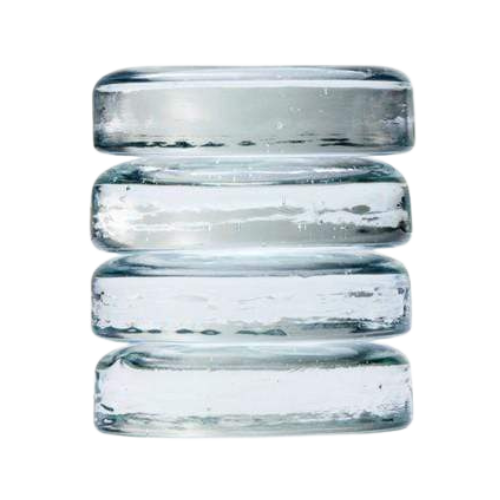
- Place a fermentation weight in the jar, fully submerging the cabbage pieces and the weight into the liquid. If you don’t have enough liquid, submerge your glass fermentation weight in the jar as much as possible. Over the next 12 hours, the cabbage should release more liquid, and you can press the fermentation weight down below the brine.
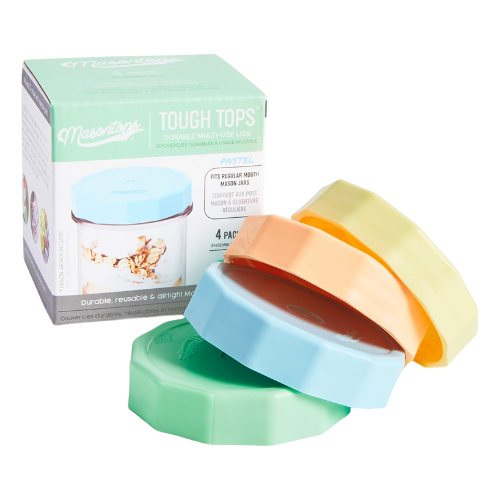
- Secure the lid, ideally a rust-proof lid. (you do not need to tighten it all the way, just secure the lid but leave it ever so slightly loose so the gas doesn’t build up too much). You can keep the jar in a glass dish to catch any spills.
- Burping the jar: It should get bubbly in the first few days. If you have a tightly secured lid, you will need to burp the jar. You should also wash off the lid to keep it clean and re-adjust the fermentation weight whenever needed. Anytime the weight comes up out of the brine, with clean hands press hard on the weight to tamper everything back down into the liquid.*
- Ferment at room temperature for 21-28 days, then remove the fermentation weight and refrigerate.
- If you try this recipe and love it, please leave a five-star review below!
Notes
- This recipe at 1x works best with a 32-ounce jar
- When things are bubbly: If it looks like you’ve lost brine and cannot re-submerge the contents by pressing down on the weight, top it off with raw apple cider vinegar. It slightly changes the flavor, but it doesn’t harm the sauerkraut’s microbes and prevents mold. You need to give it a good stir when it’s done fermenting to mix up the flavors.
- Taring/zeroing the scale with a container on it subtracts the weight of the container, allowing you to weigh only what is added to the container. After taring/zeroing the scale, it should read 0.0 with the container on it.
- Do not use oil to roast garlic. Oil can negatively impact fermentation.
- Any cabbage works in this recipe. My favorites are green cabbage, napa cabbage, and savoy cabbage.


This is brilliant! I’m a huge fan of sauerkraut, but the last time I tried to make it they came out really mushy. I’m excited to try this recipe! Thank you for sharing!
This recipe is SO GOOD! Perfect balance! We add it to every meal, I wish I’ve done more of it!!!
I’m so glad that I stumbled upon your web-site. I’ve been wanting to try making sauerkraut but I never did because I was concerned about food safety. Your in-depth explanations on microorganisms have given me the courage to finally give this a try. I have a question about the Roasted Garlic Sauerkraut. Your recipe calls for 12 grams of sea salt. If my math is correct this works out to a 2.18% brine (12 grams divided by 550 grams total weight = 2.18%). I’ve read elsewhere on your web-site that a 2.5% brine is recommended for cabbages. Could you please explain why 2.18% is adequate and safe for this recipe.
I love your web-site!!!
Hey there,
Thanks for enjoying our blog. Yes, I suggest the addition of 2.5% salt by weight (a 2.44 % total salt concentration) for most at home fermenters when fermenting cabbage. This is a “fool proof” salt concentration that prevents any issues and cuts down on the time I have to spend troubleshooting with people.
It’s not a % brine. It’s a % total (w/w) salt concentration. So yes, if you include the roasted garlic in the calculation, your math is approximately correct. You’d have to include the weight of the peppercorns too to be exact.
The recipe is safe because I’ve validated it with microbiological testing, as with all my recipes. I chose to not include the 50 grams of roasted garlic (or the black pepper) in my salt concentration calculations for two reasons. 1. It doesn’t contain much water, so it doesn’t increase the water activity (a w) 2. It was dry roasted at 400 °F meaning it contains no microbial life, thus does not contribute to the microbial population.
So 500 grams of raw ingredients that contribute water activity to the recipe multiplied by 2.5% is 12.5 grams.
I chose to round down because after much feedback some people have informed me that the kitchen scales they bought don’t have a decimal place.
Kaitlynn,
Thank you for the quick, clear and detailed response!
I appreciate that you took the time to provide such a detailed explanation and this gives me full confidence in your work.
The recipe calls for 20 grams salt. However,in the previous conversation, you both mention 12 grams salt. Can you please clarify? Thanks!
updated this recipe last year, so that it would be for a 32-ounce jar like all my other sauerkraut recipes. older version was for a smaller amount. Follow the recipe as written!
Can’t wait to try this recipe. I love the site and the detailed scientific explanations. Both nerdy and digestable!
Hi! About to try this. Can you please clarify: what size jar? Can I double the recipe? How much room should be left at the top?
Hi Amy,
Check the notes section of the recipe. This recipe at 1x works well with a quart-size jar. There are buttons at the top of the recipe card to double and triple the recipe. You should increase the jar size accordingly.
Hi – I’m on day 10 of this ferment and have noticed that my top vegetables are no longer submerged and there seems to be less water/brine. Is this normal? I have not opened the jar since day 1.
Hey there,
Please check the blog post above the recipe card that outlines care instructions throughout the duration of fermentation. You should remove the lid and press everything back down into the brine, clean the lid and place it back onto the jar.
Starting this recipe today 🙂 got extra cabbages this week. I’m not planning on roasting my garlic, as I quite like the sharpness of raw garlic in fermented foods. I hope it works out okay. I’ll edit this post with a review in a few weeks 🙂
Glad to hear you are trying the recipe! I think the raw garlic will be great 🙂
I usually refrain from buying commercially grown cabbage due to concerns about indiscriminate use of pesticides/insecticides here in the Philippines. Organically grown vegies are more expensive and not widely available. My question is, does any chemical residue affect the microbial population on the cabbage and would it change fermentation parameters? Thank you.
It all depends on the chemical being used. Some pesticides and fungicides can destroy vegetable and soil microbiomes, making wild fermentation of those vegetables difficult. However, cabbage is considered a “clean 15” vegetable even if grown conventionally. Since you remove the five or so outermost leaves before using the cabbage, there’s basically no pesticide residue… also, a few of the microbial species involved in wild fermentation have the ability to degrade pesticide residues.
Can you can this after the fermentation process is complete? I wanted to make enough to store.
I think it’s possible, but I’m not sure the logistics of it, since I’ve never tried it.
Thank you for the reply. Great info. I’m now more inspired and confident to continue doing lacto fermentation with a science based approach.
Hi!
Thank you so much for your perfect recipe. The only thing that is not so perfect in my situation is that:
Cabbage even in the grocery can contain wax or pestide so I usually rinse it with baking soda to get rid of them( in many articles they said it is effective up to 90% of the time).
My question is, can baking soda also disrupt the fermentation of cabbage ( I hope not 🙁 )… ?
a bit of wax on cabbage leaves is natural, this is called epicuticular wax, and it is secreted by the cabbage leaves. Cabbage is a “clean 15” vegetable. Once you remove the outer leaves, cabbage is extremely clean with little to no pesticide residue. Also, the lactobacillus spp. involved in vegetable fermentation are great at degrading any residual pesticide residues.
Rinsing the cabbage with baking soda can disrupt the microbiome and cause insufficient fermentation.
Thanks for this recipe. I had tons of cabbage so made 4 jars of this. I just tried them about 4 weeks after making them, and 1 of the 4 jars tastes different than the others. It smells/tastes more sour. Is this variation normal or should I toss it?
could be just a slight variation in the cabbage if you used multiple cabbages to make it. Or maybe it was in a slightly warmer spot on the counter than the other jars. It’s normal, and if it’s more sour that means it’s more acidic so it’s safe to eat.
Thanks for confirming! I did eat some yesterday and didn’t experience any signs of food sickness. I’m glad I don’t have to toss it. Thanks for the recipe !
I am new to fermenting and I was thinking of getting some weck jars for this recipe. Can you burb the weck jars easily or do I need an air lock. Thanks
you do not need an airlock. You can use the regular weck jar glass lid with the clips to secure it, leave the gasket off, and set the jar in a dish to catch any seepage. This keeps everything submerged perfectly, without needing to burp the jar.
This came out amazing!! Can I quadruple the recipe or will multiplying the quantities not work? Thanks!
you can quadruple it!
Great explanations!
I’ve ordered weights but they haven’t arrived yet and I’m impatient. Are they essential?
the weights are VERY essential. You must keep everything submerged in the brine!
This is so much better than store bought kraut. Will make again perhaps with fresh not roasted garlic.
fresh garlic is great too! Thanks for leaving a review!
So delicious!!! I will be making this one on repeat!!
Thank you for leaving a review! Happy to hear you love this sauerkraut!
This is incredible!! This is the best sauerkraut I’ve ever eaten. This is my first time making sauerkraut and now I feel like a pro because it is so simple yet gourmet
omg I love to hear this! Thank you for leaving a review!
I have done this recipe. First of all – it has great taste and aroma. I really like it.
But there is also one point, I have a question for you. I’ve been making my own sauerkraut for a couple of years already, and I always put it to the fridge after 4-5 days, where it gradually improved taste. Usually at firt it has “mustardy” taste, that goes away in like 10 days. But this time I wanted to follow your recipe timings. So I kept the cabbage outside of fridge for 9 days (not 21). And next day I tried it. It’s good, but in my opinion it’s too sour. Not sure if it should be this way. It’s more sour than kimchi for example, which we usually put in the fridge after 2 days.
I wonder – what if in your place you have less bacteria on vegetables than me. Or maybe you usually have lower temperature.
Glad you like it! Thanks for trying it! No, I don’t have less bacteria on my vegetables. The reason is that I, and many other readers here, enjoy more sour flavors than you do. Everyone’s perception of sour taste is different. Just like people who love spicy food and people who don’t. It’s no more sour than a vinegar pickle, but it is a different kind of sour since it’s a different acid.
Hi
I love your recipe and I’m about to try this version of sauerkraut. I’ve been doing sauerkraut for a few years now and I never add water to it, just salt and there’s always enough juice that come out by massage it that it’s fully submerged. Just curious why do you add water? Is it just to be 100% it will be enough liquid or does water effect the whole process in any way?
Thank you
Not everyone uses the same quality or freshness of cabbage so adding water standardizes my recipes, making sure everyone gets enough brine, regardless of cabbage variability. Standardizing my recipes with water is a lot easier than helping thousands of people trouble shoot not having enough brine.
This is our favorite sauerkraut recipe! It does not last long. I made a huge batch this time around, so it doesn’t run out as quickly. I was having issues half burning my roasted garlic. This time we peeled the cloves first and piled them in a stoneware roasting dish. We added 1 Tb of water, put the lid on and roasted @ 400 F for 20 min, then removed the lid put it back in for 20 min more checked on them and added 5 min until they were perfectly roasted and fragrant. The peeling made it much easier instead of sticky garlic and paper getting stuck to my hands. We decided we like the flavor after 28 days the best. Now we play the waiting game. Thank you for all your recipes. I really enjoy trying new ones and learning new info from your website!
omg I love these garlic roasting tips! Thank you for leaving a review!
Hi Kaitlynn! Thank you so much for your beautiful website!! I’ve never made my own sauerkraut before, this will be my first time. I’m wondering if it would be okay to add fresh dill to the recipe? If so, how much would you recommend? Thank you so much for your time!
yes! you can add fresh dill. I suggest one or two sprigs, and place the whole springs in the bottom of the jar before you pack the cabbage in, so it stays submerged.
Super easy and super tasty.
Would recommend.
I have made this many times and it turned out wonderful! I have added tumeric and red pepper flakes to add a nice variation.
Great recipe. Love the flavor. I went from too much brine to not enough though. Was my own fault since I drained some off and still learning. I just tasted it and put it in the fridge? Can I make more brine and add to it at this point or is it too late? I was hoping to use the brine for other recipes?
It’ll be good in the fridge, doesn’t need to stay submerged if it’s refrigerated! I wouldn’t recommend adding any salt water brine now, as that will dilute the acidity. You can top it with some raw ACV. It’ll change the flavor a little, but it’s any easy way to make more brine without reducing the acidity.
This recipe is so easy to follow and absolutely delicious! My husband and I LOVE it! It is definitely peppery but we enjoy that level of flavor/spice. I am almost immediately making another large batch of it so we don’t have to go too long without it. Thanks so much for this great recipe!
Thank you for trying my roasted garlic kraut recipe! I’m so glad you and your husband are loving it. 🙂
I really enjoyed this sauerkraut, and will be making it again soon. I’ve also shared it with my kraut loving friends. I did omit the black pepper. Very tasty!
This recipe is amazing! I always thought that roasting beforehand would inhibit fermentation, and I’m so glad I found this recipe to prove that wrong! Garlic always slaps in a ferment, but the roasted garlic cuts the bite a bit and leaves a very delicious and salty buttery-ness that I’d never before tasted in sauerkraut. I’ve been putting this on everything (and eating it by the spoonful the way others might do with a bag of shredded cheese at night?) because it’s that addicting and delicious. I’m kicking myself in the butt for not immediately starting a new batch when I tasted the first one. I DO NOT WANT TO GO A FEW DAYS WITHOUT HAVING THIS IN MY FRIDGE!! it’s that good!
thank you so much for leaving such a glowing review! 🙂
Hello,
I’ve just found this website and I’m looking forward to learning from you.
😁
happy to have you here learning fermentation with us!
Hey! Can I add some apple to this? I’ve made this one before and your apple celery kraut as well. I have a partial apple I want to use up before it goes bad.
sure! just replace a little of the cabbage with some apple!
Everything is clearly explained and simple. Thank you!
you are welcome! I’m glad you enjoyed the recipe!
I grew up on sauerkraut, and this is my first attempt at making it. This recipe is fantastic. 5 stars
So happy to hear that you loved this recipe! Thanks for leaving a review 🙂