The History of Tempeh
Tempeh originated in Java, Indonesia, as a byproduct of the manufacturing of tofu and soybean oil. It is essentially tender cooked legumes bound together by a dense mycelium of white Rhizopus mold.
When food crafters would press oils from nuts and seeds and liquids from soybeans, the resulting waste products were fibrous and dense seed, bean, and nut cakes to be discarded.
This soybean waste is called okara. It’s speculated that the okara got contaminated with fungi used for soy sauce production. Accidentally inoculating okara waste with fungi brought about a protein-packed, fiber-rich food that is quite delicious… and economical.
So, accidently or not, if you love tempeh, you can thank Indonesia for this delicious food!

Can You Eat Homemade Tempeh Raw?
Homemade tempeh isn’t exactly probiotic because we cook tempeh before eating it. You technically can eat some raw, but I do not recommend it, and it’s best to cook it. However, the fermentation process of tempeh is very beneficial for gut health.
Tempeh fermentation helps remove phytic acid from legumes, making them easier to digest. The elimination of phytic acid through the fermentation process also means that the legumes will cause less gas production in the gut (so yes, you will fart less haha).
I should note here that cooking also reduces phytic acid in beans. So beans don’t have to be fermented to be good for you.
Tempeh is great for people who want to eat more beans. Shifting the diet to more beans and legumes as protein sources can sometimes cause bloating and gas initially. However, these side effects are significantly less likely with tempeh since it is fermented.
The Rhizopus fungi that ferment the legumes into tempeh make nutrients and vitamins more readily available.
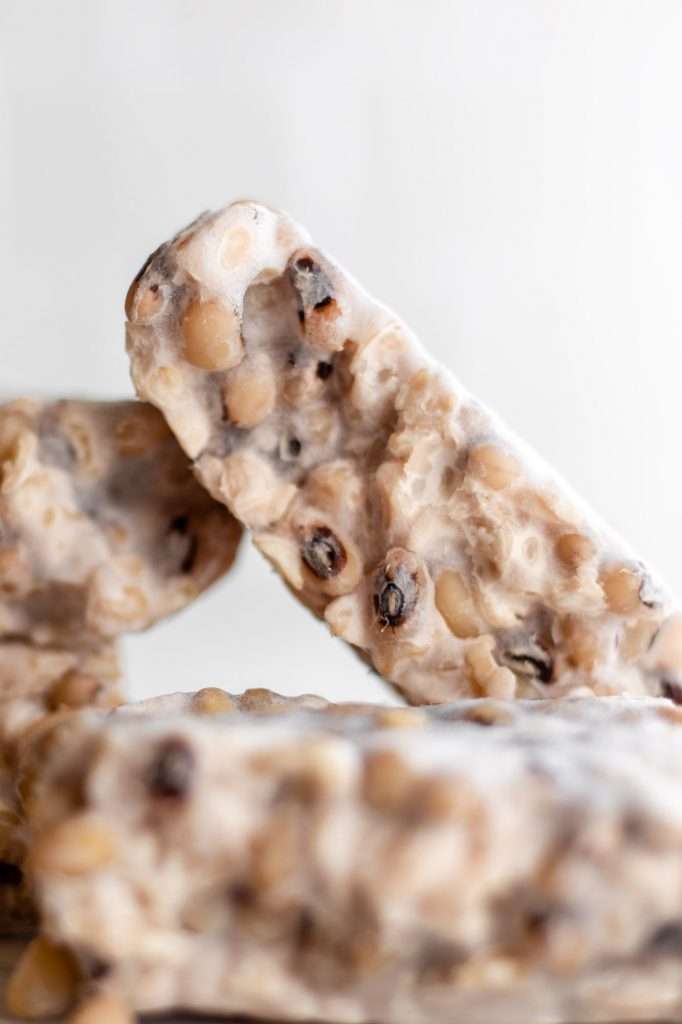
The Homemade Tempeh Process: Removing the Hulls
I like soaking my black eyed peas for about 12 hours. After soaking, I put the legumes in a bowl of cold water. Then I rub them between my hands in the water until many of the hulls float to the top. The hulls are easily poured off.
You don’t have to remove every single hull, the tempeh will still come out fine, especially since the hulls on black eyed peas are so thin. More hulls will come off when you cook the peas, too.
When cooking, you want them to be tender but not mushy. The peas should be firmer than if you were cooking them to eat right away. It’s important not to overcook.
Drying Out the Black-Eyed Peas
For your homemade tempeh to come out delicious and safe, you must dry the peas you just cooked.
Please do NOT put them in a dehydrator or anything; you are not trying to dry them out that much. I like to spread the cooked legumes on a clean sheet pan lined with a clean towel and let them air dry for about 2-4 hours. Sometimes, I’ll use a blow drier and blow hot air under the towel holding the peas to speed up this process.
The cooked legumes have to be more on the dry side, and the material the tempeh is wrapped in has to be breathable (either with holes or made from a porous material).
The breathable material provides oxygen to the aerobic fungi and, in tandem with dryness, prevents anaerobic spoilage microorganisms, like Bacillus spp. and Clostridium spp. These are the worst contaminants that we need to worry about with tempeh. These contaminants usually result from too much heat and too much moisture.
When you smell it, you’ll know if the tempeh hasn’t fermented properly. Bad homemade tempeh is very hard to miss.
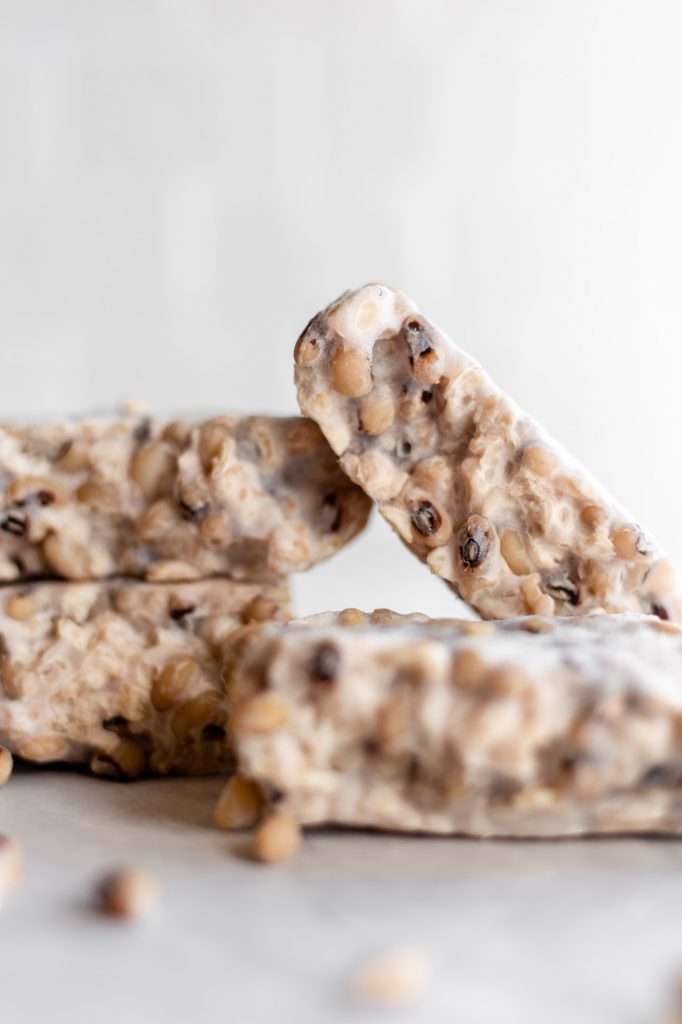
Homemade Tempeh Starter Culture
Let’s talk a little bit about the fungus that makes tempeh! It’s called Rhizopus, and it’s a pretty cool fungus.
Rhizopus is a genus of filamentous fungi commonly found in nature, on food, and in association with animals. Rhizopus fungi are characterized by a branching mycelia composed of three types of hyphae: stolons, rhizoids, and usually unbranching sporangiophores. This complex mycelium holds tempeh together in a uniform, dense mass.
Multiple species of Rhizopus can be used to make tempeh, but the most common species used is R. oryzae. CLICK HERE for the starter culture I like to use.
Equipment and Supplies for Making Tempeh with Black Eyed Peas
You must tightly wrap the cultured legume mixture in a bag or something similar to make tempeh.
Honestly, I HATE using plastic to make tempeh. I think the most problems arise when you use plastic because the plastic holds too much condensation and moisture. This leads to nasty results and undesirable microbial growth.
However, if you want to take a chance, you can use a plastic bag with holes poked in it. If you need to use a plastic bag, I suggest using plastic bulk section bags or produce bags from the store. I get great results using these because they’re more porous than a ziplock.
Banana Leaves work best since they are porous, and you can sometimes find these at the Asian market. Another option is bamboo leaves (my personal favorite). You can also use cheesecloth (but you’ll have to wrap it with a few layers and sterilize it somehow after).
You’ll also need something heavy, like a large cutting board or a textbook, to press the legume mixture into a dense cake.
Can You Freeze Tempeh?
Yes, you can freeze homemade tempeh. Freezing tempeh is a great way to extend its shelf life while preserving its texture and flavor. Here are some tips for freezing homemade tempeh:
- Cool Down: Ensure the tempeh is completely cool before freezing. This helps to prevent ice crystal formation that can affect texture.
- Portioning: Consider cutting it into smaller portions if you have a large block of tempeh. This way, you can thaw only what you need for a particular meal.
- Wrapping: Wrap the tempeh tightly in cling film or place it in a freezer-safe bag. Removing as much air as possible helps to prevent freezer burn.
- Labeling: Label the packaging with the date of freezing. Properly stored, frozen tempeh can last for up to 6 months.
- Thawing: When ready to use the tempeh, thaw it in the refrigerator overnight. Avoid thawing at room temperature, which can lead to uneven thawing and potential bacterial growth.
- Cooking After Thawing: Once thawed, cook the tempeh normally. It’s generally not recommended to refreeze thawed tempeh, as this can affect its quality.
Freezing doesn’t significantly change the texture or taste of tempeh, making it a convenient option for meal prep and reducing waste.
More Tempeh Recipes
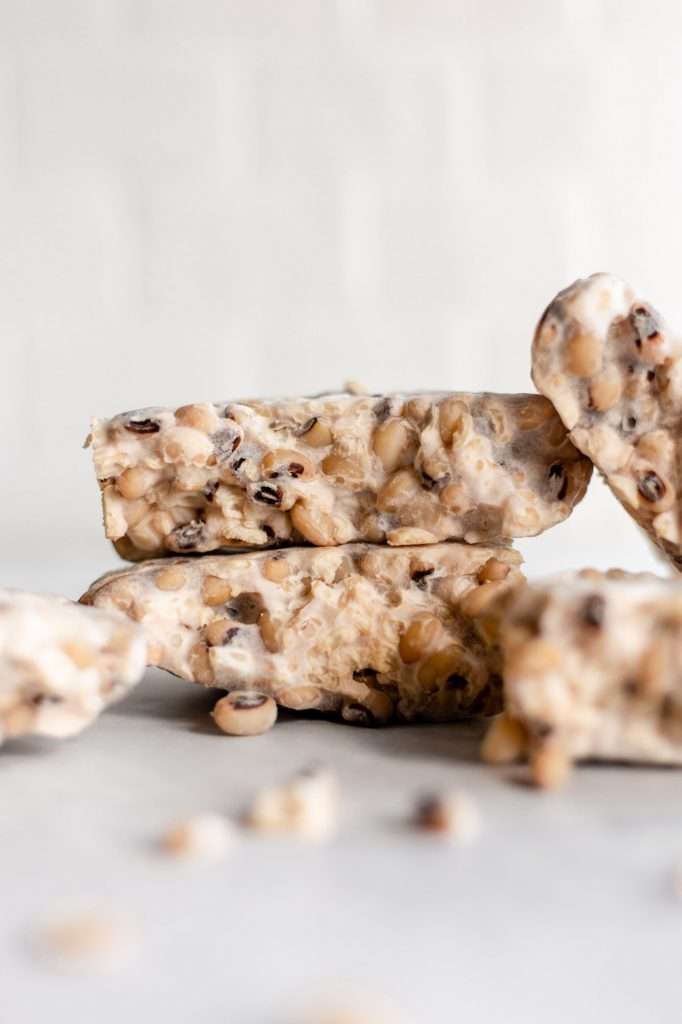

Homemade Tempeh with Black Eyed Peas
Homemade tempeh is a wonderful and unique way to prepare peas, beans, and other legumes. Use this recipe to learn how to make tempeh with black-eyed peas. This tempeh has a light, earthy flavor and works well in any recipe with tempeh.
- Prep: 60 minutes
- Cook: 15 minutes
- Total Time: 73 hours 15 minutes
Ingredients
- 300 grams black eyed peas, dry
- 30 milliliters distilled vinegar
- 1 packet (1 teaspoon) tempeh starter culture
Instructions
- Soak the peas in water for about 8- 12 hours.
- After soaking, rinse the peas a few times. Then add to a bowl of cold water. Rub the peas in between your hands to remove the hulls. The peas may break in half, and that’s perfectly fine. You do not need to remove every single hull.
- Add the peas to a stockpot.
- Cover with water so that the water level is about two inches above the peas.
- Bring the water to a boil, then reduce the heat to a simmer.
- Cook over medium heat, uncovered, for about 15-30 minutes. Check the peas every five minutes to see when they’re tender. You want them to be tender, but not as soft as canned beans. Using a slotted spoon, remove any hulls that float to the top while boiling
- Once tender, drain the peas.
- Spread the cooked peas out on a clean sheet pan lined with a clean towel to dry out for about two hours. You want the peas to be dry to the touch, but still tender. *see notes
- In a clean mixing bowl add the cooked peas, vinegar, and tempeh starter. Mix well.
- Place the tempeh mixture on a banana leaf, in a plastic bag (non-ideal), or on some cheesecloth. If using a plastic bag, press all of the air out of the bag to create a tightly packed, rectangular mass. Poke holes in the bag with a toothpick because the tempeh mixture needs oxygen. If you are using a banana leaf or cheesecloth arrange the mixture into a rectangle on top of the leaf or cloth, then fold over the leaf or cheesecloth to wrap it like a package around the mixture. It should be a tightly secured rectangular shape. Secure closed with twine. *If using cheesecloth, make sure to wrap it in a few layers of cloth so that it’s “breathable”, but not too much.
- Place the wrapped tempeh mixture between two small cutting boards, or place on a cutting board and set a slightly heavy book on top. Keep it in a warm place for 12 hours. Ideally, tempeh should be at 85 to 91° F for 24 hours, then at 60-75° F for 24 more hours. *see notes on incubation
- After 12 hours the tempeh should be generating its own heat. This is part of the fermentation process. Remove from the warm location and set at room temperature for another 24-36 hours.
- Unwrap the tempeh, and you have a few options for storage.
- You can vacuum seal, boil, then store in the fridge or freezer. This is how you get store-bought level tempeh.
- You can refrigerate and cook and eat within 7 days.
- or you can freeze it (see directions in the blog post above this recipe).
Notes
*If you find that your beans are still kind of wet after the drying period: toast some flour in the oven at 350 degrees for 15 minutes to sterilize it. add two small spoonfuls of the flour to the mixture to dry it out more.
*If you have an instant pot with a yogurt setting, you can set it to the low temperature for 91° F and place the tempeh on a rack in the instant pot for the first 24 hours, then move to room temperature for the last 24-48 hours.









Hi Kaytlinn! Loving this fermentation recipe (as always) and I’m eager to try. I have one question though: How easily transferable is this method and the quantities from the recipe to other legumes such as kidney beans, garbanzo beans or even soy beans? Not only tempeh is impossible to find where I live, but so are high-quality (organic) legumes, unfortunately. Do I have to choose different types of starter culture depending on the legume I want to work with?
You can use any legume with this recipe!
Super interested in trying this! I normally soak beans and grains in sourdough starter prior to cooking. Would this be a good idea for the initial soak for this recipe too? Also what would be the benefit of using the banana leaves as opposed to cheesecloth for the wrap? Thank you so much for sharing this!
No, you do not want sourdough microbes involved in this process. You should follow the recipe as it is written. Banana leaves are traditionally used in Indonesia so it’s a more authentic process. The leaves allow for the perfect amount of moisture and airflow.