

Dutch Oven Sourdough Bread Master Recipe
This is my master recipe for Dutch oven sourdough bread. This is the recipe I use to develop all my other Dutch oven sourdough bread recipes with fillings incorporated. So think of it as a base recipe. If you would like to fold in herbs or more ingredients, you can! See the tips in the sections below.
Here are the ingredients and things you need to get started:
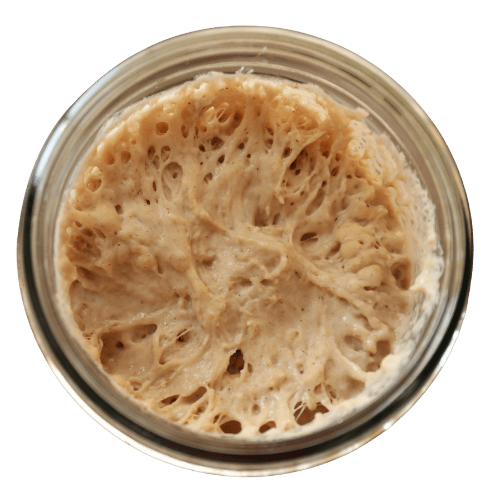
- Sourdough Starter: We have an easy sourdough starter recipe HERE. You’ll need to start this seven days before baking or two days before if you use our quick recipe option! I feed my starter 100% rye flour or a 50/50 rye all-purpose mix.
- Flour: I use bread flour or unbleached all-purpose for my Dutch oven sourdough bread.
- Water: You can use tap water to bake bread; I do. But if you prefer bottled or filtered, that works too!
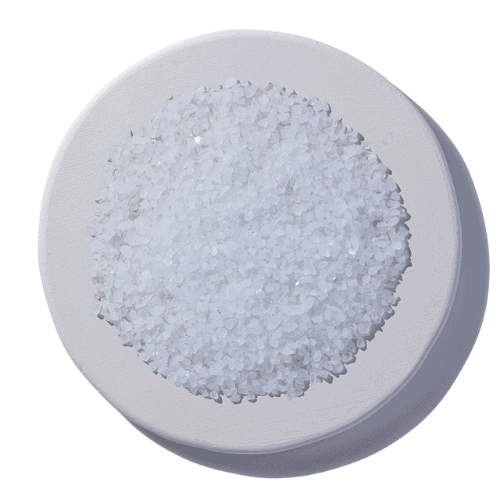
- Salt: Unrefined sea salt, please! Just make sure your sea salt is unrefined and free from anti-caking agents.
- Spray Bottle Filled with Fresh Water: This is a must-have for stretching and folding the dough. (see the section below)
- Dutch oven: a 6-quart Dutch oven with a lid works best for this recipe. (see more details on the size below)
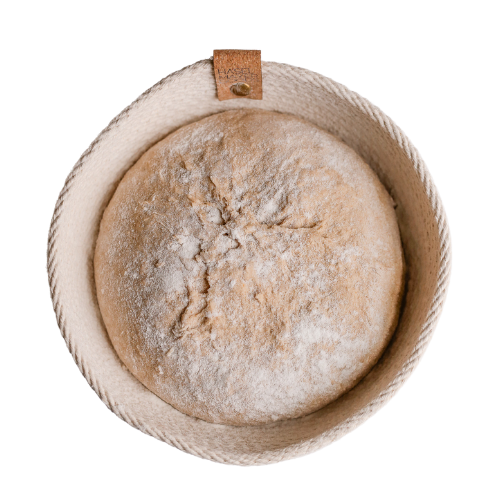
- Proofing Basket: You can use a proofing basket like this one or a bowl with a tea towel coated in flour.


Before Baking Sourdough Bread in a Dutch Oven
The hardest step to making a Dutch oven sourdough boule (boule = round bread) is stretching and folding. It takes patience and a gentle touch. I suggest watching Bake with Jack on YouTube for a tutorial on stretching, folding, and shaping the dough.
I have three main rules for stretching and folding my sourdough loaves:
- Don’t use a floured surface. You must turn the dough onto a clean surface to stretch and fold. Some people suggest sprinkling flour on the surface but DO NOT. Get yourself a little spray bottle and fill it with fresh water. Spray your surface and hands with water before turning the dough out on the surface. This prevents sticking without making the dough dense with too much flour. The more hydrated your dough, the greater the rise will be.
- Make sure you adjust the time with the temperature. The time you need to wait between stretch and folds depends on the temperature in your house. If your house is above 75° F, you may be able to reduce the amount of time between stretch and folds to one hour.
- Do at least three wet surface stretch and folds in 6 hours. You can do a stretch and fold every hour for six stretches and folds or every two hours for three stretches and folds minimum.


What Makes Sourdough More Digestible?
Sourdough is the oldest form of bread. Experts say the bread originated in Egypt long ago… as in 1,500 BC. Since commercial yeasts were obviously unavailable back then, bread products had to be naturally leavened using wild yeasts.
Wild yeasts are captured in a sourdough starter along with flavor-developing microorganisms, like lactic acid bacteria. When I say “captured,” I mean they come from the flour you use to make it.
The wild yeats are significantly more acid-tolerant than packages of baker’s yeast. So the yeasts in sourdough are still very active and able to produce carbon dioxide to make the bread rise even when they’re in the presence of acid-producing bacteria.
Visit our sourdough starter blog to learn more about the microbiology of sourdough starters.
Since sourdough ferments during a longer rise time than traditional bread, it’s much easier to digest and more flavorful.
The flavor comes from the wild yeasts and bacteria metabolizing the sugars in the dough during the long rise times and producing acids as byproducts. This is also why the bread is easier to digest! Essentially the microorganisms do some of the digesting for you in this sourdough bread recipe.


Dutch Oven Sourdough Bread Nutrition
Sourdough bread is made out of flour, just like regular bread. However, the fermentation process makes the nutritional components of the flour more bioavailable.
Lactic acid bacteria in sourdough starters are able to reduce phytic acid, the compound that can prevent nutrient absorption in regular bread. Without the phytic acid, binding to the minerals, you can absorb more potassium, phosphate, magnesium, folate, and zinc from the bread.
Those amazing little lactic acid bacteria also produce antioxidant compounds (postbiotics) and SCFAs (short-chain fatty acids) during the fermentation process. Aren’t lactic acid bacteria awesome?!


What Size Dutch Oven for Sourdough Bread?
I think the best Dutch oven size for baking sourdough bread is 5.5 to 6 quarts. Now, what size you can use depends on the size of the loaf you are baking, though. Smaller loaves can, of course, be baked in a smaller Dutch oven.
For this master recipe and all of my Dutch oven sourdough bread recipes, a 5.5-quart Dutch oven works perfectly. More importantly, make sure your proofing basket is the right size. A too-large proofing basket can lead to flat boules. I suggest a small one, 7-inch or 8-inch baskets work perfectly.


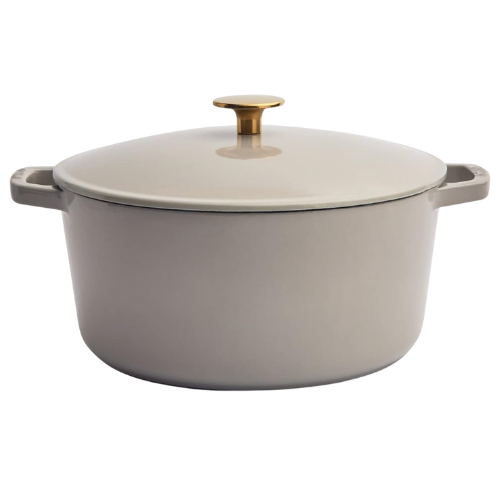
The Best Dutch Oven for Sourdough Bread
Here are my favorite Dutch oven options. These all work great and last forever if you care for them properly. Strictly follow any care instructions you receive with your Dutch oven. You can use an enameled or a non-enameled Dutch oven:
- The Milo by Kana 5.5 Quart Enameled Cast Iron (this is what I have, and I would buy three more I love it so much)
- Le Creuset Enameled (this one is for my fancier readers with a bigger budget)
- Classic Seasoned Lodge Cast Iron (this one is not enameled, but very versatile if you’re like me and want a cast iron that you can also take camping)
Over time, it will change colors if you bake a ton of Dutch oven sourdough bread in a light-colored enameled Dutch oven. As you can see in the picture below, my Dutch oven has gone from pristine white to what I call “lived-in” white lol.


Sourdough Starter Problems?
If you have trouble with your starter rising, check out this blog: Why is My Sourdough Starter Not Rising? How to Fix a Flat Starter. You can also read about Sourdough Starter Mold: Common Sourdough Starter Problems and How to Fix Them
If you are looking for an easy-to-follow sourdough starter recipe, I have two:

Dutch Oven Sourdough Bread Recipe Variations
You can fold many things into sourdough bread. My favorite things to fold into Dutch oven sourdough are herbs, nuts, seeds, cheese, and dried fruits.
To fold ingredients into sourdough, wet your counter and gently stretch the dough out without breaking the dough.
Then, you will carefully sprinkle the additions over the dough before you roll it up into the dough and fold the sides over each other for the stretch and fold.
Then you will knead the dough again. It will get sticky, and some ingredients may tear through the dough, but that’s okay.
Here is a great video from my favorite baker on YouTube, Bake with Jack, to help you learn how to incorporate fillings without breaking the dough. CLICK HERE.

More Sourdough Bread Recipes to Try
- The Best Sourdough Cinnamon Bread with Maple and Pecans
- Rustic Rosemary Sourdough Bread
- Sweet Sourdough Pumpkin Bread With Cinnamon and Pecans
Things You May Need:


Dutch Oven Sourdough Bread (Master Recipe)
This Dutch oven sourdough bread recipe is perfect for beginners. Learn how to make a classic Dutch oven sourdough boule. This is my master recipe for Dutch oven sourdough bread, which means you can use this as a base recipe for any sourdough bread you want to make.
- Prep: 20 minutes
- Cook: 1 hour
- Total Time: 7 hours 20 minutes
Ingredients
- 500 Grams Organic Bread Flour
- 300 grams Water
- 100 grams Sourdough Starter
- 10–15 grams Sea Salt
Instructions
- It’s best to start the sourdough process before 9 am so you have enough time. Please check the notes section of this recipe for tips.
- In a large bowl, combine the starter, flour, salt, and water.
- Knead the ingredients together until a uniform dough ball forms.
- Using a spray bottle filled with water, mist your clean countertop. Wet your hands and wet the top of the dough ball with the spray bottle. Turn the dough out onto the wet counter surface. Scrape out the bowl and rinse the inside of the bowl really well. Leave the bowl wet.
- Stretch and fold the dough. Stretch the top of the dough over the bottom, side over side, and bottom over top. Place the dough back in the bowl with the seam side down. Let the dough rest for 30 minutes.
- Stretch and Fold 1: Using a spray bottle filled with water, mist your clean countertop again. Wet your hands and wet the top of the dough ball with the spray bottle. Turn the dough out onto the wet counter surface. Scrape out the bowl and rinse the inside of the bowl really well. Leave the bowl wet.
- Stretch and fold the dough. Stretch the top of the dough over the bottom, side over side, and bottom over top. Place the dough back in the bowl with the seam side down. Let the dough rest for 2 hours.
- Stretch and Fold 2: Using a spray bottle filled with water, mist your clean countertop again. Wet your hands and wet the top of the dough ball with the spray bottle. Turn the dough out onto the wet counter surface. Scrape out the bowl and rinse the inside of the bowl really well. Leave the bowl wet.
- Stretch and fold the dough. Stretch the top of the dough over the bottom, side over side, and bottom over top. Place the dough back in the bowl with the seam side down. Let the dough rest for 2 hours.
- Stretch and Fold 3: Using a spray bottle filled with water, mist your clean countertop again. Wet your hands and wet the top of the dough ball with the spray bottle. Turn the dough out onto the wet counter surface. Scrape out the bowl and rinse the inside of the bowl really well. Leave the bowl wet.
- Stretch and fold the dough. Stretch the top of the dough over the bottom, side over side, and bottom over top. Place the dough back in the bowl with the seam side down. Let the dough rest for 2 hours.
- Clean and dry the counter surface you’re working on. Sprinkle some flour on the surface of your counter and coat your hands in a bit of flour. Gently flip the dough out onto the floured surface so that it is seam side up.
- Pre-shape: Gently stretch out the dough, and fold it again. Fold side over side and top over bottom. Then flip the dough over so that the seam side is down on the counter. Tuck under any parts of the dough you need to form a nice circular shape. Leave the dough on the counter, sprinkle some flour on the top of the dough, and cover with a tea towel.
- Let the dough rest for 1 hour.
- Sprinkle a little more flour on the top of your pre-shaped dough and on the counter around the dough. With your hands coated in flour, flip the dough over so that the seam side is up again.
- Gently stretch out the dough, and fold it again. Fold side over side and top over bottom. Then flip the dough over so that the seam side is down on the counter. Tuck under any parts of the dough you need to form a nice circular loaf shape. This is the final shaping so take your time with it.
- Coat a proofing basket with flour and bread toppings (optional). You can also use a bowl lined with a towel and a generous amount of flour.
- Flour your hands and swiftly pick up and flip your dough into the basket. Smooth side down, seam side up.
- Cover and place in the fridge overnight for 8-12 hours.
- After the 8-12 hours in the fridge, preheat your dutch oven with the lid, in your oven at 450 degrees F.
- Once your oven is preheated, carefully remove your dutch oven and place the lid to the side. *Don’t forget that it’s very hot!*
- Cut a large square of parchment paper and place it on the counter. Turn your dough out onto the paper so that the seam side is down and touching the parchment paper.
- Score the dough using a very sharp knife or a scoring tool.
- Picking up all four corners of the parchment paper, move your dough into the dutch oven.
- Place the lid on the dutch oven and bake at 450 F for 30 minutes.
- After baking covered, remove the lid and bake for another 20-30 minutes at 450 F.
- Remove your finished loaf from the dutch oven and allow it to cool for at least 1 hour.
Notes
- The time you need to wait in between stretch and folds depends on the temperature in your house. If your house is above 75° F, you may be able to reduce the amount of time between stretch and folds to one hour.
- You can also speed up the time in between stretch and folds by using a bread proofer or heating pad near the dough. Just stretch and fold when the dough has risen a bit and relaxes out into the bottom of the bowl, and make sure you do at least three stretches and folds. Monitor the dough to make sure you do not over-proof.
- when flouring your proofing basket, it helps to use coarse flour such as rye, masa, or rice flour.
- Depending on your oven, you can bake at a lower temperature. Some ovens run hotter than others.
- When baking with the dutch oven lid off, check every few minutes. Some ovens run hotter than others, so check to see when the loaf is golden brown.


I’ve tried my hand at a few sourdough boules but none have turned out as good until I used this recipe. I’ve made it twice in three days because we ate it so fast!
Best recipe! Ive tried others and this one NEVER fails!
It is the first time ever I bake with homemade sourdough starter, I followed your recipe and was very skeptical because my starter was not really bubbling (or at least not as much as I thought it had to). But I decided to trust the process and just see what happen… I was afraid I was going to end up with a heavy chunk of cooked dough because once again I couldn’t really see any raise or air in the dough.
But I stucked with it, baked it and… It’s UNBELIEVABLE!! This bread is soooooo good! I am French, live in the US, and really miss the good “baguette tradition” you can find in Paris, and this bread tastes exactly the same!
Thank you so much for sharing your recipe, it almost brought tears to my eyes!
Sandra, Thank you so much for leaving this review! I’m beyond happy to hear that your first-ever boule came out so wonderful with my recipe.
I was so excited to get back into sourdough baking, and this was the perfect recipe to start with! I used Kaitlynn’s recipe for the 7-day sourdough starter and then made this boule, and it was the sourdough I’d been dreaming of. It didn’t last very long in my house . It’s such an easy recipe to make, it just takes time. Just trust the process! We will definitely be making this one on a regular basis!
This was the most straightforward and easy-to-follow sourdough boule recipe I’ve found. This was only my second time ever making a sourdough boule and it came out sooo good. Can’t wait to keep practicing with it!
Since sourdough bread is baked does it still have probiotics or is it considered pre/postbiotic or something else? On a side note, I just baked some sourdough I had in the fridge for an extra extended fermentation (over 72 hours) for my sister-in-law who hasn’t eaten gluten in years but she wanted to try my sourdough. The bread did rise but less than it does with a shorter fermentation. The texture was great with a moist, chewy crumb and light crisp crust – yay! When the fermentation is so long, do the health benefits or nutrition change beyond the digestiblity? At which point is it considered the healthiest amount of fermenting time? Hope that my questions make sense!
There are no probiotics in sourdough because it is baked. There are many pre-biotics and post-biotics, though! The longer sourdough ferments, the more time the microbes in the starter have to eliminate hard-to-digest FODMAPs and anti-nutrients. Anywhere between 24 and 72 hours in the fridge before baking is fantastic.
Is over 12 hours in the fridge okay? I have to go to work in the morning and I won’t be back until around 3:00pm
yes! you can leave it in the fridge for up to 72 hours. It develops more sour flavors the longer you leave it though.
I have tried my had at some of the most popular and recommended sourdough recipes. NONE of them have turned out. The bread was always gummy, no matter how long I proofed my dough. This recipe, absolute perfection!! I will always recommend this recipe from now on!
that’s wonderful! I’m so glad you gave my recipe a try
hi, can you make this recipe with poolish instead of sourdough starter?
thank you!
Yes, it should work, but it will probably ferment and rise much faster.
thank you!!!!!
my sourdough never seems to rise, I follow instructions to the teeth, but doesn’t work.
Hello ,kaitlynn been trying to get a good bake for a few months now. Tried your recipe and I think I am on my way to some beautiful sourdough bread. Thank you for sharing. Wish I could post a picture of the bread
It’s lovely to hear that you found success with my recipe!
if we’re going to use a 3.5qt dutch oven, could we just half the recipe above?
sure, you can make a smaller loaf.
This was a very well explained recipe! I baked my first loaf of sourdough bread today and it was a success! Side note: I use a very simple roasting pan that is lightweight to bake my bread and it has worked very well for. me (successful with overnight no knead bread also). I do put a cookie sheet underneath the roasting pan to help prevent the bottom of the bread from overcooking. Thank you for a very well written and detailed recipe.
Hello! When does the bulk fermentation happen during this recipe?
During/between all the stretch and fold steps.
Have you tried doubling the recipe? Does it still turn out the same? I’ve found that some recipes
Work when doubled and
Others don’t.
yes I’ve doubled the recipe many times. Then I split it into two loaves before pre-shaping.
How smooth should the dough be after the initial mixing and kneading of the ingredients?
it should be somewhat shaggy, and it will smooth out as you do more stretch and folds.
Absolutely full proof and perfect bread every time! Is it a simple adjustment if we want to add flavors or toppings? For instance cinnamon raisin or olives?
Check the body of the blog post above the recipe. There is a section all about folding in ingredients and a link to a youtube video I really like that shows you how.
I’m new to sourdough baking. I fed my starter in 4 Weck jars and had a ton of discard. So I fed it in a large bowl. Next morning was putting jars back in fridge. There in bowl was a beautiful bubbly starter, probably 6 cups. So I had to start.
6 cups flour
2 heaping cups fed starter
1/2 cup sugar
1/4 cup corn oil
2 tbsp kosher salt
1 1/2 cups warm water
Mix all in stand mixer with dough hook on level 2 for 2 to 3 minutes, until sticky dough started climbing the hook. Rested 30 mins then began stretch and fold I think 6 times. Then overnight 10 hrs to rise. Bubbles on top, pushed down and pull and fold 2 times. Then cut in half to make round loaves for 6 quart Dutch oven. One was enamaled and one plain. Proof in tea towels resting in glass bowls. 6 hours later doubled in size. Heated 2 ovens 500 degree for 30 minutes.
Took dough rounds out of the proof towels. Nice pattern from the towels. Parchment paper and transferred to Dutch ovens. Put top on and placed in a 425 degree oven. Bake 30 mins then remove lid. Baked 30 mins more. Out of oven looked perfect.
After 10 minutes of rest, family couldn’t wait any more so we cut one.
UNBELIEVABLE!!
Whole loaf gone in 10 mins.
Can you make this recipe in one day like your sandwich bread loaf? The other recipe I’ve tried where I’ve done the final proof in the fridge doesn’t work when I put the loaf straight in from the fridge. It doesn’t rise at all in there but the sandwich loaf i made all in the same day rise beautifully.
I find the fridge proof really helps it hold its shape when scoring and transferring to the dutch oven. But sure! Instead of putting it in the fridge, let it sit in the proofing basket for a little bit then move on to the baking steps.
Same here-wishing of brought to room temp like my gut told me. I have a pretty flat loaf.
It does not need to be brought to room temp. If your bread is flat, that means you got your proofing time wrong and/or you are using a proofing basket that is too big for this size dough.
I am so happy I stumbled upon your site! I am new to the sourdough-making world and, I will admit, this is only the third recipe I have tried. However – I love everything about it! The technique was simple, and it was the first loaf that held it’s shape and that I was actually able to score easily. I couldn’t believe how great it looked after baking – it rose beautifully and was still very round. I was so anxious to cut it open – I thought for sure it won’t look right on the inside or won’t taste the best – but the look and texture is exactly as I had hoped, AND it tastes amazing!! Thank you so much for sharing – after hours of reading blogs and watching videos I have finally found the perfect sourdough recipe! I am looking forward to trying your other recipes!
YAY!! I’m so happy for your sourdough success! Thank you for leaving a great review.
I’m pretty new to SD and this is the 3rd or maybe 4th recipe I’ve tried. I have finally had success!! This process is the easiest to time and the boule is so good!
I have made this 3 times, and it’s always came out great! Definitely the most reliable recipe I’ve ever used. Thank you for sharing!
So delicious! I’ve made this 4 times in the last 10 days and I love it. I’m new at the whole sourdough world and these instructions are so easy to follow.
Great recipe! I left out a stretch accidentally but turned out fantastic!
Top of my list.
Do you cover the bowl in between stretch and folds or leave it open to air? Hope this isn’t a dumb question! I’m new to this whole sourdough journey
I like to cover the bowl with a damp tea towel! or I set a plate on top the bowl to act like a lid, if the bowl is the right size for it.
Can I use this recipe with a clay pot, like a Romertopf? Also, I’ve never had much luck baking after using an overnight cold ferment. My loaves come out dense, so I usually leave this step out, and just leave the dough in my banneton.
I’m not sure because I’ve never tried it. I suggest sticking to the recipe as written for the best results.
I’m struggling with the same thing with the overnight proof. Hard lump in the morning. Last time I tried trusting the process and going ahead and baking it to see if it leavened in the oven but it didn’t. It looked beautiful last night before I put it in the fridge. This time I put it on the counter this morning and am going to let it come to room temp for a bit and see if it will proof (not positive I’m using the correct terms here!) before baking. Any other ideas?
Sounds like it must not be fully proofed or it’s over-proofed before you put it in the fridge. It should be fully risen, jiggly, yet with good structure when you shape it, before it goes in the fridge.
Holy smokes! I’m a novice and though very intimidated as I’ve had a few failures with other recipes I’ve found, I just made this recipe to the letter and it’s PERFECT. Thank you very much for both the recipe and the detailed instructions. I’m so pleased, as is my husband. This will be my go to forever. 🙂
Love the strength of the dough after the 3rd fold and shape – wow! My problem (and this is my 2nd time trying this recipe) is that during the final rest (1 hour under a tea towel on the counter with flour) my boule becomes dry and forms a dry crust on the outside. The house between 73 and 75 degrees and the humidity is moderate to low. When I shaped the dough to put it for fridge rest, it had dried crusty parts on the outside 🙁 Prior to this step, the dough was absolutely the best, most beautiful sourdough I have worked with so wondering what might be my issue. I have been baking sourdough for over a year and have a very happy starter and this round used King Arthur. The time before I used Hayden’s and a bit of rye and it was too heavy to rise fully in the dutch oven. (I have found a bit of rye makes the starter so so happy.) Thank you for sharing your art with science in baking sourdough and educating at the same time!
Hi! My sourdough usually forms a dry outer layer when I proof it in a banneton in the fridge. Is it cracking or anything like that when you transfer it to the proofing basket? It shouldn’t be an issue, it may just make a unique crust design when you bake.
thank you very much! I try to ‘ignore’ the dryness and stay the course!
Do you put the cold dough in the oven to bake or does it need to rise again when removing from the refrigerator?
follow the directions exactly as written! You score the shaped, cold-proofed dough and it goes right into the preheated dutch oven.
I have made several sourdough bread recipes, but this is the best and will be my go to recipe going forward. It is crusty on the outside, light and fluffy on the inside with a delicious sourdough bread taste . It is well worth the patience of waiting and following the recipe completely. I am looking forward to trying the pumpkin sourdough bread soon . Thank you so much for this delicious sourdough bread recipe.
I have made a few loafs and this is the first recipe I try that has actually delivered on a super airy sourdough bread. I’m so proud and happy for this recipe.
I have really struggled with sourdough in the past and always felt like it was too complicated for me. But this recipe was so easy to follow, and everything was explained so well; I actually felt like I had the background information needed to understand what needed to happen with the bread. I have been using this recipe for the past month, and each loaf has turned out so well! I especially love the step-by-step instructions and intend to continue using this recipe for my weekly loaves. Thank you so much! <3
The BEST sourdough recipe I’ve used! I will never go back to my old sandwich loaf recipe. Thank you so much!
oh yum! Are you making this recipe as a sandwich loaf!? I love that.
between stretch and fold do you cover dough?
you can cover the bowl with a plate or damp tea towel
Do you add the inclusions before the long ferment or just before baking?
You can add in the inclusions when first bringing the dough together or at the first stretch and fold. Check the paragraph right above the recipe card, there is a link to a video I really like on adding inclusions.
Question…when you say stretch and fold, and to watch the video on how to do it, he kneaded it for 8 minutes and let it rest. So when you say, stretch and fold in your recipe, do you do this 8 minutes each time? Or just literally, 3 folds, etc.? Sorry its a bit confusing.
the video I have linked in this post demonstrates incorporating mix ins into the dough. You only knead the dough, where it says knead in step three in the directions in the recipe card. When I say stretch and fold I only mean stretch and fold.
Never made sour dough bread before; I was gifted the starter & decided to give it a go…little confused as to what the stretch and Fold-technique was but looked it up and did the best I could… To my surprise, it turned out great!!
yay! Thrilled to hear it turned out great, and now you know how to stretch and fold 🙂 Thanks for leaving a review!
Just baked my second ever loaf using this recipe both times and they turned out amazing! Great for a beginner like me and really breaks it down. Thank you for the recipe!!
Thank you for leaving a review! Happy to hear you had success as a brand new sourdough baker!
This is the best sourdough recipe I have made so far in my 6 years of baking sourdough. I was skeptical at first but this will be my go to now!!
I have my boule in the oven! I’m new to sourdough though….was it supposed to be really sticky? Other breads I make, I add enough flour where it isn’t sticky. I wasn’t sure if you do the same with sourdough or not? I didn’t add any extra flour and would wet my hands each time, but I felt like I lost a lot of dough from it sticking to my hands after each stretch and fold, and sticking to the bowl.
not really very sticky, it should smooth out after the first stretch and fold. What kind of flour are you using?
This is a foolproof recipe. I received a starter from a colleague. I have baked three loaves since Christmas and they get better every bake.
Thank You Kaitlynne
My friend gave me the starter and coached me through this recipe. The first two loaves came out perfectly! I am making more right now! Thank you for an easy to follow Master Recipe that makes amazing sourdough bread. My friends and family will be forever grateful!
What a sweet friend! So happy to hear this and thank you for leaving a review.
What can I do if for the covered part of the baking was at 350 instead of 450 degrees?
I’m going to sound like all of the other reviewers. I wasn’t sure the bread would turn out. The dough seemed very heavy. I baked two loaves, one with rosemary and olives and the other plain. They both turned out beautifully! They are the best sourdough loaves I’ve ever made. This will be the only recipe I will ever need. Thank you!
So I really lucked out deciding to use this recipe as a base sourdough to add inclusions to. Wonderful recipe, great success even in my first batch.. as you can see!! Jalapeño cheddar pictured. 18 more loaves to be baked today. Let me jst say again, THANK YOU!!
i want to start off by saying this recipe was very well written, thank you for that! but i’m wondering if i did anything wrong, my bread came out looking great on the outside, but there was a decent sized hole/air pocket in the center-top of the loaf. it also seemed to rise more only in that area. however, the bread itself tasted pretty good! not as sour as i thought so maybe i should leave it in the fridge longer?
big random air pockets usually mean it’s under fermented and it needed a little more time to ferment at room temperature.
Thank you! My first sourdough turned out beautifully!
Great directions
wonderful! happy to hear it! thanks for trying my recipe and leaving a review 🙂
Loved this recipe! Used it for my first trad loaf and it was soooooo good. We ate it in one night lol
Thank you so much for leaving a review! I’m glad y’all loved it!
To make this into a bread loaf what would the measurements be?
I use the same measurements, then shape it for a loaf pan.
After dough is in refrigerator overnight and when you take it out does the dough need to sit until it reaches room temperature before baking?
nope. you score it and it goes in the dutch oven cold. Follow the directions exactly as written.
Thank you so much love the directions can’t wait for results😋
This was the best receipe and the steps are fantastic however however I think I used too large a basket for dough when putting in refrigerator. Game out great but smaller and not large and bottom was darker and crusty. Any feedback is appreciated
Love this bread thank you for sharing
Thank you for leaving a review!
Need it in standard US measurements
you need a kitchen scale for this recipe.
I am new at baking and making sourdough. I’ve made about 5 or 6 loaves using different techniques including yours which was my most recent. After being sure that the starter was in peak condition after being fed earlier I used your recipe and directions outstanding results and my go to recipe and method
Thank you
Only my 5 th or 6th loaf. Came out great
My go to recipe and method
Thank you
yay! This is wonderful to hear! Thank you for leaving a review.
This turned out amazing!! I tried this after trying your discard bagels (which were also amazing) and wow! I tried another recipe from someone else before and my loaf turned out a complete failure. This recipe was such a better recipe and easy to follow. The pictures also really helped me as well because I second guess myself a lot.
I was super skeptical with this being my first time making a starter and loaf. My dough wasn’t super stretchy and didn’t seem to rise at all during the process. After the fridge, I left it out for about 2 hours to get it a little warm to see if that would help. When I baked it though, it did rise and it was perfect. The loaf was beautiful and tasted amazing. Good texture, perfect sourdough taste, and a little crispy on the edges! So proud of myself and my first loaf!!
Can the prepared dough be divided as my Dutch Oven dish isn’t big enough to hold that size loaf, and when would I do that. Also would I hold the other half in the refrigerator until the next day to bake then? Thank-you
yep! You’ll want to divide before the shaping step
Would you use a stand mixer and a dough hook to mix the dough instead of by hand?
You can!
My first time making sourdough, the directions are so thorough yet so simple, my first loaf came out great!!
So glad your first loaf came out great! Thank you for leaving a review!
I used this recipe to make my first ever sourdough and it turned out perfect. Thank you!
yay! Thank you for leaving a review!
Made this today as my first loaf with my new starter (I had a starter a few years ago too) and it turned out so well!! The process takes a while but is incredibly easy and your instructions are simple to follow. If you were to add inclusions to a loaf, at what step in the process do you do it? During that final shaping before the bulk ferment? Thanks!
awesome! Thank you for leaving a review!
This bread is amazing! I’m new to the sourdough baking world. I’ve used this recipe on repeat and it’s always perfect. My entire family loves it.
love this recipe. have some time issues today. what happens if the resting time is longer than recommended
If you have a timing conflict: it’s okay as long as it’s not over-proofed. You can stick the dough in the fridge at any point, then pull it out, let it get to room temp and continue.
If you mean it’s taking longer today than usual: In the fall and winter, especially if the temperatures are lower than usual, fermentation will naturally take longer. It’s okay if you need to extend the times in the recipe a bit for it to rise.
Very happy with this recipe and method. First loaf in over a year came out really good and me and my husband ate about 3/4 of it before it went bad on us. Second loaf is currently in the oven on its last bake before cooling. I followed another recipe the first 4-6 making sourdough bread and it just didn’t come out that great. Still learning, never gonna stop. This will be my go-to recipe/method moving forward. Thank you!!!
⭐️⭐️⭐️⭐️⭐️
Thank you for such a fantastic and thorough review! I’m glad my recipe is a go-to for you!
Brilliant
Thank you for leaving a review! So glad you enjoyed the bread!
I have tried so many sourdough bread recipes and was never happy with the results. This recipe was perfect! I could tell it was going to be great as I was making it. Very forgiving. I am so excited- thank you so much Kaitlynn!!!
I have used this recipe and method twice now after relying on another sourdough recipe. Both timesy bread came out perfectly. This site/recipe is my go-to recommendation from now on. The only adjustments I made was adding salt during stretch and folds & fridge proofing for 48 hours.
5⭐️
wonderful! Thank you so much for leaving a review. I’m glad you enjoyed the bread and that my recipe is now your go-to!
I’ve tried this recipe twice and my dough does not rise in the fridge nor does it rise much in the stretching stages. It’s very flat , dense,flat and chewy. What could be the issue ?
your starter is the issue. You need an active, healthy, bubbly starter.
I have been trying for a year to make sourdough with heart breaking results. Trying everything reading everything until yesterday when I stumbled onto this recipe. I have succeeded in cooking the most beautiful light springy loaf. Thank you so much Kaitlynn😀
This recipe made one of the best sourdough loaves I’ve ever tasted
Best recipe by far. The hydration level is key. Best SD I’ve ever made!
Props to you! I’ve roughly followed your recipe and it makes the perfect springy and flavorful loaf. I’m going to keep using it! 🙂
Thanks for trying my recipe and leaving a review! Glad your loaf came out great 🙂
This recipe was great and forgiving. I was in a rush and forgot to read about the fridge over night step beforehand. I baked it late last night, skipping the fridge step and it came out perfect and so delicious. I find that sourdough baking is an experience and an experiment. And very forgiving if you don’t follow through exactly. Next attempt I will know not to rush the process, but nonetheless,it turned out to be one of the best loaves I’ve attempted so far. Thank you!
It’s so wonderful to hear this! Thanks for trying my recipe and coming back to leave a review 🙂
I liked this recipe the best compared to others- hydration is key! However I think my problem is proofing. My starter doubles and looks bubbly and active. It’s winter where I am and we keep the house at 68•F I put in a warmer area (by the furnace or in the oven with the light on) but still get a dense bread that doesn’t raise much. It does have bubbles inside. Suggestions?
Does it rise as a dough, but not when baking? What size proofing basket are you using? Most often when everything goes well, and your starter is bubbling and great, and the dough proofs well, but the bread still comes out flat, it’s because of overnight fridge proofing in a too big basket. For this size dough, you need a basket with a 7 or 8-inch diameter.
I really like your recipes 🤍
Followed recipe to a tee and came out perfectly (wish I could post a pic). I tried one other recipe twice and it was okay but not perfect. This was PERFECT. New to sourdough too.
SO happy to hear this!