

Sourdough Pumpkin Bread
If you’ve baked sourdough boules before, this sourdough pumpkin bread recipe will be easy. I adapted my sourdough boule recipe to incorporate pumpkin, cinnamon, pecans, and brown sugar. You can use freshly roasted pumpkin in this recipe or pumpkin puree from a can; both options work well. I chose to roast a fresh pumpkin, and I prefer it over a canned pumpkin.
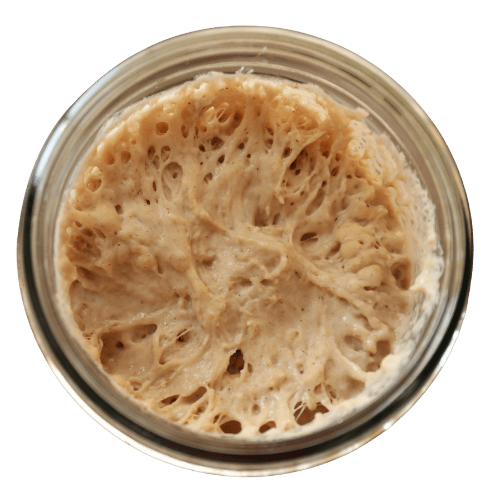
This is not a sourdough discard recipe, and you need an active, bubbly sourdough starter.

Sweet Cinnamon Sourdough Pumpkin Bread
The trick to making this bread is when to add the sweet filling. You won’t add the sweet cinnamon brown sugar mix until the first stretch and fold.
This is important because sourdough starter yeasts ferment sugars. If you add the sugar mixture too early, you can easily over-proof your dough, and the flavor won’t be as sweet but sourer.
You also want the gluten to develop just a bit before you add in some pecans.
To add fillings to sourdough, you need wet your counter and gently stretch the dough out without breaking the dough. Then, you will carefully spread half the filling over the dough before you roll it up into the dough and fold the sides over each other for the stretch and fold.
Then you will knead the dough again. It will get sticky and some ingredients may tear through the dough, but that’s okay.
Here is a great video from my favorite baker on youtube, Bake with Jack, to help you learn how to incorporate fillings; it’s not as difficult as it seems. CLICK HERE.

Pumpkin Sourdough Bread with Cinnamon and Pecans
To be transparent, this blog was once a pumpkin bread that was more like quick banana bread, but I decided to update it and go with a full-on sourdough recipe.
When you make this recipe you should start the dough by 9 am, so it’s either baking or in the fridge at a decent hour.

Things You May Need for Pumpkin Sourdough Bread


More Sourdough Recipes to Try


Sweet Sourdough Pumpkin Bread with Cinnamon and Pecans
Sweet sourdough pumpkin bread is the most delicious pumpkin bread you will ever have. My pumpkin sourdough bread is a simple sourdough loaf recipe with roasted pumpkin, brown sugar, cinnamon, and pecans incorporated.
- Prep: 10 minutes
- Cook: 1 hour
- Total Time: 9 hours 10 minutes
Ingredients
- 100 g Sourdough Starter (fed and bubbly)
- 200 g roasted pumpkin*
- 500 g White Bread Flour
- 180 g warm Water
- 30 g maple syrup
- 10 g Salt
- A pinch of turmeric for color
- A pinch of cinnamon
- 50 grams roasted pumpkin* (filling)
- 100 grams brown sugar (filling)
- 1 tsp cinnamon (filling)
- 15 grams flour (filling)
- Pinch nutmeg (filling)
- 60 grams crushed pecans (filling)
Instructions
- It’s best to start the sourdough process before 9 am so you have enough time. Depending on the temperature in your home, you may need to adjust the rest and rise times. If it is warmer in your home, the dough will ferment faster. If it is colder, it will ferment slower. There is also sugar in this bread, so it may rise much faster. Monitor the dough closely to avoid over proofing.
- In a large bowl, combine the starter, pumpkin, flour, water, maple syrup, turmeric, and cinnamon. (everything except the filling ingredients)
- Knead the ingredients together until a uniform dough ball forms.
- Let the dough rest for 45 minutes.
- Wet your hands, and spray the dough with your water bottle. Sprinkle the salt over the dough, then knead it into the dough. Let rest for 30 more minutes.
- Using a spray bottle filled with water, mist your clean countertop. Wet your hands and wet the top of the dough ball with the spray bottle. Turn the dough out onto the wet counter surface. Scrape out the bowl and rinse the inside of the bowl really well. Leave the bowl wet.
- Stretch and fold the dough. Stretch the top of the dough over the bottom, side over side, and bottom over top. Place the dough back in the bowl with the seam side down. Let the dough rest for 30 minutes.
- While the dough rests, mix the filling ingredients.
- Stretch and Fold 1 + adding the sweet pumpkin pecan filling: Using a spray bottle filled with water, mist your clean countertop again. Wet your hands and wet the top of the dough ball with the spray bottle. Turn the dough out onto the wet counter surface. Scrape out the bowl and rinse the inside of the bowl really well. Leave the bowl wet.
- Stretch out the dough into a rectangle, but be gentle and do not break or tear it. Spread the mixed filling over the dough.
- Fold the ingredients into the dough by folding the top of the dough over the bottom, side over side, and bottom over top. Then you will knead the dough again, knead it until it is mostly smooth and the pecans are evenly distributed through the dough. It will get sticky and some pecans may tear through the dough, that’s okay. Use a bench scraper to keep scooping the dough together. (Please watch the video linked in the blog post if you need more guidance).
- Repeat another stretch and fold then place the dough back in the bowl with the seam side down. Let the dough rest for 1 to 2 hours.
- Stretch and Fold 2: Using a spray bottle filled with water, mist your clean countertop again. Wet your hands and wet the top of the dough ball with the spray bottle. Turn the dough out onto the wet counter surface. Scrape out the bowl and rinse the inside of the bowl really well. Leave the bowl wet.
- Stretch and fold the dough. Stretch the top of the dough over the bottom, side over side, and bottom over top. Place the dough back in the bowl with the seam side down. Let the dough rest for 2 hours.
- Stretch and Fold 3: Using a spray bottle filled with water, mist your clean countertop again. Wet your hands and wet the top of the dough ball with the spray bottle. Turn the dough out onto the wet counter surface. Scrape out the bowl and rinse the inside of the bowl really well. Leave the bowl wet.
- Stretch and fold the dough. Stretch the top of the dough over the bottom, side over side, and bottom over top. Place the dough back in the bowl with the seam side down. Let the dough rest for 1 to 2 hours.
- Clean and dry the counter surface you’re working on. Sprinkle some flour on the surface of your counter and coat your hands in a bit of flour. Gently flip the dough out onto the floured surface so that it is seam side up.
- Pre-shape: Gently stretch out the dough, and fold it again. Fold side over side and top over bottom. Then flip the dough over so that the seam side is down on the counter. Tuck under any parts of the dough you need to form a nice circular shape. Leave the dough on the counter, sprinkle some flour on the top of the dough, and cover with a tea towel.
- Let the dough rest for 1 hour.
- Sprinkle a little more flour on the top of your pre-shaped dough and on the counter around the dough. With your hands coated in flour, flip the dough over so that the seam side is up again.
- Gently stretch out the dough, and fold it again. Fold side over side and top over bottom. Then flip the dough over so that the seam side is down on the counter. Tuck under any parts of the dough you need to form a nice circular loaf shape. This is the final shaping so take your time with it.
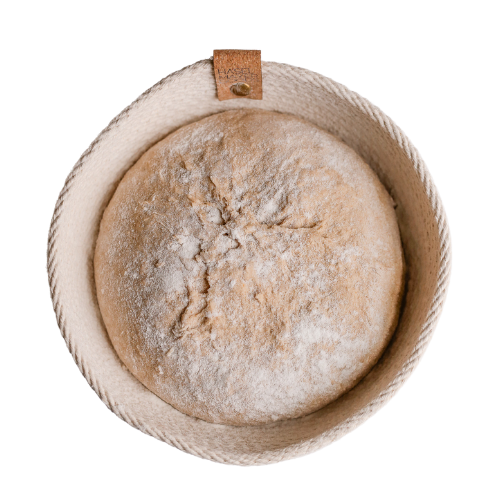
- Coat a proofing basket with flour. Be generous, as you do not want it to stick. You can also use a bowl lined with a towel and a generous amount of flour.
- Flour your hands and swiftly pick up and flip your dough into the basket. Smooth side down, seam side up.
- Cover and place in the fridge overnight for 8-12 hours.
- After 8-12 hours in the fridge, preheat your dutch oven with the lid, in your oven at 450° F. (see notes on temperature)
- Once your oven is preheated, carefully remove your dutch oven and place the lid to the side. *Don’t forget that the pot and the lid are both very hot!*
- Cut a large square of parchment paper and place it on the counter. Turn your dough out onto the paper so that the seam side is down and touching the parchment paper.
- Score the dough using a very sharp knife or a scoring tool.
- Picking up all four corners of the parchment paper, move your dough into the dutch oven.
- Place the lid on the dutch oven and bake at 450 F for 35 minutes.
- After baking covered, remove the lid and bake for another 20-30 minutes at 450 F.
- Remove your finished loaf from the dutch oven and allow it to cool for at least 1 hour.
Notes
- This dough contains sugar, so watch your dough closely to avoid overproofing it.
- You can use roasted pumpkin or strained pumpkin puree
- To strain the pumpkin puree: Open a 15-ounce can of pumpkin puree. Place a colander in a large bowl and line the colander with a few layers of cheesecloth or butter muslin. Dump the puree in the lined colander and allow the pumpkin juice to separate from the pulp, collecting the juice in the bowl. Use the pulp in this recipe.
- To roast a fresh pumpkin: Cut and clean a pumpkin, rub the inside with some oil, place it open-side down on a sheet pan, and roast at 425° F for about 20 minutes. Once completely cool, you can scoop the pumpkin out of the skin and use it in this recipe.
- The time you need to wait in between stretch and folds depends on the temperature in your house. If your house is above 75° F, you may be able to reduce the amount of time between stretch and folds to one hour.
- You can also speed up the time in between stretch and folds by using a bread proofer or heating pad near the dough. Just stretch and fold when the dough has risen a bit and relaxes out into the bottom of the bowl, and make sure you do at least three stretches and folds. Monitor the dough to make sure you do not over-proof.
- when flouring your proofing basket, it helps to use coarse flour such as rye, masa, or rice flour.
- Depending on your oven, you can bake at a lower temperature. Some ovens run hotter than others.
- When baking with the dutch oven lid off, check every few minutes. Some ovens run hotter than others, so check to see when the loaf is golden brown.


I’m attempting this! I mixed the starter, flour maple syrup and water but I don’t know when to add the pumpkin, turmeric, cinnamon into the dough?
oops!
It looks like those ingredients were not showing up in the first directions for some reason! Let me fix it!
You can go ahead and knead those ingredients in before moving on to the next steps.
Yeah, adding the pumpkin in after the first 45mim rest isn’t working at all 😅 I’ll start over. Thanks for the quick reply!
Another excellent recipe. I made this a few days ago and it was so good. The dough will be wet but don’t worry it makes such a beautiful moist loaf! Loved this and I am going to make another one or two before this fall season is over. Thanks for such genius recipes.
I just came across this recipe and am wanting to try it! I don’t currently have a spray bottle for baking. Is there anyway that traditional stretch and folds can be done in the bowl, And the filling can be added once these are completed? I don’t want to try this and have it be a complete fail for this recipe! Thank you!
yeah, if you’re familiar with stretching and folding in the bowl, you can totally do that instead.
I was so surprised at how soft this bread turned out! the recipe is right though, it’s very easy to overproof with all the added sugar. I kept a close eye on my dough though and it came out perfect.
I’m in middle of making the recipe and the filing says 15g flour twice. Do I add it twice or is it a typo? Really appreciate your website! And all the valuable info ❤️
It’s a typo. Thanks for pointing it out!
This recipe is amazing!! It is a more detailed stretch and fold series than I am used to, but it is worth it! The bread has a perfect hint of sweetness and the sourdough balances it out so well. This was my first attempt at sourdough with add-ins and it turned out so well! I made slices from the bread into french toast, amazing! Will be making this again soon thank you Kaitlynn!
I’m excited to hear that you loved this recipe! It’s one of my favorites. Thank you for leaving a review!
I wish the recipe have cup
Hi! You suggest starting this by 9AM – is that feeding your starter at 9AM, or mixing everything at 9AM? Thanks 😊
9 am to begin the directions in this recipe. Your starter should already be fed when you begin.
Does the dough need an overnight cold ferment? Or could I bake it without?
You can do it either way! Feel free to skip the overnight ferment.
Thank you!
Wow, this bread is amazing! My loaf didn’t rise that much- I don’t think my starter was active enough – so the bread is a bit dense. No matter, the flavor is fantastic, and definitely worth the effort!
Happy to hear you enjoyed the bread!
Hi! I made this earlier this week and it is delicious but my crust got too done. Would you recommend reducing cooking time with the lid on or lid off? Or any other ideas? Thanks!
I’d say reduce the temperature once it’s in the oven. Down to 400 should be good. So preheat to 450 still then reduce the heat once the bread is in.
Hello,
I have a question… instead of the roasted pumpkin, can you use pumpkin purée for that too?
Thanks!
That should work
I love how easy it is to follow this recipe. The only thing that kind of confused me was the kneading instructions in the beginning of the recipe. I was not sure how the dough was supposed to feel or look like after the first knead. I am making 2 loaves and one of them looks “correct” and the other is still tacky- should i have kneaded both until they were not sticky? Tbh I’m not really sire how one looks right and the other doesn’t. Other than that the directions have been very easy to follow.
No need to worry if they are a little different. The dough should smooth out as you do more stretch and folds!
If you do not use a fresh roasted pumpkin in the initial ingredients, would you use the same grams as a pumpkin purée?
I am totally into flavored sourdough bread. My coworkers love it tremendously. Unfortunately I can’t spend as much time as I’d like bread as it takes a lot of time and work a lot of hours.
But when I get to bake, I love it. My starter is over four years old now. I’m very proud of it.
Thank you for all your great recipes
yeah, you can evenly sub roasted pumpkin for pumpkin puree
What should the internal temp of the bread be?? Mine has been in the oven for way over the instructions and just now at 145 degrees.
are you sure your oven is the right temperature? Sourdough bread is usually about 190 F when it’s done.
This bread was my favorite to date! Thank you for the detailed recipe- it was super easy to follow – I charted out the timing separately so I knew I could get it in the fridge overnight with my later start (noon). I got scared after I added the pecan mixture because it did break through the dough and became pretty stringy… thought I ruined it, but with all of the kneads and rest it came together just fine. Baked up so light and delicious! I only cooked 10 min without the lid so next time I will heed your advice to try 400° because the bottom did slightly burn- but it doesn’t even matter- it’s still the best.
yay! I’m so happy you loved this recipe. and yes, since there is sugar in it, the crust can caramelize a bit, so baking at a lower temp works too.
This is an AMAZING recipe. I have made it a few times and it comes out great every time. I’ve gotten confident enough it to give it away and bring it to dinners and I get compliments with every bake! Some have said it’s the best bread they’ve ever had. I’ve doubled and quadrupled the recipe without issues also. Do yourself a favor and try this recipe! It’s worth the labor of love
This is an EXCELLENT recipe. I have made it a few times and it comes out great every time. I’ve gotten confident enough it to give it away and bring it to dinners and I get compliments with every bake! Some have said it’s the best bread they’ve ever had. I’ve doubled and quadrupled the recipe without issues also. Do yourself a favor and try this recipe! It’s worth the labor of love
wow! I’m thrilled to hear this! Thank you so much for leaving a review 🙂
So glad I stumbled across the recipe and I can’t wait to try it! I’ve been brainstorming a pumpkin sourdough bread with a sort of cream cheese filling/swirl. Any suggestions on where I could incorporate this here? During stretch & folds or shaping? Should I omit the pumpkin filling if I went that route?
ohh good question! I’m not sure, because I haven’t tested with cream cheese. You can maybe try half pumpkin half cream cheese for the filling, keeping the amounts about the same!
I want to make this but I want to use pumpkin creamer instead of water. Do you think that is a good idea or do you think it will ruin the dough?
hmm… I’m not sure because I’ve never tested it. I guess it depends on what the creamer is made of.
So far, I’m doing okay, although at first it looked like a lot more than 3 stretch and folds. I just added ingredients, but resting for 1-2 hrs is confusing, why the difference and what am I looking for to know if 1 hour or 2
The difference is because your house and my house may be very different temperatures because we live in different places/climates. You should be looking for it to just about double in size. It should be light and airy and bounce back when you poke it.
I’m in the middle of making this recipe, could you tell me if it’s 200 g of pumpkin or 250 g of pumpkin the pumpkin is twice. Also flour is listed at 15 g twice. Could you please clarify this? Thank you so much.
The pumpkin is twice because some goes in the dough and some is for the filling! I just updated the look of the ingredients list to be more clear for you 🙂
I’m so anxious to make this, but Id love to watch the video first! I can’t find the link to the blog, help…
Thank you
I do not have a video for this! It’s just a written recipe.
Do you have this in cups measurements by any chance ?
I’m sorry I don’t have cups for this one. I’ll see about converting it though!
Should this pumpkin pecan sourdough loaf have to be refrigerated after it has been baked? I’m worried the pumpkin in the filling will sour.
You can refrigerate and toast it by the slice to warm!
I love the taste of this bread as did all my family. The only problem I had was incorporating the filling. As it is wet some of the filling leaked to the outside. It burned very quickly. The inside was excellent. I wondered if anyone else had this problem and knows how to fix it.
Can I use the dough cycle on my bread machine for this recipe?
possibly! It should work okay, I know mine beeps when it’s time to throw in the mix ins. I haven’t tested it though