

Easy Cottage Cheese Bagels with Sourdough Starter
If you’re looking for an extremely nutritious way to use your sourdough starter, these sourdough cottage cheese bagels are a high-protein solution! This recipe combines the tangy flavors of sourdough with the convenience of instant yeast, allowing you to whip up a batch of high-protein, chewy bagels in just four hours with minimal hands-on effort.
For those seeking an extra benefit of sourdough digestibility, there’s an optional overnight fermentation step in the fridge. The overnight fermentation enhances the bagels’ flavor and improves their digestibility.


The Best Cottage Cheese to Use for Bagels
For these bagels, I recommend one of three cottage cheese options:
- Homemade Cottage Cheese (click here for the recipe)
- Good Culture 2% Cottage Cheese
- Kalona Organic Whole Milk Cottage Cheese


The Best Flour for Making Cottage Cheese Bagels
When making any kind of homemade bagels, using organic bread flour is a game changer. Bread flour is designed explicitly for yeast-leavened baked goods, boasting a higher gluten content than all-purpose flour. This elevated gluten level is crucial for developing the best bagel texture.
The robust gluten network formed by bread flour helps the bagels hold their shape during boiling and baking, ensuring they have a nice crust and tender, chewy interior. Additionally, choosing organic bread flour means you’re opting for a product free from synthetic pesticides and additives, which can contribute to a cleaner, more wholesome bagel. All in all, organic bread flour is an essential ingredient for homemade bagels.


Cottage Cheese Bagels No Yeast: Three ways to make this recipe with sourdough starter
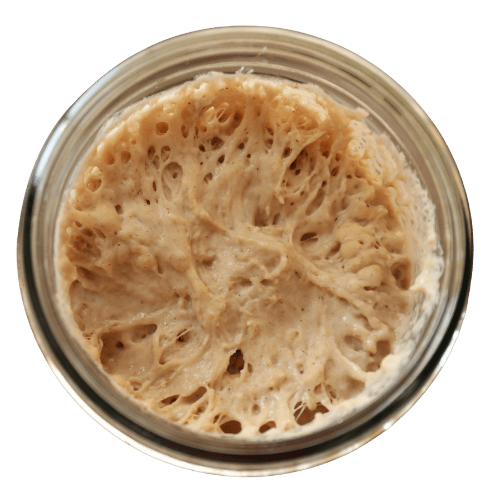
- Active, bubbly, peaking sourdough starter: The first option is to make cottage cheese bagels with an active, bubbly, peaking sourdough starter. This is the best option for making these bagels without packaged yeast. I do this all the time, and it works great; I double (sometimes triple if it’s cold) the proofing times in the recipe card when using only an active starter.
- Sourdough discard from the fridge: The second option for making these bagels without any packaged instant yeast is to use sourdough discard from the fridge. You’ll need to start the dough the night before you plan to bake. So, in step 4 in the recipe card below, you will leave the dough covered overnight for 8-12 hours, then the following day, continue with step 5. This should allow enough time for the starter to become active in the dough. This method isn’t always successful and depends on the individual starter, how long it’s been in the fridge, and how established it is. This method also tends to result in more sour flavors.
- Sourdough Discard + Instant Yeast: This is the method the recipe is written with. It’s the easiest and quickest. Adding instant yeast with the sourdough starter gives you all the great flavors of classic sourdough but with the reliable results of packaged yeast. You can still get long-fermentation benefits by proofing the shaped bagels overnight in the fridge before cooking. (see next paragraph for details on long overnight proofing)
My best advice for getting the best results from this recipe is to use an active peaking starter or a combination of starter discard and instant yeast.


Long Ferment Sourdough Discard Bagels Overnight
To long ferment these bagels overnight, you place them in the fridge after they’re shaped. Once in the fridge, you can leave them to long ferment for up to 72 hours. Then, continue with the recipe as written.


Why Do You Boil Bagels?
Boiling bagels is a crucial step in achieving their distinctive texture and flavor. Here’s why this process is essential:
- Texture: Boiling bagels before baking helps to create their characteristic chewy crust. The boiling process gelatinizes the starches on the surface of the dough, forming a barrier that traps moisture inside the bagel. This results in a chewy interior and a shiny, crisp crust.
- Structure: Boiling helps to set the bagels’ shape. It provides an initial dough firming, allowing the bagels to retain their round shape during baking.
- Flavor Development: The boiling water, often with added ingredients like malt syrup or honey, contributes to the bagels’ flavor. Malt syrup, for example, adds a subtle sweetness and enhances browning during baking.
- Browning: The boiling process affects how the bagels brown in the oven. The gelatinized surface helps achieve a rich, golden-brown crust.

Why are My Bagels so Chewy?
Boiling bagels for too long can make them excessively chewy. Boiling bagels for too long can lead to over-gelatinizing the starches on the surface, resulting in a denser and chewier texture than desired. Additionally, extended boiling times can cause the bagels to become overly puffy or misshapen as the dough expands.
Typically, bagels are boiled for about 30 seconds to 1 minute per side. This short boiling time is usually sufficient to achieve the desired texture and flavor without compromising the bagels’ quality.

How to Store Cottage Cheese Bagels
- Cooling: Allow your homemade bagels to cool completely on a wire rack before storing them. This prevents condensation from forming, which can make them soggy.
- Room Temperature: Store bagels at room temperature in an airtight container or resealable plastic bag for up to 4 days.
- Freezing: To freeze bagels, wrap each bagel individually in parchment paper or aluminum foil. Then, place them in a freezer-safe plastic bag or airtight container. This prevents freezer burn and helps maintain their quality. You can freeze bagels for up to 3 months.
- Thawing: When you’re ready to eat them, you can thaw bagels at room temperature, or for a quicker option, toast them directly from the freezer. You can also defrost them in the microwave for a few seconds, then toast them to restore some of the crispy texture.

Things You May Need:


Sourdough Cottage Cheese Bagels (13.4 g Protein)
Make these delicious sourdough cottage cheese bagels in just 4 hours! This recipe is high-protein, with 13.4 grams of protein per bagel. (Includes an optional overnight ferment).
- Prep: 20 minutes
- Cook: 30 minutes
- Total Time: 4 hours 50 minutes
Ingredients
- 720 grams bread flour (6 cups)
- 120 grams sourdough starter discard (1 cup)
- 1/2 teaspoon active/instant yeast*
- 200 grams water (3/4 cups)
- 455 grams cottage cheese (2 cups)
- 10 grams sea salt (about 2 teaspoons)
- 1 Tablespoon baking soda (for the water bath)
- 1 Tablespoon honey or sugar (for the water bath)
Instructions
- Read the recipe notes on proofing time before starting.
- In a large bowl, combine the starter, instant yeast, flour, salt, cottage cheese, and water.
- Knead the ingredients together until a uniform, but shaggy dough ball forms.
- Cover the bowl with a plate or a damp towel and proof the dough for 1 hour at a warm temp.
- Stretch and fold the dough. wet your hands and stretch the dough up out of the bowl and fold it in on itself, do this a few times until the dough smooths out and has more tension. Scoop around the sides of the dough with your hands to form it into a nice, smooth ball. Cover and let the dough proof for 30 minutes at a warm temperature.
- Next, sprinkle some flour on the surface of your counter. Remove the dough from the bowl and place it on the floured surface.
- Stretch the dough into a rectangle that’s a little bigger than a sheet of paper. Be gentle with the dough!! You don’t want to flatten it. Just lightly pull the sides until it’s a rectangle about the size of a sheet of paper.
- Divide the dough into 10 equal pieces (each piece should weigh about 160 grams).
- Line a baking sheet with parchment paper and sprinkle flour on top of the parchment paper.
- Grab a piece of dough, and fold it in, forming a small round dough ball. Place the dough ball on the floured parchment paper. Repeat for the other pieces.
- Lightly sprinkle the top of the dough balls with flour. Cover the dough balls with a towel and let them rise for about 30 more minutes until they puff up a good bit.
- Flour your hands and pick up a dough ball. Place it in your right hand. Using your thumb on the top of the dough ball and middle finger on the bottom, squeeze a hole through the center of the dough ball. Bring your index finger and ring finger through the hole in the dough to touch your thumb.
- Use your other hand to guide the donut-shaped dough through your right-hand palm and fingers that are held in a circular shape. This is how you create a bagel shape.
- Place the shaped bagels back on the floured parchment paper. (lightly sprinkle more flour if you need to)
- Let the shaped bagels rest for about 15 minutes until they’re nice and puffy, but don’t overproof.
- (optional) Place the bagel dough in the refrigerator for a final proof of 12 hours.
- Preheat your oven to 450° F.
- Gather your toppings and add them to small bowls for easy use.
- Bring a large pot of water to a boil. Add in the baking soda and the honey (or sugar).
- Using a slotted spoon, place each bagel in the boiling water for about a minute, flipping at 30 seconds.
- Remove the bagel from the water, place it back on the parchment paper.
- Brush the boiled bagels with egg white and sprinkle on the toppings.
- Repeat for the remaining bagels. Once they all have toppings, place the bagels in the oven.
- Bake for approximately 20 minutes* until golden brown. Rotate the bagels at 10 minutes for even baking.
- Remove and allow to cool for 30 minutes.
Notes
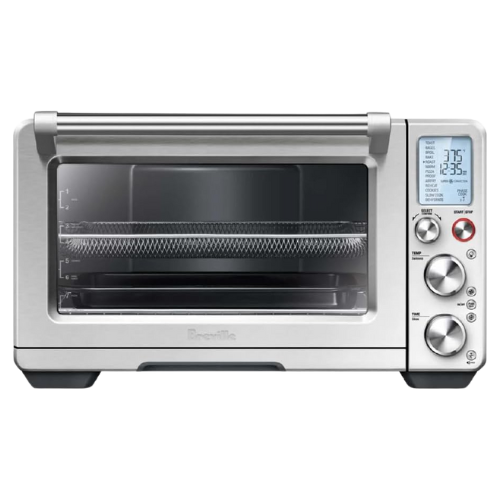
- I proof my dough in my air fryer that is also a bread proofer set to 98° F. The times in this recipe are for those conditions. If you are not using a proofer, and the conditions in your home are cooler, proofing times may take longer.
- If you want to make this recipe without any packaged yeast, you can! Double the proofing times in the recipe directions and use bubbly, peaking, active starter.
- Bake time may vary. I usually end up baking for 35 minutes total. You can check the bagels every 5 minutes to ensure you do not overcook them.


Made this with fresh milled red wheat berries and it was delicious! It’s hard to find a recipe for bagels fresh milled that is super soft and this is perfect! Thanks for sharing!
Thanks for letting me know that fresh milled read wheat works great in the recipe! And thank you for leaving a review!
I made these today and they were SO delicious! I love a good bagel and knowing these have more protein is a great feeling. Unfortunately, I’m not great at keeping a sourdough starter alive, so I used pâte fermentée in its place and it worked wonderfully! I will definitely be making these again. Thank you for an awesome recipe!
Wonderful to hear! I’m glad you love the bagels! thanks for coming back to leave a review 🙂
Amazing bagels. I usually make your regular bagel recipe, but this will be my new go to. Super soft and great flavor. Added bonus of the protein!
Happy you enjoyed them! Thank you for leaving a review!
Such a solid recipe. These bagels do amazingly well from the freezer, too! Thank you for sharing —
These are moist and crispy at the same time ! Great recipe !
This recipe is why I now believe I was a New York City baker in a past life. I had so much fun making these as my first bagels ever and it came together so easily! Kaitlyn explained it so well I felt like a natural at it. I’ll definitely be doing these weekly from now on.
I’m new at this I’ve made these bagels two times. 2nd time was much better I love them so does my husband. I freeze mine
I’ve just started with sourdough and I’m loving these bagels! I’ve made them twice – both times with discard + yeast- they’ve come out great. Love that there is extra protein, but I don’t have to process the cottage cheese first and you don’t see the curds in the bagels! This is my go to from now on. Thanks!!
woohoo! So happy you are enjoying the cottage cheese bagels!
I made these yesterday with active starter and the dry yeast . This recipe was simple and they cane out beautiful and delicious. I put everything bagel seasoning on them. The inside is soft with a crisp chewy crust. I will definitely make them again ! Thank you for sharing .
Thank you for leaving a review! Glad you enjoyed!
Amazing recipe! Bagels are crisp on the outside and soft on the inside. Love the added protein and sourdough for gut health. I have tried other recipes in the past that did not come out great. This is my nee go to recipe! Thank you!
These turned out absolutely perfect! Thank you for the recipe and detailed instructions. I used the discard method and they weren’t too sour tasting.
yay!! Happy to hear the discard method worked great for you. It’s probably the method I use most!
Excellent recipe. I followed all the instructions and my bagels turned out just like in the pics. Perfect taste and texture. Balls took more like an hour to rise even in a warm spot. I’d only suggest blending the cottage cheese before adding to the dough. While cottage cheese specks didn’t show in the baked product they did give me a lot of anxiety while kneading.
Thank you so much for the feedback and a thorough review!
Made these today and the whole family loved!! Did it with active starter and dry yeast, did a long ferment over night. Very tasty and the perfect texture!
Only thing that happened was the parchment paper stuck to the bottom of the bagels… any tips to prevent this for next time?
Love this recipe I’ve made it like 5 times
I have used other Sourdough Bagel recipes and this one wins 5 stars. Especially since they are full of protein. My friends loved them!
Hi! Excited to try making these! Is it ok to let cottage cheese sit at room temp for a longer period of time? Thanks!
They were delicious! but I was surprised to see that 1 cup of sourdough starter discard is only 120 grams, usually it’s around 220 grams. And I noticed 10 equal pieces weighed about 150 instead of 160 grams.Could the weight for the sourdough be a typo ? Thanks!
The weight for the sourdough is not a typo. What a cup of starter weighs depends on if you’re using fresh bubbly starter or dense discard from the fridge. One cup of fresh starter with lots of air bubbles will weigh much less than one cup of dense, cold inactive starter. You can use either fresh starter or starter from the fridge… either way, if we are using instant yest for rise, the starter is considered “discarded” into the recipe. A 150 gram and 160 gram bagel are about the same.
Thank you for your reply and explanation, I’ll stick with 120 grams then!
If I am using active bubbly starter and no packaged yeast, is it still only the the 120g of starter?
yep!
Ahhhh-mazing. Made it once. No notes.
Instead of egg wash, I used milk because that can help give the golden color. Seeds seem to stay with this substitute.
Awesome! Thanks for leaving a review and letting me know about the milk substitute!
First time making bagels. These were amazing. Easy to follow recipe. Absolutely amazing.
So glad your first time was great! Thanks for leaving a review!
I can’t believe how great these instructions are – I got into sourdough this year (5 years late) and wanted to make these. My first time turned out great (I mixed yeast and the proofing took a LONG time). I do have a question – for the overnight ferment after taking it out of the fridge should I let the bagels come to room temperature before boiling and baking them?
Made a half batch of dough for these bagels Sunday evening, cold fermented them in the fridge about 16 hours. Boiled and baked them Monday afternoon. They are delicious!
I used just flattened ‘active’ starter with 1/4 tsp of yeast. I substituted some whole wheat flour for the bread flour and I did not add sugar when boiling them, just used baking soda. I used everything seasoning on the tops.
Thanks so much for another wonderful recipe!!
amazing! Happy to hear the recipe was great with some whole wheat flour incorporated!
If I am using an active starter can I double the proofs up until shaping and then shape and store in the fridge overnight?
yep! That will work!
I did this and my bagels sunk when I went to boil them? Trying to figure out where I went wrong on the proofing.
I doubled all proof times and after shaping put them in the fridge until the next morning…
These came out amazing!
They look great but I don’t understand how I am supposed to tell if they are done? Is it internal temp of 200 degrees? Advice please?
if you baked them for the designated time at the designated temp, and they’re golden brown, then they are done.
These bagels are a weekly bake for me. My family absolutely loves them. I have made them full size and cut them in half to make mini bagels. I freeze them and toast one every morning. I grew up with NJ bagels and my kids live in NYC. These bagels rival both areas!
omg thank you so much for this glowing review!!
Delicious bagels. I do overnight rest.
Trying to get my kids more protein. Was worried they would taste the cottage cheese but the couldn’t at all. Big win for this mama!
yay! I love when the kids benefit from my recipes! 🙂
Wow! These are truly amazing. I followed the steps and did the overnight fermentation. Would not change a thing! Entire family loves them. Thank you.
I cannot say enough how much I love this recipe. I’ve made it at least 7 times (yeast version) and it comes out perfect every time. My family loves them. We think they are better than any bagel shop! I am comfortable with traditional sourdough but love to use up my discard with this recipe. I also love that it’s high protein. Thank you for an awesome recipe.
yay yay yay!!! I’m happy to hear the whole fam loves the bagels! I just tested a version of these bagels with Greek yogurt instead, and I’ll post the recipe soon. I hope you try it! Thanks for leaving a review 🙂
I’ll be honest.. I had little faith in these at the beginning of my prep.. but wow was I mistaken. These are the best bagels I’ve made to date. Pinning this to make again & again !!
yay! glad the bagels were such a pleasant surprise for you.
I have made these bagels 4 times in the last month! The recipe is spot on. Consistent every time. I will say small curd is best. My husband loves jalapeño cheddar and sesame. Thank you!!!
I’ve made this dozens of times and my family LOVES them! I had to come back and leave a review. Wonderful recipe!
By far the very best bagels I have ever made. What brand of cottage cheese do you use to get the protein per bagel content so high? The full fat cottage cheese I buy has 12g per half cup. 2 cups cottage cheese = 48g, divided by 10-12 bagels (?)
I’m so happy to hear these are the best bagels you’ve made! Thanks for trying my recipe! The protein content isn’t only from cottage cheese. Bread flour also contains protein. the 720 grams of bread flour adds about 86-100 grams of protein to the whole recipe. So protein per bagel would be (86+48) divided by 10 = 13.4 🙂
I made these today. They are amazing.The crust is perfect. The inside is tender. So much like a real NY bagel. Thank you for sharing.
I see that it says “Knead the ingredients together until a uniform, but shaggy dough ball forms”. Do you knead by hand or mixer and how many minutes would you say?
You can do either. I always knead by hand though, I don’t have a mixer. It’s only, maybe, 3 minutes or so. The dough ball can be rough looking, and it smooths out during stretch and folds.
OMG! Ruined for all other bagel recipes! DELICIOUS!!! Thank you!
hahah this is my favorite review yet! So glad you love them 🙂
This recipe is perfect! I just made bagels in my kitchen and will never buy them again, thanks to this gem!
YAY!! Thanks for trying my recipe and leaving this glowing review!
I love these bagels! I have made them almost every week since I found them! I’m wondering if there is a way to make them whole wheat? I’m trying to up my fiber, and I have a whole wheat starter, but I have never used it 😅
yes! I’d suggest starting with a test batch of half whole wheat flour and half bread flour. When first combining the dough you may have to drizzle in a little bit more water since whole wheat absorbs more water than white flour! Let me know how it goes!
I have made sourdough bagels a couple times now and they turned out yummy. I am excited to try this recipe with the cottage cheese to give it some protien. Can i knead dough in my kitchen aid (with dough hook) or do you recommend doing by hand. I have ever only did them usinf my kitchen aid i just didnt know if this recipe would turn out differently. Thanks😁
I don’t have a stand mixer, so I’ve never tried it. I recommend kneading the dough by hand. Since bagel dough can be more dense it might be hard on your mixer.
Left out the yeast and they still turned out perfect!
yay!! I love using just sourdough starter to make these too 🙂 Takes a little longer but so worth it!
I love this recipe/ it’s my go to! Wondering if I can add inclusions? Not sure if it would mess anything up.
totally. But if the inclusions add moisture, like fresh blueberries, you may want to reduce the cottage cheese and add them in with the cottage cheese 🙂
I love this recipe I make it then freeze it them to savor
I make these pretty much weekly and have mastered, adding asiago cheese and garlic to make savory bagels. I would love to try my hand at a Blueberry bagel. Would you alter the recipe or could I simply add blueberries to the basic recipe?
Blueberries will add more moisture! so I suggest replacing some of the water weight or cottage cheese weight with an equal amount of blueberry. I also think you should mix them right in the beginning with everything else 🙂