

Homemade Sourdough Discard Bagels
If you’ve ever found a surplus of sourdough discard and wondered what to do with it, these sourdough discard bagels are the perfect solution for you! This recipe combines the tangy flavors of sourdough with the convenience of instant yeast, allowing you to whip up a batch of fresh, chewy bagels in just four hours with minimal hands-on effort.
For those seeking an extra benefit of sourdough digestibility, there’s an optional overnight fermentation step in the fridge. The overnight fermentation enhances the bagels’ flavor and improves their digestibility. Whether you’re a sourdough enthusiast or simply looking to reduce waste in your kitchen, these bagels are a delightful and practical way to make the most of your sourdough discard.

The Best Flour for Making Sourdough Discard Bagels
When making homemade bagels, using organic bread flour is a game changer. Bread flour is designed explicitly for yeast-leavened baked goods, boasting a higher gluten content than all-purpose flour.

This elevated gluten level is crucial for developing a chewy, dense bagel texture. The robust gluten network formed by bread flour helps the bagels hold their shape during boiling and baking, ensuring they have that ideal firm crust and tender interior. Additionally, choosing organic bread flour means you’re opting for a product free from synthetic pesticides and additives, which can contribute to a cleaner, more wholesome flavor in your bagels. Organic bread flour is an essential ingredient for bagel baking.


Are Sourdough Discard Bagels Healthier Than Regular Bagels?
Sourdough discard bagels can be healthier than regular bagels, thanks to the unique fermentation process. The key lies in beneficial microbes in the sourdough starter and/or an extended fermentation time.
Sourdough starters contain a community of wild yeast and various acid-producing bacteria. During fermentation, these microbes break down the flour carbohydrates, sugars, and proteins, producing organic acids and other byproducts that enhance the bagels’ nutritional profile. This fermentation process can make the bagels easier to digest than those made with only regular yeast. The sourdough starter fermentation microbes break down FODMAPs, reducing the potential to cause digestive discomfort and improving nutrient absorption.
Moreover, the longer fermentation time, especially if you opt for an overnight refrigerator proof, allows further breakdown of the dough’s complex carbohydrates. This extended period helps to neutralize phytic acid, an antinutrient found in grains that can inhibit the absorption of minerals like iron and zinc. By reducing phytic acid, sourdough discard bagels may offer better mineral availability and nutritional benefits.
In summary, the microbes in sourdough starter and the extended fermentation process enhance the bagels’ flavor and contribute to improved digestibility and nutrient availability, making sourdough discard bagels a healthier choice than traditional bagels.

My Favorite Bagel Toppings
I have some specific toppings listed in the recipe card below, but there are so many delicious toppings you can try on bagels. Here are all my favorite bagel toppings you can try with this recipe:
- Everything bagel seasoning (a blend of poppy seeds, sesame seeds, garlic, onion, and salt)
- Sesame seeds
- Poppy seeds
- Caramelized onions
- Fresh or dried herbs (such as rosemary, thyme, or oregano)
- Cheddar cheese (shredded or slices)
- Flaky sea salt
- Cracked black pepper
- Garlic granules
- Dried onion flakes
- Parmesan cheese
- Dill or chives
- Cinnamon sugar (for a sweet twist)


Sourdough Discard Bagels No Yeast— Three ways to make this recipe with sourdough starter
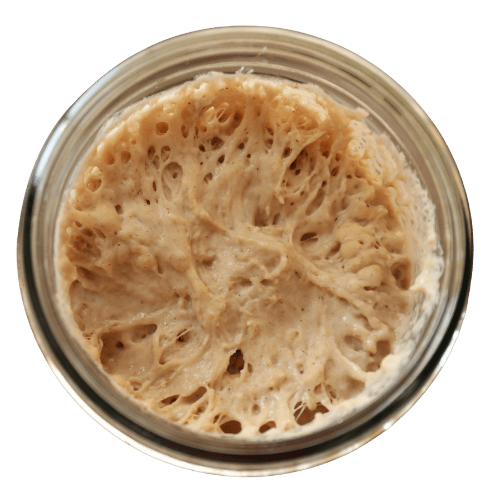
- Active, bubbly, peaking sourdough starter: The first option is to make this recipe with an active, bubbly, peaking sourdough starter. This is the best option for making these bagels without packaged yeast. I do this all the time, and it works great; I double (sometimes triple if it’s cold) the proofing times in the recipe card when using only an active starter.
- Sourdough discard from the fridge: The second option for making these bagels without any packaged instant yeast is to use sourdough discard from the fridge. You’ll need to start the dough the night before you plan to bake. So, in step 4 in the recipe card below, you will leave the dough covered overnight for 8-12 hours, then the following day, continue with step 5. This should allow enough time for the starter to become active in the dough. This method isn’t always successful and depends on the individual starter, how long it’s been in the fridge, and how established it is. This method also tends to result in more sour flavors.
- Sourdough Discard + Instant Yeast: This is the method the recipe is written with. It’s the easiest and quickest. Adding instant yeast with the sourdough starter gives you all the great flavors of classic sourdough but with the reliable results of packaged yeast. You can still get long-fermentation benefits by proofing the shaped bagels overnight in the fridge before cooking. (see next paragraph for details on long overnight proofing)
My best advice for getting the best results from this recipe is to use an active peaking starter or a combination of starter discard and instant yeast.


Long Ferment Sourdough Discard Bagels Overnight
To long ferment these bagels overnight, you place them in the fridge after they’re shaped. Once in the fridge, you can leave them to long ferment for up to 72 hours. Then, continue with the recipe as written.

Frequently Asked Questions
How do you stretch and fold the dough while it’s in the bowl?
Here is a picture demonstration of stretching and folding the dough while keeping it in the bowl:


Why Do You Boil Sourdough Discard Bagels?
Boiling bagels is a crucial step in achieving their distinctive texture and flavor. Here’s why this process is essential:
- Texture: Boiling bagels before baking helps to create their characteristic chewy crust. The boiling process gelatinizes the starches on the surface of the dough, forming a barrier that traps moisture inside the bagel. This results in a dense, chewy interior and a shiny, crispy crust.
- Structure: Boiling helps to set the bagels’ shape. It provides an initial dough firming, allowing the bagels to retain their round shape during baking.
- Flavor Development: The boiling water, often with added ingredients like malt syrup or honey, contributes to the bagels’ flavor. Malt syrup, for example, adds a subtle sweetness and enhances browning during baking.
- Browning: The boiling process affects how the bagels brown in the oven. The gelatinized surface helps achieve a rich, golden-brown crust.
Overall, boiling is essential for creating bagels with the perfect balance of chewiness, flavor, and appearance.

Why are My Homemade Sourdough Bagels so Chewy?
Boiling bagels for too long can make them excessively chewy. Boiling bagels for too long can lead to over-gelatinizing the starches on the surface, resulting in a denser and chewier texture than desired. Additionally, extended boiling times can cause the bagels to become overly puffy or misshapen as the dough expands.
Typically, bagels are boiled for about 30 seconds to 1 minute per side. This short boiling time is usually sufficient to achieve the desired texture and flavor without compromising the bagels’ quality.
How to Store Sourdough Discard Bagels
- Cooling: Allow your homemade bagels to cool completely on a wire rack before storing them. This prevents condensation from forming, which can make them soggy.
- Room Temperature: Store bagels at room temperature in an airtight container or resealable plastic bag for up to 4 days.
- Freezing: To freeze bagels, wrap each bagel individually in parchment paper or aluminum foil. Then, place them in a freezer-safe plastic bag or airtight container. This prevents freezer burn and helps maintain their quality. You can freeze bagels for up to 3 months.
- Thawing: When you’re ready to eat them, you can thaw bagels at room temperature, or for a quicker option, toast them directly from the freezer. You can also defrost them in the microwave for a few seconds, then toast them to restore some of the crispy texture.
More Sourdough Discard Recipes I Highly Recommend
- Double Chocolate Cherry Muffins with Sourdough Discard
- Sourdough Cheese Crackers with Aged Gouda and Cheddar
- Buttery Flaky Sourdough Biscuits From Scratch

Things You May Need:


New York Style Sourdough Discard Bagels
Make these absolutely delicious sourdough discard bagels in just 4 hours! This recipe for homemade sourdough bagels is great for sourdough beginners and includes an optional overnight ferment for better digestibility. This recipe works with active, bubbly sourdough starter or discard.
- Prep: 20 minutes
- Cook: 30 Minutes
- Total Time: 4 hours 50 minutes
Ingredients
- 720 grams white bread flour (6 cups)*
- 120 grams sourdough starter discard (1 cup)
- 1/2 teaspoon active or instant yeast*
- 280 grams water (1 1/4 cups)
- 15 grams sea salt (about 2 teaspoons)
- 40 grams honey (about 2 tablespoons)
- 60 grams water, set aside (1/4 cup)
- 1 Tablespoon baking soda (for water bath)
- 1 Tablespoon honey or sugar (for water bath)
- 2 tablespoons egg whites (for toppings)
- poppy seeds
- sesame seeds
- everything but the bagel
Instructions
- Read the recipe notes on proofing time before starting.
- In a large bowl, combine the starter, instant yeast, flour, salt, honey, and water. Add the extra set aside water if needed.
- Knead the ingredients together until a uniform, but shaggy dough ball forms.
- Cover the bowl with a plate or a damp towel and proof the dough for 1 hour at a warm temp.
- Stretch and fold the dough. wet your hands and stretch the dough up out of the bowl and fold it in on itself, do this a few times until the dough smooths out and has more tension. Scoop around the sides of the dough with your hands to form it into a nice, smooth ball. Cover and let the dough proof for 30 minutes at a warm temperature.
- Next, sprinkle some flour on the surface of your counter. Remove the dough from the bowl and place it on the floured surface.
- Stretch the dough into a rectangle that’s a little bigger than a sheet of paper. Be gentle with the dough!! You don’t want to flatten it. Just lightly pull the sides until it’s a rectangle about the size of a sheet of paper.
- Divide the dough into 8 equal pieces (each piece should weigh about 160 grams).
- Line a baking sheet with parchment paper and sprinkle flour on top of the parchment paper.
- Grab a piece of dough, and fold it in, forming a small round dough ball. Place the dough ball on the floured parchment paper. Repeat for the other pieces.
- Lightly sprinkle the top of the dough balls with flour. Cover the dough balls with a towel and let them rise for about 30 more minutes until they puff up a good bit.
- Flour your hands and pick up a dough ball. Place it in your right hand. Using your thumb on the top of the dough ball and middle finger on the bottom, squeeze a hole through the center of the dough ball. Bring your index finger and ring finger through the hole in the dough to touch your thumb.
- Use your other hand to guide the donut-shaped dough through your right-hand palm and fingers that are held in a circular shape. This is how you create a bagel shape.
- Place the shaped bagels back on the floured parchment paper. (lightly sprinkle more flour if you need to)
- Let the shaped bagels rest for about 15 minutes until they’re nice and puffy, but don’t overproof.
- (optional) Place the bagel dough in the refrigerator for a final proof of 12 hours.
- Preheat your oven to 450° F.
- Gather your toppings and add them to small bowls for easy use.
- Bring a large pot of water to a boil. Add in the baking soda and the honey (or sugar).
- Using a slotted spoon, place each bagel in the boiling water for about a minute, flipping at 30 seconds.
- Remove the bagel from the water, place it back on the parchment paper.
- Brush the boiled bagels with egg white and sprinkle on the toppings.
- Repeat for the remaining bagels. Once they all have toppings, place the bagels in the oven.
- Bake for approximately 20 minutes* until golden brown. Rotate the bagels at 10 minutes for even baking.
- Remove and allow to cool for 30 minutes.
Notes
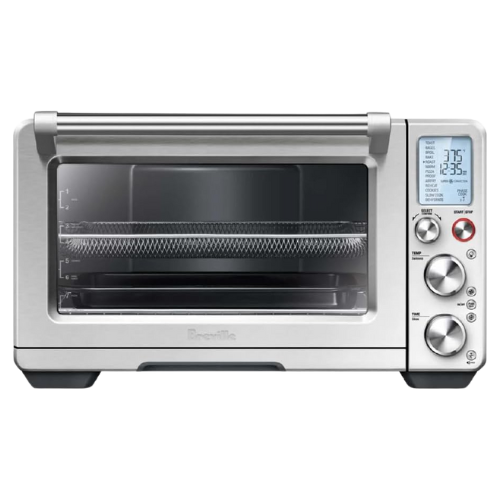
- I proof my dough in my air fryer that is also a bread proofer set to 98° F. The times in this recipe are for those conditions. If you are not using a proofer, and the conditions in your home are cooler, proofing times may take longer.
- If you want to make this recipe without any packaged yeast, you can! Double the proofing times in the recipe directions and use bubbly, peaking, active starter.
- Any time you add packaged yeast to a recipe you should follow the directions on the packet/jar of yeast before adding it in. Some brands are the add it straight in kind, some brands suggest blooming first, and with some brands you can do it either way.
- Bake time may vary. I usually end up baking for 35 minutes total. You can check the bagels every 5 minutes to ensure you do not overcook them.
- This recipe is formulated with unbleached white bread flour ONLY. You cannot evenly sub whole wheat, fresh-milled, rye, or any other types of whole grain flours bc they absorb much more water.


Great and simple recipe, but the bake time is off. Perhaps the temperature also. I do not have a gas oven, first time making them at 450 degrees they were a tad too overdone at 23 minutes.
Thank you for your feedback. I’m sorry the bake time was off for you. I bake these bagels every week since Jon eats them for breakfast, and that’s what I bake them at every time. Every oven is going to be slightly different. That’s why I included that “the bake time may vary” in the notes. I’ll add in a direction to check the bagels at 20 minutes.
I will try this soon but have a question: on steps 16 and 17, should I cover with a towel again while proofing?
You can cover them with a towel to place them in the fridge, but you don’t have to.
You mention that the ball of dough will be pretty dry, but just how dry? When I do my folds I really have to pull at it.
yep, that sounds right. It gets easier to work with as it rises.
I keep my sourdough starter in the fridge and feed once per week, so it is not super active, can I make these with discard or do I need to make sure my starter is very active?
No, the starter needs to be active.
But this recipe says discard, not active starter. What am I missing?
The recipe notes, you’re missing the recipe notes. All the notes are in the “notes” section right under the instructions.
I have tried bagel recipes from other websites that have not turned out so well, but this recipe was fantastic! My family thought they looked like I could sell them in a New York bagel shop! They were simply delicious. I used a great quality bread flour (Better Basics Milling) but I’m sure there are other great flour sources as well. Next time I plan to mill my own flour. You can’t go wrong with this recipe. The only thing I will note is that I need to use the top shelf in my oven as baking them on the bottom shelf will cause the bottoms of the bagels to burn a bit. If you love bagels, you will love this recipe!
So glad you loved the recipe! When I run out of my flour I want to try better basics milling too!
So easy! Lots of steps seemed overwhelming but they’re soooo helpful, not long, and easy to complete!!!!!
After doing the long refrigerated ferment, do you let them come to room temperature first or just go right into the next step?
no, you just go right into the next step! Just follow the recipe as written and you’ll be good to go!
The. Best. Bagels. I’m from New York and now live in Florida. I had basically given up on trying to find good bagels here until this recipe. It’s now a household favorite. Fresh out the oven they are just heavenly and they freeze/re-heat really well too so we can enjoy them all week! Don’t hesitate to make these!
Amazing bagels! I was so exicitng taking these out of the oven the first time I made them. Making these for Christmas breakfast gathering. 🙂
If I wanted to ferment these overnight (more convenience sake) which step should I do that? After creating the bagel shapes?
Step 17. Where it says “place the bagel dough in the refrigerator for a final proof of 12 hours”
These are delicious! I used honey instead of maple syrup and a mix of all purpose and whole wheat flour and they came out beautifully. I also only needed to bake them for about 15-18 min with my oven. I live over in Germany and bagels are hard to come by so I will definitely be making these again. So yummy!
Love love love this recipe. Made it multiple times. While making it this time, I noticed the notes mention it makes 12 bagels and the recipe says 8 or 9. Thoughts?
It just depends on the size of bagel you want. if you cut the dough into 12 bagels, they will be mini bagels. 8 bagels will be regular-sized.
Could you freeze the bagels for a later time? If yes, is it best to freeze them unbaked, cooked and pre baked or fully baked?
Thank you for this great recipe!!!
you can freeze fully baked!
This is my go to recipe for bagels.
Quick question–was this recently changed? I don”t recall any instructions with instant yeast and have been using maple syrup not honey.
hey! So glad to hear it’s your go-to recipe!
I did recently update this blog post, to better serve more people in our audience, and to add more process photos. It’s essentially the same recipe as before, just leave the packaged yeast out and double the proofing times. Check the recipe notes 🙂 You can also still use maple syrup, either one works.
Have you done inclusions like cinnamon chips or jalapeños and cheddar IN the dough or making something like a french toast bagel using this recipe?
yes! you can add in anything you want in the first step, when you initially knead everything together.
I think maybe the water measurement was off but I had to use WAY more than 280 grams? 280 grams was so dry I couldn’t mix the flour all in.
Otherwise this recipe is AMAZING! I’ve made them twice so far.
I had this same issue. It was definitely more than the extra 1/4 cup she mentioned. Plus my hands were very wet during the stretch and folds because it definitely wasn’t stretching and folding. I was basically kneading because the dough was so dense. I did use 40% rye flour and 60% bread flour so that could be why. They’re currently proofing in my fridge so we’ll see how they turn out.
You can add more than 1/4 cup if you need, to get it to come together. And yes, your dough was so dense, because you changed up the recipe. Rye flour absorbs much more water than bread flour. Any whole grain flour will absorb much more water that white flour.
Just wanted to follow up to say they turned out beautifully! Total recipe time was 10 hours for me as I increased proof time for not using yeast and had them in the fridge for a few hours before booking/baking. The texture and flavour from using rye was delicious and the little extra water seemed to work great. Thank you so much for the recipe 😊
Would I be able to just stick my bowl of dough in the fridge without shaping them?
yep. You can pop the dough in the fridge, then take it out the next day and resume where you left off.
I had this same issue, but did not change the recipe. 550 g flour probably would have been better… but I had already weighed everything out so I just visualized the water, probably added at least 150 g worth more to be able to do anything with the dough and still really couldn’t stretch and fold – just kind of knead it a little. Bake time was way too long – they were done in about 15 minutes – I have a gas oven. They turned out nice with these changes.
Thanks for your feedback! No one else seems to have this problem, unless they change the recipe and use a different type of flour. If you try to use fresh milled, or whole wheat, it will be incredibly dry as these flours absorb much more water. Also, all ovens are slightly different, that’s why the notes say bake time may vary.
These came out incredible! Thanks for putting my sourdough discard to good use… I can’t believe it, I can make bagels!
Love this recipe! I make it every weekend to prep for the following week and love experimenting with toppings. I almost always need the extra water that’s stated in the recipe. I once put too much baking soda in the water and they tasted like pretzels lol.
This is the first sour dough bagels I’ve made and they turned out AMAZING!! The recipe was so easy to follow. My family can’t stop eating them which means I need to keep making them 🤣🤣. Thank you for this wonderful recipe!!
Hi, love many of your recipes. Just wanted to confirm how cold the water needs to be for this recipe, ice cold or just tap cold water?
Thank you! Glad you’re loving the recipes! any cool temperature of water works. It doesn’t need to be ice cold.
Is it possible to make these bagels without honey (or other sugars)? I was hoping to make these to share with my 10 month old and trying to avoid sugars and babies aren’t supposed to have honey! Thank you!
yes! you can leave out the honey and sugar and they should still come out fine!
I completed step four and put the dough covered with a plate in the refrigerator for up to 12 hours. My question is when I take it out how long do I let it warm up before I start working with it?
You refrigerated after step 4? Then you need to let it come to room temperature so it will start rising again.
Came out amazing!! First time making bagels! Started my sourdough from scratch and had been itching to use it since waiting for it to rise!
awesome! Thank you for leaving a review!
This was absolutely amazing!! I did a second batch of blueberry ones. I used thawed frozen blueberries. I didn’t add the additional 1/4 water and I added about half a cup of blueberries during the s&f stage. I ended up kneading this batch instead and after about 5mins the dough came together nicely and baked up with the same texture as the original batch!
yay!! so happy you love the recipe and I bet your blueberry bagels were amazing!
Can i use barley malt or barley malt powder? I know NYC bagels shops use it in their bagels was wondering if this would work?
I haven’t tested this recipe with that. And I’m not sure how you would incorporate it. I suggest following the recipe as written.
Love ❤️ ❤️ this recipe!!!!! It’s the best !!! Question: Can I knead in my stand up mixer? Or just by hand?
thank you! yes you should be able to use a stand mixer with a dough hook. maybe add a pinch more water. and since this is dough is more firm, don’t use the mixer with a glass bowl.
I have made these a few times and they always turn out great! I end up making about 12 bagels and keep them in the fridge overnight to long ferment. They’re simple and my boys love them. They also freeze well.
Thank you so much for leaving a review!! Glad to hear your boys love them 🤗
My first attempt at making bagels was with your recipe! They are amazing!! Every, single detail was covered and I followed it to the letter! Added a tiny bit more water to the mix but that was it! I decided to make 8 bagels and they were pretty big. I’ll be making this for our Christmas brunch and make 10 smaller bagels. Thanks for taking the terror out of making bagels!! 😉
I’ve always wanted to make bagels this recipe was awesome. I made everything and Asiago, my son said they were better than Panera! Thank you for sharing this easy to follow recipe.
Thank you for leaving a review! So happy to hear you and your son love the bagels!
Great recipe. Easy to follow and absolutely delicious outcome. 10/10 recommend.
Came out so yummy! Seal of approval from New Yorkers
These were amazing.
I was super thrilled to stumble on this recipe, however when I started it, it’s been a bit…. Frustrating? The recipe states I can use active or instant yeast, but doesn’t specify weather or bit you have to first bloom active yeast before adding it. So I had added it without blooming it? And my dough so far does not seem to be cooperating, despite being in a warm oven. Hopefully it turns out. If active yeast is supposed to be bloomed first, I would maybe suggest clarifying that in the recipe card. Regardless though, thank you for sharing this. ❤️
Any time you add packaged yeast to a recipe you should follow the directions on the packet/jar of yeast before adding it in. Some brands are the add it straight in kind, some brands suggest blooming first, with some brands you can do it either way. I’ll add this as a note for anyone else who doesn’t know this.
Easy, beautiful and delicious! Better than any bagel I’ve bought anywhere!
Step 24 says to “rotate” the bagels. Is that truly rotating the pan or “flipping” the bagels? I ask because as a teen, I baked bagels at a NY bakery and we flipped them then seasoned them.
Just rotating the pan.
Was looking to use my sourdough discard, these turned out perfect!
Recipe was amazing! It was the most successful bagels I’ve made! I did end up turning the temperature down halfway through because they seemed to be cooking too much. I Think my oven might cook hot. If I were to add inclusions into my bagels, like chocolate chips or blueberries, for example when would I add them?
It’s best to mix in any add-ins when you initially mix all the other ingredients, step 2 & 3! Glad to hear you had great success with my recipe! Thank you for leaving a review. 🙂
If I’m using active starter, do I just skip the 1/2 active yeast? Do I need to do anything instead of that?
check out the recipe notes!
Turned out great…..chef 😘!1st try too. Will make them again. Husband Loved them.
Yay! love when a hubby loves the recipe too! I’m still making these every single week for my man. 🙂
Do I use sourdough starter or discard with the third options. It says sourdough discard + instant yeast but then it refers to using starter.
either one + instant yeast. The rise will be controlled by the instant yeast, so either way the starter is considered “discarded” into the recipe, no matter if its active or from the fridge.
These are amazing!
Any way to do this grain free? I’ve got an active starter from cassava flour.
I’ve never tested a grain-free bagel recipe before. Gluten is an important component in the bagel making process.
Have you ever used coconut sugar or another sweetener to sub for the honey?
I’ve used maple syrup and organic cane sugar. I think coconut sugar should work great.
Excellent recipe! I doubled it on my first try and they came out perfect!!
i love making double batches! Glad you enjoyed the recipe and thanks for leaving a review!
Fabulous! First time making bagels and it was sooo much fun! And they taste great!
Thank you so much for leaving a review! I’m glad you love the bagels!
I changed the water to 2 1/4 C
Plus I baked 450 degrees for 10 minutes then 425 for 10. They turn out perfect. I’ve made them many times now. Thanks for the recipe
I’m in the process of making this but am confusing on the proofing times if I don’t have the fancy air fryer you have. Should I double the time??
It all depends on what temperature you’re proofing at. Everyone’s house/conditions are different. Some people just find a warm spot to proof, some people have a proofer built in to their oven. It also depends on what method you are using (active starter, active starter + yeast, or discard + yeast). If it’s cold in your home and you are using only active sourdough starter you may need to double the time. The dough should just about double in size before you shape the bagels.
If I am using active starter, do I do the longer proof at step 4 and am I proofing for 2-3 hrs or do I want it to rise to a certain % ?
it depends on the temperature of your house, or if you’re using a bread proofer. The dough should almost double before you shape them
These came out great! Was a bit with my bagel loving family. Do you think it would work fine to make 16 mini bagels instead of eight large ones? Wondering if I should slightly lower the proving time once the dough is divided into 16 pieces if so…
yes! you can totally make some mini bagels. Just split into smaller pieces, and nothing else about the recipe should change!
My bagels came out amazing!! 20 minutes was the perfect bake time for me I think
I made these and they were absolutely delicious… so good that I was told they were the best bagels they’ve ever had!! Such a good and easy recipe. Not too chewy but has a good toughness to it that makes it the perfect bagel. I will be making these over and over!
GOATED bagel recipe!! This recipe was easy to follow and quick to make. The bagels came out absolutely perfect!!!
Thank you for leaving a review! I’m happy my bagel recipe is GOAT 🙂
Made my first batch yesterday and these came out incredible! Thanks!
Excellent recipe! It was very easy to follow and produce delicious bagels on the first try. Adding sourdough starter is worth the extra depth of flavor, as is the optional over-night ferment.
Glad you enjoyed the bagels! Thank you for leaving a review!
These were fantastic. I added the extra water and thought it would turn into a mess for a second but they’re perfect.
yay! So happy to hear they came out perfect. Thank you for leaving a review!
I made a half recipe bc I’m tired of disappointing results. These came out perfect! I wish I made full recipe. Will definitely make these again. They’re also easy to make. Try it, you’ll LOVE it. Thank you for a great recipe!
I’m so glad you gave my recipe a try after having some disappointing bakes!
Tasty if flat bagels for breakfast were a hit. Great flavor, but my bagels degassed during the overnight ferment. Next time I will either bake these directly after shaping, or shape and shape rest after the overnight ferment.
Sounds like they may have over-proofed! You can totally fridge ferment the big dough ball then do your shaping the next day.
I’m new to sourdough, but wanted to give these a try. OH MY! These are SO gooood! The texture, the flavor, the smell when they’re baking – amazing. I went the starter + active yeast route with an overnight fermentation. Thank you for sharing such a hit recipe!
yay yay yay!!! Thank you for trying my recipe and coming back to leave a review! Glad you enjoyed!
These are the best bagels that I have ever eaten. I have only made bagels twice, but I will not use another recipe to make NY style bagels. I made them same day, and after they cooled I sliced them in half and then placed them in the freezer. The next day I popped one directly into the air fryer on the toast setting. The bagel came out perfect! I made 4 plain and 2 everything bagels. I baked them for about 22 minutes. We have a propane stove, so that may have contributed to the bake time. They were easy to make, and I think this is the perfect bagel recipe for beginners.
ohhh! I love that you froze them and then toasted right out the freezer! Great idea especially is baking a double batch of bagels at once. Thank you for coming back here to leave a review.
Wow! These are fantastic! I love that sourdough discard can be used! Thank you so much for this recipe!
Thank you for leaving a review! Glad you love the bagels!
Best bagels ever! Very easy and forgiving. I make them all the time and often skip the last 15min rise and pop them straight in the fridge for the overnight rise. I also put all the ingredients in my stand mixer and mix until just incorporated because it can be hard to incorporate all the flour by hand (kneading in the bowl helps). 10/10 thank you!
Just started my sourdough journey 6 weeks ago. I’ve tried a couple of different recipes with my discard and yours wins, hands down! Thank you for making the directions so simple for someone that thought sourdough wouldn’t be confusing!!! I’ve shared your recipe with friends and they love it!
ahhh! I love comments like this! Glad to hear my recipe is beginner friendly and you enjoyed it 🙂
I tried this recipe for the first time, today. They came out gorgeous and so delicious. Great recipe! My family and I loved them! Thank you ❤️🥯
I just have a question with the proofing, do I put mine in the fridge after my 30 min rise? Or do I shape them and then put them in the fridge? And if so do I have to let it sit at room temperature the next morning till I shape them?
You follow the steps in the exact order they are written! 🙂 If you’d like to overnight proof, that’s step 16. Which happens after shaping. You put the shaped bagels in the fridge, then proceed with the next steps the next morning. No, you do not have to let them come to room temp.
After bulk fermenting in fridge, do you let it come to room temp, proof again for how many hours or boil straight from fridge?
boil straight from the fridge! no need to let them come to room temp.
The easy to follow directions resulted in a crowd pleasing breakfast!
i definitely had to add more water to the dough, and I also baked them for 16 – 17 minutes, which might be my oven. They tasted so yummy and I will make the NY style bagels again. Thanks!
Wow! The first time I made these my son’s girlfriend has just been in New York and her comment was “these are better than New York bagels”!
Seems like lots of steps but after making them a few times I find it easy especially proofing in the fridge overnight so it is a two day process.
Amazing. Thanks