

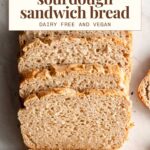
Making Gluten-Free Sourdough Sandwich Bread
Seriously, do not bother trying to make a gluten-free sourdough boule. It’s a waste of time and a waste of expensive GF flour. There is no gluten to hold GF bread together, so it is impossible to get a good rise and inner texture while creating a boule shape. I tested three recipes that I developed and tried two other people’s GF sourdough boule recipes… Same result each time: a dense loaf with a crust that is as hard as a brick. I literally cut my knuckle open on the crust while trying to slice one of the loaves.
I tried using different flours, different baking temperatures, different baking times. But there was one problem with the boule recipe: the flour to water ratio. Here’s the thing, though. If you increase the water content, the dough is too wet and impossible to shape because there is no gluten to hold it together. The fix is simple: use a loaf pan and make a sandwich loaf.

Can Gluten-Free Flour Rise with Yeast?
Yes, gluten-free flour can rise with packaged yeast or with wild yeast in a sourdough starter. And with the right bread recipe, the rise is beautiful!
Here’s the thing about gluten-free flour rising with yeast, though: you MUST shape the bread before allowing it to rise. This is NOTHING like glutinous bread dough. There is no punch-down, no stretching or folding, no pre-shaping then shaping. There is one rise and one rise only.
This is why I chose the loaf-pan method for our gluten-free sourdough bread recipe. It allows for a higher water content and no need to try and shape something that includes no gluten to hold everything together.


Equipment you need for this recipe
For this recipe you only need a few things:
- a kitchen scale
- a large mixing bowl
- parchment paper
- a 8 1/2″ by 4 1/2″ loaf pan; or a 9″ x 4″ x 4″
- a bowl cover


Ingredients for Making Gluten-Free Sourdough
If you change any of the flours used in this recipe you will get different baking results. If you want your bread to turn out like mine, you must use the flours I used in the ratios I used.
Here’s all the ingredients you need for this easy recipe:
- gluten-free sourdough starter
- water
- salt
- Bob’s Red Mill 1:1 Gluten-Free Flour
- brown rice flour
- sorghum flour

IMPORTANT Tips for Cutting this Gluten-Free Sourdough Bread
- Immediately remove the loaf from the hot pan after baking.
- Let it cool for 4 to 6 hours at room temperature on a cooling rack after baking.
- After cooling, place the loaf into an air-tight bag and let it sit in there for a few hours or overnight (this helps soften the outside a little before cutting).
- TURN THE LOAF UPSIDE DOWN TO CUT IT INTO SLICES. I cannot stress this enough; it makes cutting so easy. Use a straight, smooth knife to cut it. Do not use a serrated bread knife.

How to Eat Gluten-Free Sourdough
This gluten-free sourdough texture is ever-so-slightly moist on the inside. The slices are 10/10, five stars, delicious when toasted. If you want a quality slice of GF bread, DO NOT skip throwing those slices in the toaster for a couple minutes.

Vegan Gluten-Free Sourdough Sandwich Bread
No kneading, no stretching or folding, no gumminess, no eggs, no loaves that are as hard as a rock…This gluten-free sourdough is the best and the easiest you’ll try! Mix all ingredients until combined, transfer the mix to a parchment-paper-lined bread pan, wait 8 hours for it to rise, and then bake. It’s a very hands-off process that only requires a little patience. With this gluten-free recipe, you will get that delicious sourdough texture and flavor without any trouble.
- Prep: 10 minutes
- Cook: 50 minutes
- Total Time: 1 hour
Ingredients
- 200 grams gluten-free sourdough starter
- 250 grams Bob’s Red Mill 1:1 Gluten-Free Flour
- 150 grams brown rice flour
- 200 grams sorghum flour (or sub more 1:1 flour)
- 15 grams sea salt
- 500 grams water
Instructions
- Line a 9×5 inch loaf pan with parchment paper.
- Mix all of the ingredients in a large bowl. It’s best to mix all dry ingredients first, then mix in the water until evenly combined. *see notes on adding yeast*
- Scoop the mixture into the parchment paper-lined pan, (8 1/2″ by 4 1/2″ loaf pan; or a 9″ x 4″ x 4″) and spread it out evenly with a spatula.
- Optional: sprinkle any toppings, like sesame seeds and poppy seeds, on the top.
- Cover the loaf pan with something to keep moisture in, but allows room to expand. I have a big food storage container I stick the whole loaf pan in to keep it humid. You can also use a bowl cover positioned so that it isn’t flat on the pan.
- Allow the loaf to rise for 8 hours at room temperature (70-85° F), or for 2-3 hours if you added instant yeast. You should see it puff up quite a bit. You may notice dry spots and cracking on the surface if it’s not covered well; this is normal.
- Preheat the oven to 475° F.
- Bake at 475° F for 30 minutes, rotate the pan, then bake for 20 more minutes.
- Remove the pan from the oven. Gentle with the bread, grab the corners of the parchment paper, and immediately take the bread out of the pan to place it on a cooling rack.
- Allow the bread to rest and cool completely before cutting.
- This bread is best served freshly toasted. I mean it, cold gluten-free bread is not good. You 100% want to toast this bread before eating it. It is divine when toasted.
Notes
- You can add a teaspoon of instant yeast to speed up the process and ensure a fluffier bread. If you add instant yeast you’ll only need to let the bread rise for 2 to 3 hours.
- I suggest flipping the loaf upside down to cut. This helps keep the slices in one piece, especially if the top of the loaf cracks while baking.
- I also suggest cutting with a smooth knife, not a serrated bread knife. Be careful when cutting bread with a smooth knife.
- If you try to cut this bread while it is still hot, you will ruin it.


Years ago I made sourdough starter with dehydrated potato. I can’t remember the other ingredients but maybe sugar & flour. This made the most delicious bread. Would the addition of potato flakes add anything to this recipe or make a better rise?
I’m unsure honestly, I haven’t baked much with potato flakes! If you try it let me know how it goes.
I cannot eat sorghum, would you have a substitute flour?
I haven’t tested this recipe with any other GF flours, so I’m not sure how it will turn out with a substitute.
I absolutely love this recipe. It’s worked so great for me every time and I’ve served it at so many brunches and everyone is impressed. Wondering if you have any tips for how to do a cinnamon raisin loaf or if you even think it’s something that would work nicely??
Hmmm… since you can’t exactly roll cinnamon and raisins into the dough, I’d say to try mixing cinnamon and raisins in at the beginning! Glad you enjoy the recipe.
Just made this yesterday! Followed your GF starter recipe last week then made this recipe. Sooooo good! It was a little too dense for hubby, but I loved it! I’m curious, if I added dry yeast, would it make the loaf a little less dense? I know GF products are usually denser, just curious if that would help? Also, just curious have you ever calculated how many carbs are in this recipe? I tried to but I’m not quite sure if I did it right hahaha
Usually I wouldn’t care, but just found out I’m prediabetic so gotta watch those carbs now 😉
Thanks for sharing!
Hello. Your article starts by saying gluten-free flour can rise with packaged yeast. Can you advise how I would make your recipe if I used packaged yeast instead of the sourdough starter over the seven days? I’d like to try both methods.
Thank you very much. This looks absolutely wonderful and I can’t wait to make some!!!
Hi Tamara,
You can just substitute the sourdough starter for one single package of active dry yeast. You will only need to let it rise for 2 to 3 hours if using packaged yeast. Let us know how it turns out if you try it!
This recipe I would love to try, but can you convert the grams to cups instead because I don’t have a scale?
I don’t think that using cups will work well in this baking recipe. To make sure the bread comes out with the right texture it is important to use weight measures. If you want to convert the measurements to try it anyways, 1 cup = about 120 grams.
Have been working on getting my bread starter ready for my first loaf! Excited to see it actually rising in my glass jar! Do you have any throw away recipes available? I hate wasting! Thanks so much!
Hi there! I do not have any GF sourdough discard recipes at this time. I don’t bake much GF sourdough, so I never really have the opportunity to test and write discard recipes.
Thank you for sharing! I made this recipe using your gluten free starter recipe (made it with your mix of flours and followed everything exact), the bread turned out wonderful however it has a very bitter aftertaste. Any idea why this is? Could it be the sorghum flour? Any substitute for it?
It may be from your starter. GF sourdough starters can be quite strong and tangy.
Hi there. Made this recipe. Kept it in the oven for 50mins, did the rotation, all the things. Took it out and it’s not cooked in the middle. I left it in for prob 30mins longer and the middle still seems raw. Any tips? It’s so
Strange. Thanks
did you let it cool all the way before cutting it?
Same. And I let it cool.
Did you change anything about the recipe? Like substituting with different GF flour?
Hello. I made this recipe yesterday and followed the directions exactly, but it also turned out gummy in the center. I used the recommended 1:1 flour, a very active buckwheat starter, let the dough rise for 9 hours (it didn’t rise much ), and waited 6 hours before slicing. I used the same starter a week ago and it made a good GF artisan loaf (Dutch oven).
It’s normal for it to be somewhat moist in the middle. That’s why I recommend toasting it before eating.
Is the sourdough starter you refer to the unfed discard, or should I feed my starter and use it at peak? Thank you!
you should use an active, fed sourdough starter for baking.
Most cake pans have temperature limitations of ;25 or 450 degrees Fahrenheit. What loaf pan do you recommend?
I use a glass pyrex loaf pan.
Hi Kaitlynn!
I made two loaves of this (my first foray into the sourdough world) and after sampling a piece this morning- they are amazing!
Have you frozen one of these loafs? If so, any tips? And how long will these last before going bad if left out?
Thank you!
Kelsi
Hi there! I’m so glad to hear you enjoyed the recipe. I have not frozen a loaf, but they should freeze fine. I would slice it before freezing; then you can probably toast a slice straight from the freezer.
This is the first gluten free sourdough recipe I have tried and it actually worked! I got a sourdough starter for Christmas and I have been trying different recipes with no success until I found this recipe! Can I pin this on Pinterest? I can’t find it on Pinterest anywhere. I see your account and other posts but not this one.
Hello! I’m going to try and make this – I have one more day on the starter recipe you also provided
Question – is there any way I can use the Dutch oven / casserole pot instead please as my load equipment isn’t big enough
If not – do you have a recipe for the ditch oven equipment that works as yet? Thank you
Hi there! you need to use a loaf pan for this recipe, since you cannot shape the GF dough a dutch oven won’t work.
Merryl—how big is your Dutch Oven? If it’s small enough (2qt or less) AND you line it loosely with parchment paper* I’ve made it work.
*loosely=don’t bother about flattening the paper against the edge of the Dutch oven to make it neat. You want some “extra space” around the dough-batter. 😉
Still in the starter development phase, but I’ve only been using Bobs 1:1 for the starter and realized I should’ve been using the mix you recommend above. Should I restart my starter or do you think I can use the bobs starter I’ve been feeding?
you can use bob’s 1:1 and it should work fine. No need to start over completely.
Can I use white rice flour instead of brown rice flour?
I haven’t tested it, but that should work!
I made this with gluten free flour blend my work makes and it turned out great! I mistakingly only used 500 grams of flour total and realized after it was too late but it was tasty !
I have made this recipe multiple times…I use a 50/50 mix of Bobs Red Mill 1:1 and Namaste Flour, keeping in the Brown Rice Flour and subbing out the Sorghum flour, this has a great texture and gives me great results. I want to try making this a Jalepeno Cheddar loaf, have you ever added inclusions? Would you change anything? When would you add them?
so happy to hear you’re having great results with my recipe! I suggest adding in the mix ins in the very beginning, step 2!
I made the Jalepeno Cheddar mixed in at step 2 and it is SOOOOOOOOOOO GOOD! Making another loaf today! Also…I toasted the bread in my air fryer, it crisps the cheddar for an even better sandwich. Thanks again!
I made the Jalepeno Cheddar mixed in at step 2 and it is SOOOOOOOOOOO GOOD! Making another loaf today! Also…I toasted the bread in my air fryer, it crisps the cheddar for an even better sandwich. Thanks again!
Can you let this proof longer than 8 hours?
you can, but I wouldn’t recommend. It gets very sour.
This recipe is amazing! My husband loves it n he does not eat gluten free. I was able to conver to cups n was successful. So far I have made it 2x. This recipe is a favorite. The author is correct when she says not to bother with boule. I have tried it 2 times n an epic fail. And as the author stated…. what a waste of expensive flour. I will not bother trying again. This is my go to recipe. In my version I did not use sorghum flour n used 1×1 as recommended. I think it will freeze well… but haven’t been able to freeze it bc it doesn’t last long enough. Thank u so much for sharing!
I am so happy to hear this bc I was thinking about re testing this recipe! It’s been so long since I’ve made it!