

My Favorite Instant Pot Yogurt
If this is your very first time making instant pot yogurt, welcome! You’re about to save so much money making the healthiest possible yogurt at home.
Various probiotic bacteria are at the heart of this process, each playing a crucial role in crafting yogurt. The stars of the show are often species like Lactobacillus, Bifidobacterium, and Streptococcus, which are commonly found in different types of yogurt.

Specific varieties, such as Greek and Bulgarian yogurt, get their unique character from the particular combinations of strains of bacteria used to culture animal-sourced milk. When these friendly microbes feast on lactose, they produce lactic acid as a byproduct, causing the milk proteins to coagulate, resulting in the luscious semi-solid yogurt we all love. It’s a delicious transformation that changes the taste and enhances the milk’s nutritional profile.
As for me, Greek yogurt is my go-to, celebrated for its rich tartness and velvety thickness. The magic happens with the help of Streptococcus thermophilus and Lactobacillus bulgaricus, the microbial duo that makes Greek yogurt a standout! Get ready to fall in love with making fresh yogurt at home!
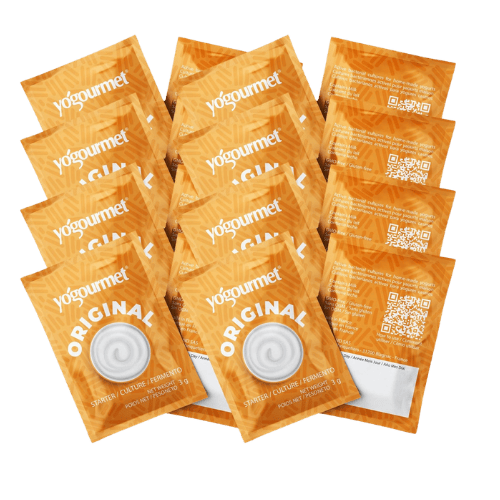
Click here to buy my favorite Greek Yogurt starter cultures.

Plain Whole Milk Yogurt Instant Pot Recipe
Here’s what you will need to make this Instant Pot yogurt:
- 64 fluid ounces of raw cow or goat Milk
- A starter culture or yogurt with live active cultures
- Jars for the finished yogurt
- Thermometer
- Instant Pot (I have this six-quart instant pot with a yogurt setting)
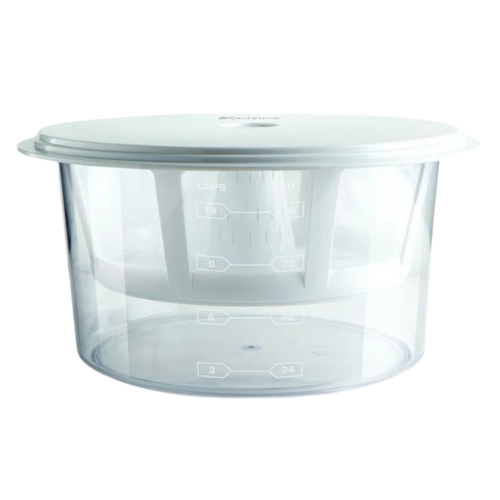
- You also need cheesecloth or a Greek yogurt strainer if you plan to make thick yogurt.
Here are the settings you will use to make this recipe.
- First, heat the milk on the high setting at 181° F
- Then, you allow the milk to cool
- Next, add your starter cultures or already-made yogurt
- Last, you will incubate the yogurt for 12 hours on the medium setting at 107° F or a custom setting of 104° F.
How Long Does it Take to Make Instant Pot Yogurt?
It take about 12-24 hours to make instant pot yogurt. The incubation time will depend on your individual instant pot settings and flavor preferences. Also, I want you to note that it only takes about 5 minutes of actual hands on time.


What Kind of Milk is Best for Homemade Instant Pot Yogurt?
You can choose from goat, sheep, or cow milk to create your perfect batch! While each type of milk offers unique flavors and textures, I find that whole cow milk delivers the creamiest, most satisfying results.
If you’re curious about trying something different, goat milk yogurt has a naturally thinner consistency due to its lower lactose content and distinct fat composition. This results in a tangy and light yogurt that can be quite refreshing!
For those who crave a thicker, more substantial yogurt, cow milk is your best bet. You can even experiment by mixing different milks to craft a custom flavor profile. After combining your chosen milks, simply strain the yogurt with a yogurt strainer to achieve that luxuriously thick texture you desire. The possibilities are endless

Which is Best—Raw or Pasturized Milk for Yogurt?
When it comes to making homemade yogurt, one of the key decisions you’ll make is whether to use raw milk or pasteurized milk, each offering its own set of benefits and considerations. Yogurt is mainly a “sterile” culturing process: the substrate, or milk, is heated and then inoculated with chosen microbes. Even when using raw milk, it’s crucial to heat it to 181°F for 30 seconds or 145°F for 30 minutes before making yogurt.
Heating serves two essential purposes: first, it helps your yogurt achieve that desirable thickness, and second, it ensures that only the yogurt cultures flourish, keeping unwanted microbes at bay. This enhances the flavor and extends the shelf life of your yogurt, allowing you to enjoy a delicious batch within just 12 to 24 hours after inoculating.
If you’re concerned about the health benefits of raw milk, there’s no need to worry; the heating process won’t destroy its nutritional value. The yogurt microbes contribute additional enzymes and bioactive vitamins and minerals as the milk transforms into yogurt. I highly recommend using organic goat or cow milk from the farmer’s market for the best flavor and quality.
I use Kalona Super Natural low-temp pasteurized, non-homogenized milk in my yogurt recipe every week, and it consistently yields excellent results. Whether you choose raw or pasteurized milk, you’ll be on your way to creating a delicious, healthful homemade yogurt

Is It Worth Making Yogurt in an Instant Pot?
Yes!
Making yogurt at home in an Instant Pot can be a fantastic way to save money while enjoying a delicious, fresh product.
For example, purchasing 32 ounces of organic yogurt costs about $7.50 at the store. In contrast, a gallon of milk, priced at $8.99, yields significantly more homemade yogurt.
You can obviously transform one gallon of milk into a whole gallon of yogurt. If you prefer thick yogurt and strain off the whey, you can produce approximately three quarts of creamy, strained yogurt from one gallon of milk.
This means that, even when straining, you’re effectively getting over $20 worth of yogurt for just $8.99— a savings of over 50%. Plus, making yogurt at home allows you to control the ingredients and customize flavors, making it a healthy and budget-friendly option for your family.
Additionally, the cost of a yogurt starter culture is negligible, as you typically only need to purchase it once. After that, you can use a small amount of your homemade yogurt to culture the next batch, making the ongoing expense minimal. You’ll only need to buy more starter culture if something goes awry with your yogurt.


How to Make Thicker Yogurt
Store-bought Greek and Skyr yogurts are thick because they are strained to remove excess liquid. Many first-time yogurt makers often ask, “Why is my yogurt kind of runny and lumpy?” The answer lies in the whey still being present; this is a normal appearance before straining. If you mix the whey back in, the texture can be thin, similar to milk kefir.
All thick, perfectly smooth yogurts undergo a straining process, and you can easily do this at home! Straining separates the liquid whey from the coagulated proteins and fats in the milk, resulting in a creamier texture.


To strain your yogurt, start by carefully following your recipe instructions. Once the yogurt has been incubated, chill it in the refrigerator. Next, transfer the yogurt to a yogurt strainer and let it sit overnight in the fridge. By morning, you’ll find the whey collected at the bottom of the strainer, leaving you with beautifully thick and smooth yogurt on top.
Don’t forget to save the whey! It can be used in smoothies, as a nutrient-rich water for plants, added to lemonade for a probiotic boost, or even sprinkled on your dog’s food for extra nutrition.

FAQ
Do you have to heat the milk first?
If you want consistent results, yes. Not only does heating the milk first make for the best texture, it also ensures consistent flavor and microbes.


How many times can you use homemade yogurt as a starter?
Indefinitely, as long as your batches of yogurt are coming out to your liking, you can keep using it to culture the next batch.

What is the best starter for homemade yogurt?
I suggest buying your absolute favorite plain yogurt brand from the store and using it as your starter culture. You can also use a starter culture packet, and this one is my favorite: Greek Starter Culture
My yogurt is too sour, how can I make it more mild?
- Option one: Decrease the incubation time. The least amount of time you should incubate is 8 hours.
- Option two: Reduce the temperature to about 104° F. This is my absolute favorite incubation temperature.
- Option three: Strain off more whey. A lot of the acidity is in the whey.


Why is my yogurt clumpy and runny?
Yogurt is naturally clumpy and thin because the yogurt separates from the whey. Once you strain the yogurt it will be thicker and smoother.
What if the gasket on my instant pot smells like savory food?
I know what you mean! The gasket on my instant pot always smells like chuck roast ramen. So I bought a second gasket just for making yogurt. I wash the lid well and pop the yogurt gasket on every time I make yogurt.
Some people say you can just leave the gasket off, but I have concerns about fruit flies, so I prefer to have a clean yogurt gasket only used for Instant Pot yogurt.

What is the shelf-life of instant pot yogurt?
Keep the yogurt refrigerated and it should last 3-4 weeks.
Things You May Need:
Print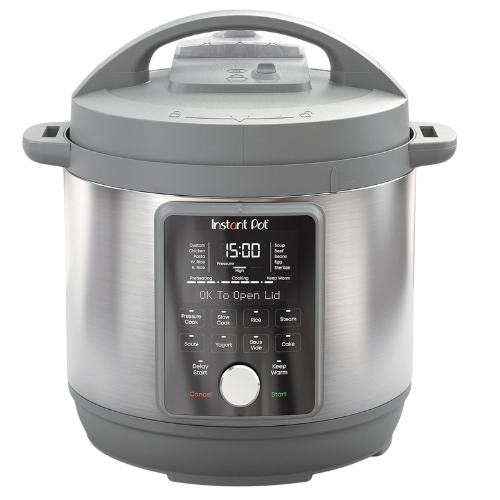
Instant Pot Yogurt Master Recipe (raw or pasteurized milk)
Our homemade instant pot yogurt recipe includes everything you need to know to make plain whole milk yogurt in an instant pot with a yogurt setting. This recipe works with goat milk, cow milk, raw milk, and pasteurized milk. Enjoy the instant pot yogurt chilled with fruit and granola.
- Prep: 5 minutes
- Cook: 10 minutes
- Total Time: 12 hours 15 minutes
Ingredients
- 64 Fluid Ounces Organic Cow Milk or Goat Milk
- 2 Tablespoons Greek Yogurt (or yogurt starter cultures)
Instructions
- Plug in and turn your instant pot to the yogurt setting.
- Pour the milk into the instant pot insert container and secure the lid in place.
- Adjust the yogurt setting to boil/high at 181° F. Then press start. The milk will be heated to 181° F for 30 seconds.
- When the instant pot beeps and the heating cycle is over, turn off the instant pot.
- Remove the insert container so the milk can cool.
- Place a thermometer in the milk to monitor when it reaches about 115° F. This may take some time, so be patient. (tip: you can place the instant pot insert into a big bowl of ice water to cool it down faster)
- Remove the thermometer, you may see a film on the surface of the milk from the heating process. You can remove it with a clean spoon or stir it in.
- Add in the two tablespoons of yogurt with live active cultures or starter cultures. (tip: dissolve the yogurt or starter cultures in a small bit of milk before adding it to the lot of milk, it will mix in easier)
- Whisk until the starter culture yogurt is evenly combined with the milk.
- Place the insert container back in the instant pot, and adjust the yogurt setting to medium (107° F) and adjust the time to 12:00 for 12 hours of incubation.
- Secure the lid in place and press start.
- The time readout should say 0:00. It will incubate for 12 hours. Once you press start, the timer will indicate the time passed. You can incubate for up to 24 hours for more tart yogurt. Simply taste test at 12 hours, then restart the yogurt setting to incubate for longer if you wish.
- After 8 to 12 hours of incubation, the yogurt should be slightly set, and a jelly-like consistency.
- Allow the yogurt to cool at room temperature for a couple of hours, then store in the fridge. You can also transfer to jars and then store in the fridge.
- If you want to make thicker yogurt: place the instant pot insert in the fridge to chill and set. Once it is chilled, you can strain the yogurt through a cheesecloth-lined colander or a yogurt strainer. Allow it to strain undisturbed for about 8 hours in the fridge. Then, jar it and store it in the fridge.
Notes
- You may see a lot of liquid whey separation after incubation, or you might find the yogurt lumpy in some spots. for thicker smooth yogurt, you can strain off the whey. Use a yogurt strainer or a cheesecloth-lined colander.
- Once the yogurt is strained, you can use an immersion blender to smooth it out even more. (I only do this with fully strained yogurt, and a low setting on the blender. Immersion blenders can break apart the coagulation and make it runny, so blend at your own risk!)
- Reserve some whey or some of the yogurt to culture your next batch.
- This yogurt stores well for 4-6 weeks in the fridge.
- You can use a freeze-dried starter instead of already made yogurt. Just use the amount as directed on the package.
- Goat milk yogurt is naturally thinner. For thicker yogurt, use cow milk instead.
- You can use raw milk, non-homogenized low temp pasteurized milk, or plain pasteurized milk for this recipe.


So, so easy!!
How have I never made my own yogurt before??! I can not believe how easy it is in the instapot! Thank you so much for sharing this wonderful recipe. It is now apart of our weekly routine!
I love this recipe! I’m getting a high quality product with the simplest ingredients possible while saving money. And there is a very small amount of hands on time used up. Personally I use the 24 hour setting because I like my yogurt on the tangier side
I have never tried making my own yogurt. But this sounds delicious and so much more nutritional than any store bought! Where do you suggest getting the freeze dried starter?
Cultures for health is a good option, but I prefer to use already made yogurt as a starter culture.
First time yogurt maker over here! Mine turned out very thin and lumpy! What did I do wrong? It tastes great though so that’s a plus.
You probably didn’t do anything wrong! If you are using raw milk that is not homogenized, the texture can be variable. Lumps can happen when the incubation temp is a little too high. Next time, try a slightly lower temp, and strain the yogurt through layered cheesecloth to make it thicker.
I really love this recipe!! So easy and cost effective with a toddler in the house!
Curious if there’s a way to make it thicker?
Thick yogurt is strained. You can use cheese cloth or a nut milk bag to strain the whey off the yogurt.
Where did you get the little jars to store the yogurt in? 🙂
They came with my yogurt maker. You can use 6-ounce tulip weck jars; they’re the same size and work just as well.
Can you use probiotics instead of yogurt starters ? I have a few high grade probiotics that could probably culture the yogurt just the same.
You can, but I’d be sure to look at the species in the starter. You don’t want to use anything with yeast strains.
My yogurt is about a week old and smells a bit cheesy. Why is this and is it okay to eat? It tastes okay.
I loved my first batch! I kept the whey, but how long does it hold and how much whey do you use if you use it for the next batch? Same amount as yoghurt?
Thank you for leaving a review! I store whey in my fridge for two months in a mason jar. and yes! you can use the same amount as yogurt as a starter culture. I usually do about 2 tablespoons per quart.
Awesome! I stored mine in the fridge after making the first batch…but wasn’t sure if it would keep. Really appreciate the quick answer! Going to the store for more milk now…homemade yoghurt is the best 🙂
Literally the simplest yogurt recipe. I’m saving so much money making it at home like this.
Do I need to skim off the cream before making this?
You can but you do not have to. You can leave it and make a lovely cream-top yogurt.
Is it ok to use store bought Greek yogurt as the starter and mix it with the raw milk? I am guessing since the milk is heated before hand it it eliminates the issues that come up when mixing raw and pasteurized?
Thanks so much!
yes, you can use store-bought yogurt with live active cultures.
My instant pot does not have a yogurt setting. Can I still make it?
Wow this came out perfectly and I don’t think I can ever buy yogurt from the store again! Delicious recipe and so easy!
Do I have to boil the milk? Trying to preserve all benefits of raw milk.
Even when using raw milk, you should always heat it to 181° F for 30 seconds or 145° F for 30 minutes before making yogurt. You don’t need to worry about the heat destroying the benefits of raw milk, all the great benefits will still be in the yogurt. The yogurt microbes add even more enzymes and bioactive vitamins and minerals to the milk as it turns into yogurt.
If you don’t heat it first, it may not thicken much, it probably won’t last very long, and it may not taste good.
Can I use an immersion blender to blend up the clumps prior to putting the instant pot insert into the fridge to set? And then if I want thicker yogurt, stain after it cools in the fridge?
NO!!! Do not blend it if you want to strain it. Blending it will mix all the whey back into the coagulated yogurt and it will not strain properly. You should place it in the fridge to set, then strain off the whey to thicken. Then if you still find it clumpy you can blend the strained thick yogurt.
So excited to try this for the first time! Quick question – my Instant Pot doesn’t allow me to change the time on the ‘High/Boil’ setting, so it always does 3 minutes to fully pasteurize it, instead of 30 seconds like you say in this recipe. I would like to keep as many good things in the milk as possible. I’m wondering the benefit of using raw milk rather than store bought pasteurized, if it gets fully pasteurized anyway? Or if I can do this step in a different way in the Instant Pot to not heat it so high for so long? Thank you so much!
This reciepe is so simple and easy! It has quickly become a weekly routine in our home. Highly recommend!
It was late and I missed the step about cooling the yogurt first. I used Raw Milk and heated it to 181, but then I just put it straight in the yogurt maker and the warmer. It’s just kind of like thick milk.
Do you think it’s safe to drink?
It should be safe to drink! You can also add more cultures to it and re-incubate.
How do you do this if you don’t have a yogurt setting on the instant pot? Is it possible?
Hi! My yogurt turned out a tiny bit yellowish in color. It still smells like yogurt though. Did I do anything wrong or is this normal?
That’s normal! If you strain off the whey, you’ll see its naturally yellow tinted and the yogurt will be more white.
I used soured raw milk, a little over 2 weeks from a home delivery, and after 12 hours it looked very separated and watery. Also didn’t taste great. Should I bother incubating another 12 hours or start over with another batch?
Since raw milk is not homogenized the whey separates out more easily than if you used homogenized milk. You should strain it using the directions in this post for a thick, smooth yogurt. I think you can try incubating it longer and straining it. Did you heat the milk before adding the starter and incubating?
Does heating the milk at 181 kill off the good bacteria? I thought 160 was the max before it loses some of its health benefits.
I have a slightly different Instant Pot so the buttons to press were a bit different but this recipe was the easiest to follow. I looked at several different ones online before landing on this one. I used A2A2 local raw milk. It came out delicious. I used Yogurmet Starter. I would have used my usual yogurt as a starter but it is sold out because they are resting their herd. I used a fine mesh to strain it. Next time, I want to pour directly into the cup because that’s how my favorite brand of yogurt is made. I’m hoping it forms a cream top. The yogurt I strained did not, instead it was thick like Greek yogurt. The instant pot makes this so easy that I will definitely be making yogurt a weekly thing for my family. It’s a considerable savings and the Instant Pot makes it super convenient. We are lucky to have a lot of access to high quality organic raw plain milk and yogurt in VT, but it’s nice to be able to make my own. It’s all essential for our family’s healthy gut biome and probably one of the best gifts I have given my son that I know plenty of children do not get the opportunity to have access to probiotic food.
I loved this recipe and am making it for the second time now. Do you have any suggestions for what to do with all the whey that is strained off?
Happy to hear that you loved it! I do a lot with the whey. I love to freeze some in ice cube trays for protein smoothies. I also give some to our dog and cat daily for a probiotic. It’s great for culturing the next batch of yogurt. It’s also great to use in sourdough bread instead of water. I also add a little to my simmering bone broth. Any that I don’t use I dilute with water and water my plants with it (my house plants love it).
Good day. I am very interested in buying an Instant Pot to specifically make yogurt and was referred to your blog by the Instant Pot sales gurus in my region. So I hope you can assist.
I have health challenges, which requires me to use UNpasteurised milk to cure my gut.
I need to use organic NON-pasteurized milk as per medical doctor prescription which need to be converted into fermented foods such as yohurt or cheese. How can one switch off the pasteurization, since pasteurization results in the enzyme which breaks down lactose, being destroyed, thus leading to lactose intolerance. I need to heal my gut due to autoimmune diseases and can only do so when having the right microbiome reintroduced to my gut, thus healing my autoimmune disease. Please advise how I can update the software or settings to specifically cut out pasteurization during yogurt making or recalibrate the temperature setting (since, according to my knowledge pressure results in pasteurisation at lower temperatures). It serves no function if I end up making yogurt which I could just as well have bought from a store.
As mentioned before, the milk may NOT be pasteurised and I am not familiar with the effect that pressure has on the potential of pasteurisation at lower temperatures.
So your help will be greatly appreciated!
Thanks!
Hello!
The process and importance of each step is fully explained in the body of the blog post above the recipe card. This recipe is written as I developed it. I’m not an instant pot technician or expert, and can only provide this recipe based on the instant pot model I have. Heating the milk using the yogurt setting does not pressurize it, and my recipe here requires that you heat the milk before cooling it to make yogurt.
I have an instant pot but my model does not have a “yogurt”setting. Are there alternate instructions?
I’ve only every worked with the instant pot model I have. If there is a way to set your instant pot to 104-107° F for 12 hours, then you can use your instant pot.
Would halving this recipe still work in a 6 qt instant pot?
I think it would take me too long to go through a half gallon of yogurt.
yes! you can cut the recipe in half. Any volume will work in the instant pot.
I’ve seen some recipes that use a cast iron Dutch oven to heat the milk, then cover and place it in the oven (turned off) overnight to sit with the residual heat. Do you think this method is OK?
I think that could work!
Hi! I’ve been making this yogurt for a few months now, I love it!
I sometimes use raw milk, sometimes pasteurized, but not ultra pasteurized.
I drain it for a few hours through linen or cotton( that i sanitize by boiling) and put it into smaller jars.
The last 2 times I made it one of the jars has become “fizzy”. You can see gas forming pockets throughout the jar. It hasn’t affected the whole batch.
I have been eating it, it doesn’t smell off or look different. I’m just wondering why this is happening.
Bubbles and gas production in yogurt is from yeast contamination. This sort of “contamination” isn’t necessarily a bad thing, it just means some wild yeast made its way into your yogurt. Probably from the cotton or linen straining cloths. Use some of the yogurt that is not fizzy to culture the next batch, and before you strain, soak your straining cloths in 5% distilled vinegar before boiling.
thank you!
I have used this recipe a few times with varying results. The first time I made it was honestly the best. Most recently the end product was very liquidy (though delicious) and I’d love for it to a bit thicker. I’m wondering if it was liquid because I added maple syrup and vanilla after the 12 hour incubation, immediately before cooling and transferring to fridge. Of course I had to stir it in – would this have caused the yogurt to break down and leave me with the watery texture?
No following the recipe will cause varying results. Yes, if you stir it before it cools and sets it can make it watery. Also maple syrup is a liquid, so naturally that will make the yogurt less thick. As it says in the note, you need to strain it if you want it thicker.
This was so easy to follow! I was concerned about making yogurt with raw milk but this could not have been easier. With the Instant Pot, your instructions, and 2 ingredients, I have a beautiful, nutritious batch of yogurt. It is straining right now in the fridge as I like it thicker. Perfect!
yay!!! I’m thrilled to hear that you enjoyed the recipe!
Hi! I love this recipe. However, I want to try adding vanilla bean paste and maybe some maple sugar or syrup. Is there a point where it is best to add? Thanks for any insight!
so glad you love the recipe! Stirring in vanilla and sugar when it’s finished is the best option. If you try to incorporate sugar in the beginning some of the sugars will be fermented and that will only make the yogurt more sour.
This is the best and easiest recipe. I make it weekly and love it.
I LOVE this recipe & how easy it is! My only question is – I strain it overnight to get a thicker yogurt, but texturally it’s still pretty lumpy/thin. Any advice? I’m using raw cows milk!
It may be the cream top clumps since it’s non-homogenized. You can try incubating at a slightly lower temp.
Worked perfectly with my fresh raw goat milk I don’t like yogurt but needed to see if I could make it
I forgot to wait till the milk cooled to 115 before adding the starter. Can I still continue with recipe once it reaches 115?
Yes! you can still continue! just add more starter once it cools down.
Duh!! I went ahead and threw it out, bummer! I used Strauss Organic 2% milk and Strauss organic whole milk yogurt to make my 2nd try. “Cooked it at 104 for 15 hours because I like my yogurt tart. PERFECTION! It’s straining now, can’t wait to eat my Greek/thick yogurt. Thanks for this recipe… I’m sending it to my niece!
Oh man! I was hoping I got to your comment in time so you wouldn’t throw it out lol. I’m so glad you gave it a second try and it came out great. Thanks for trying my recipe, leaving a review and for sharing it with your niece!
I used Strauss Organic 2% milk and Strauss organic whole milk yogurt to make my 2nd try. “Cooked it at 104 for 15 hours because I like my yogurt tart. PERFECTION! It’s straining now, can’t wait to eat my Greek/thick yogurt. Thanks for this recipe… I’m sending it to my niece!
First time making yogurt ever and it turned out great! First couple of times I used a cheese cloth to make it thicker but I just ordered the yogurt strainer you recommended hoping to get a really thick consistency. I used raw milk.
Thank you for leaving a review! I’m happy you enjoyed the recipe and that it turned out great!
Question: If using whey as starter, is it still 2 tablespoons or is ratio different? What if I’m using part whey and part yogurt?
Still 2 tablespoons!
What if I double the recipe (1 gal). Do I use 4 tablespoons starter yogurt?
If I double the recipe, do I double the starter (4 Tablespoons)?
yes!
I have made this recipe weekly now for about 4 months with multiple variations on milk. It is fantastic!
Hi first time making yogurt. I used raw milk, set instant pot to 8, checked it 8.5 and WOW it’s beautiful like barely jiggling, it’s Set,smells great….put in fridge to thicken up over night. No whey, so I scoop to separate bowl incase whey was at bottom some reason. No whey, immersion blender, went from thick and beautiful to liquid….so question is do we strain regardless or did I mess something up. Tastes good, be used in smoothies etc.
Thanks for your time!
I only ever immersion blender fully strained yogurt. Even if you don’t see the whey, it’s still in there. I think the immersion blender, depending on the intensity of yours, can break up the coagulation, mixing the liquid back in.
Oh and I want to add, that you shouldn’t discard this batch even if the blending made it liquid! Now it’s just like kefir. 🙂
Thanks so much for the quick reply. I’ll definitely try again. Yup had some in a smoothie and it’s delicious.
Thanks again!
Love this , I had 1/2&1/2 that I needed to use up. Turned out great and so easy. Thank you for posting!
yum! with half and half I bet it was so thick and creamy!